This release introduces enhancements to the Bulk Insurance Payments page, the Unsent Claims page, and the Billing Statements page to streamline your workflows. Additionally, the Patient Chart and Imaging includes enhancements to help you diagnose and notate patient conditions.
Insurance
Bulk Insurance Payment Enhancement
From the Home menu, when you select Bulk Insurance Payments, you see more information about Bulk Insurance Payments. When you expand an insurance payment and select a specific patient (1), you are now able to link directly to that patient’s ledger by clicking the Go to Ledger link (2). The Ledger opens in a new tab so you can work there without losing your place in the Bulk Payments utility. Just close the patient’s Ledger tab when you are done.

Sorting Capability for Unsent Claims
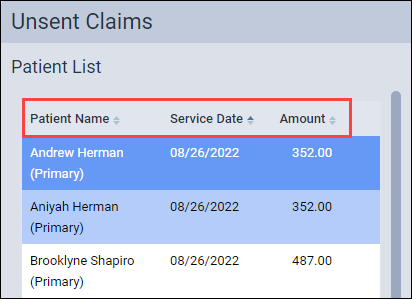
There are two ways to review your unsent claims. One of them is to click the Unsent Claims widget on the Home overview page.

New to this page is the ability to sort the unsent claims by Patient Name, Service Date, or the claim Amount. The default sort method is by Service Date. Click any column heading to sort the unsent claims by that heading. Click the heading again to reverse the sort order.
Link to Patient Ledger
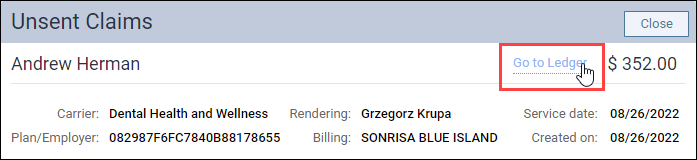
The Unsent Claims page also includes a new link to the patient ledger. When you select a patient from the list, you will see a Go to Ledger link. Click the link to open the patient’s ledger.
Billing Statements
Updated Default “If Not Billed Since” Date
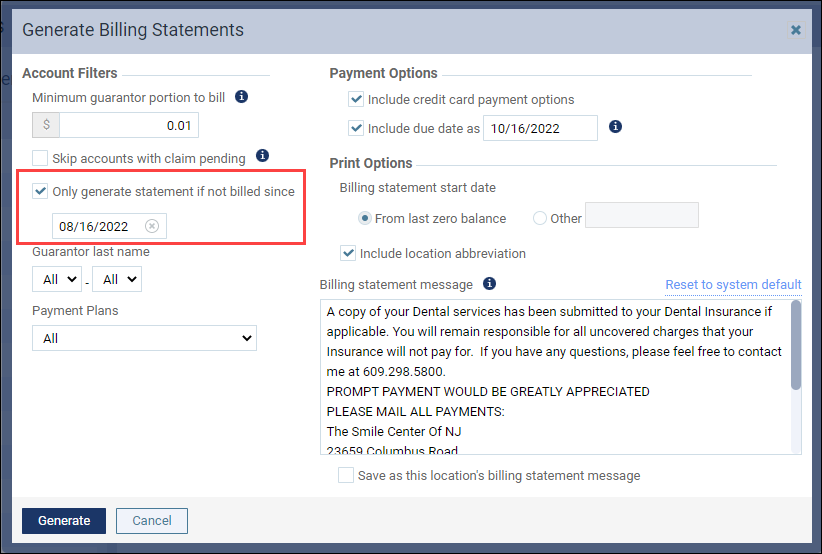
From the Home menu, when you select Billing Statements, you see the Generate Billing Statements dialog box. In this dialog box, you have the option to only send billing statements to patients who haven’t received a statement since a specific date. In the past, when you checked Only generate statement if not billed since, Dentrix Ascend automatically input today’s date in the date picker. As of this release, the default date has been changed to more closely reflect how many offices prefer to bill their patients. Dentrix Ascend will now automatically input a date that is one month prior to today’s date in the date picker.
Clinical
Patient Chart Enhancement
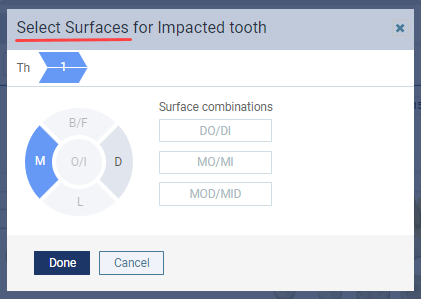
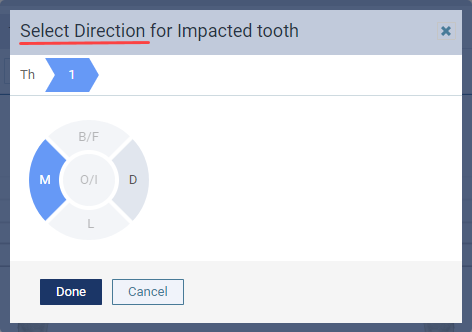
The patient chart conditions window now states Select Direction instead of Select Surface when you enter the following conditions:
- 100787D Diastema of teeth
- 104161D Impacted teeth
- 161301D Impacted tooth (morphological abnormality)
- 148719D Lack of interproximal tooth contact
When you enter one of these conditions, the Select Direction window opens where you can select mesial (M), distal (D), lingual (L), buccal/facial (B/F), or occlusal/incisal (O/I) to show which direction the tooth is drifting.
Before
After
Usability
Shortcut for Patient Search
When you are ready to search for the next patient, rather than reaching for your mouse and clicking in the Patient Search box, simply press the F2 function key and start typing. The shortcut command is Ctrl + U for Macintosh.

Imaging
This release includes multiple 3D Volume and 2D image enhancements.
3D Volume Image Enhancements
Freehand Drawing Annotation
The Freehand Drawing tool has been added to the Annotations tools tab for 3D volume imaging exams. The freehand drawing tool gives dentists the ability to draw on images in the image viewer so they can quickly notate a finding.
Note: Like the other annotation tools, when you add a freehand drawing annotation to a 3D image, the drawing is added to the specific 3D image slice that you are currently viewing. Additionally, each freehand drawing is listed under the Annotation list that includes the name of the view (axial, coronal, or sagittal view) and the slice number. To view the annotation, click the annotation in the Annotation list.

3D Volume Snapshot
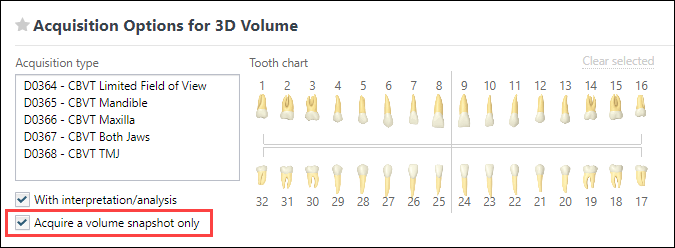
Under Acquisition Options for 3D Volume, the Acquire a volume/model snapshot only checkbox name has changed to Acquire a 2D Image/Link Only.
Before
After

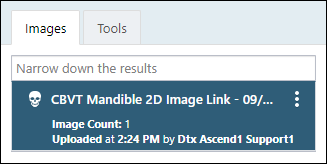
After you acquire the image, the 2D image link appears in the Patient Image history as a CBVT 2D image link.
Clear Annotations and Measurements
If a 3D volume has annotations and/or measurements and you try to rotate a slice, a new Clear Image Rotation dialog box now opens to ask you to clear the annotations and measurements first. When you click Clear Annotations/Measurements, all annotations and measurements from the image are cleared.
3D Software Bridge Enhancements
CAD/CAM support has been added to the Carestream Software Bridge. Now you can import an .stl or .ply file to a patient in Carestream. The imported file keeps its original name and extension when added to the patient’s Carestream folder.
Volume support has been added to the J.Morita i-Dixel Software Bridge. This will allow you to acquire images via the J.Morita iDixel Software bridge.
Additional Image Enhancements
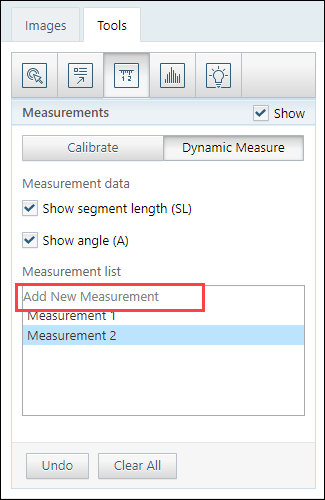
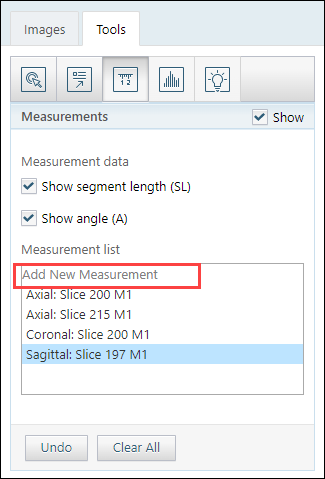
Multiple Measurements
With this release, you can add multiple measurements to an image. Before this release, you were only able to add one measurement. Click Add New Measurement to add measurements to the 2D or 3D image.
2D Images
3D Images
Zoom Enhancement
The zoom feature has increased from 200 percent to 300 percent to accommodate larger template sizes, such as a Full Mouth Series (FMX). Now you can zoom in even more while in the template mode to view and diagnose patient images instead of having to open the individual images.
User Rights
No new user rights were introduced in this update.
New Learning Content
The Education Team continuously adds to and updates content in the Dentrix Ascend Resource Center. Below are the latest videos. Click the title to get more information about these topics.
Essentials Video Updates
Viewing and Navigating the Calendar (video update)
The Calendar is the heart of your practice’s workflow. For your Calendar to be useful, you need to know how to navigate it and to modify its display to suit your needs. Watch this video to learn how to view and navigate the Calendar.
Working with Imaging Tools (video update)
The imaging tools in Dentrix Ascend help you view patient images so you can accurately diagnose conditions and recommend treatment to your patients. Watch this overview video to learn how to work with the tools in Dentrix Ascend Imaging.
New On-Demand Webinar
3 Keys to Succeed in Dentrix Ascend Imaging
If you missed the live webinar, you can watch this new on-demand webinar to learn how to set up computer and imaging devices, acquire images, and solve common problems in Dentrix Ascend Imaging. This webinar has something for everyone, regardless of your experience level.