This release introduces an enhancement to your recare management workflows by allowing note entry. Filtering the Day Sheet by provider now limits the detailed transaction list so you can focus on specific providers’ transactions. The timeframe settings for Patient Communications have been updated, and the experience of viewing Patient Forms has been improved.
Recare
Recare Note Enhancement
You can now add a Recare Note to record thoughts, progress, and next steps for a patient’s recare record in three places in Dentrix Ascend:
- Patient’s Recare page
- Patient’s Overview page
- Recare Management page
The Recare Notes feature helps you as you follow up and communicate with patients.
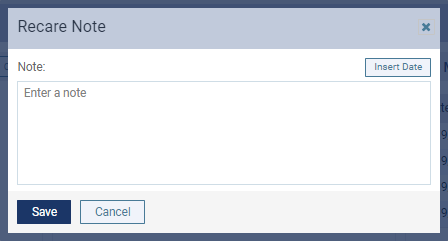
Recare Page
To add a note on the patient’s Recare page, select the recare type. In the Note field, add a note, or edit an existing note. Click Insert Date to add the date if needed. Then, click Save.

Patient Overview Page
To add a note on the patient’s Overview page, locate the Recare widget, and click the new note icon for a recare type.
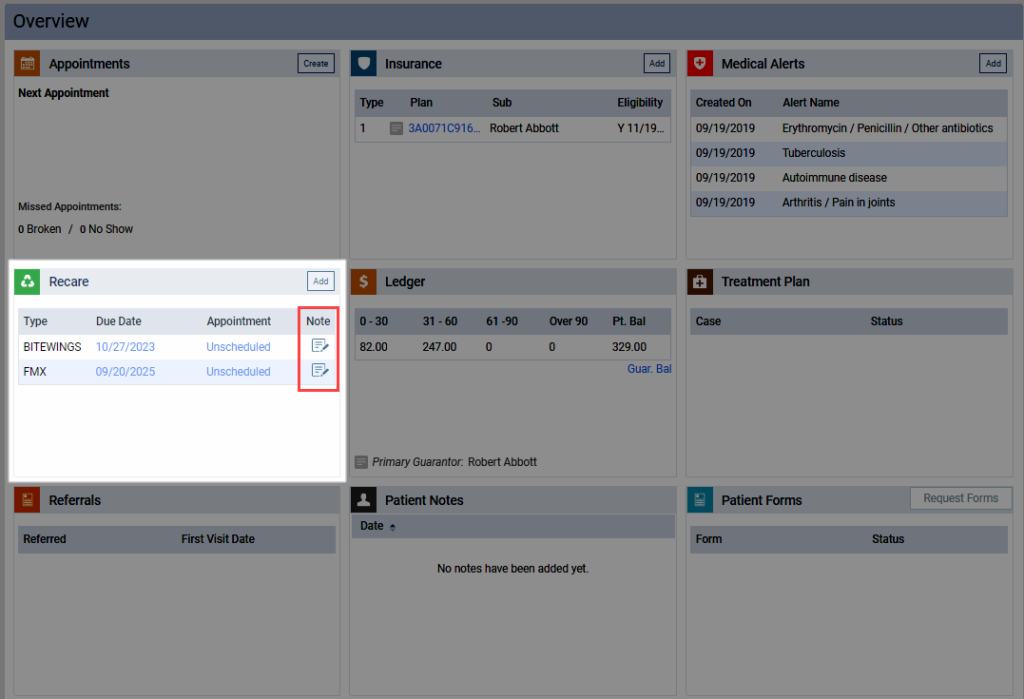
A Recare Note dialog box opens. You can add a note or edit an existing note. Then, click Save.
Recare Management Page
A new note column has been added to the Recare Management page so you can add a note to the patient’s recare record.
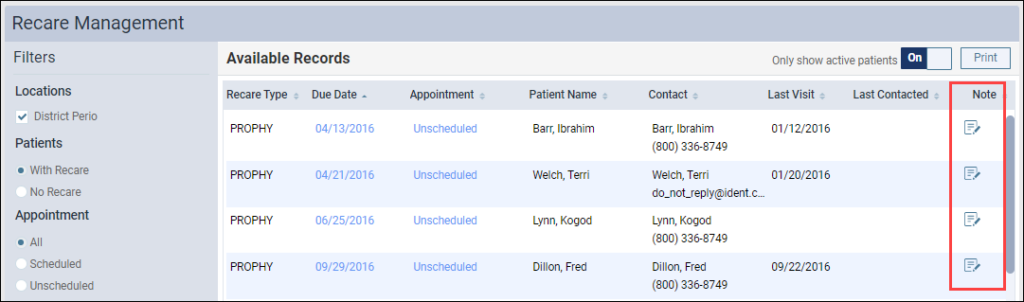
Click the note icon to add your note. A Recare Note dialog box opens. You can add a note or edit an existing note in the note field and click Insert Date to add the date if needed. Then, click Save.
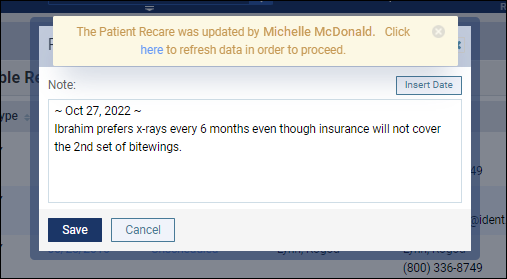
In all three places, if another staff member is adding a note at the same time for the same patient, the other staff member will see a warning message and must click here (in blue) to refresh the note before they can add and save their note.
Note: A blue note icon means that the patient has a recare note. A white note icon means that the patient does not have a recare note.
Patient Communications
Updates to Appointment Start Date and Time in Patient Communications
In the Patient Communications settings, you can set up appointment reminders to be sent a specific number of hours, days, weeks, or months before or after a specific event. These events include:
- Appointment Scheduled Date
- Appointment Confirmed Date
- Appointment Start Date and Time
- Appointment Completed Date
- Appointment Broken Date
- Appointment No Show Date
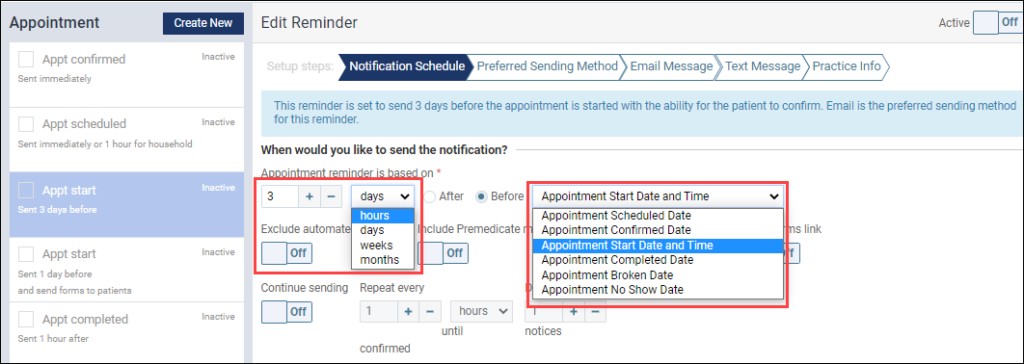
This release introduces an update to prevent patients from receiving communications during times that are significantly outside of business hours. As of this release, you can choose a number of hours only for the Appointment Start Date and Time event. The maximum number of hours you can choose is 3 hours. This is to prevent patients with early appointments from receiving communications from your office early in the morning. The hours option is no longer available for other events.
Implications for Existing Reminders
Existing reminders linked to the Appointment Start Date and Time event:
- If you selected a timeframe between 1 and 3 hours, the timeframe would not change.
- If you selected a timeframe over 3 hours, the timeframe will be changed to 1 day.
Existing reminders linked to all other events:
- If you selected a timeframe using the hours selection, the timeframe will be changed to 1 day.
Clinical
Patient Forms Window Enhancements
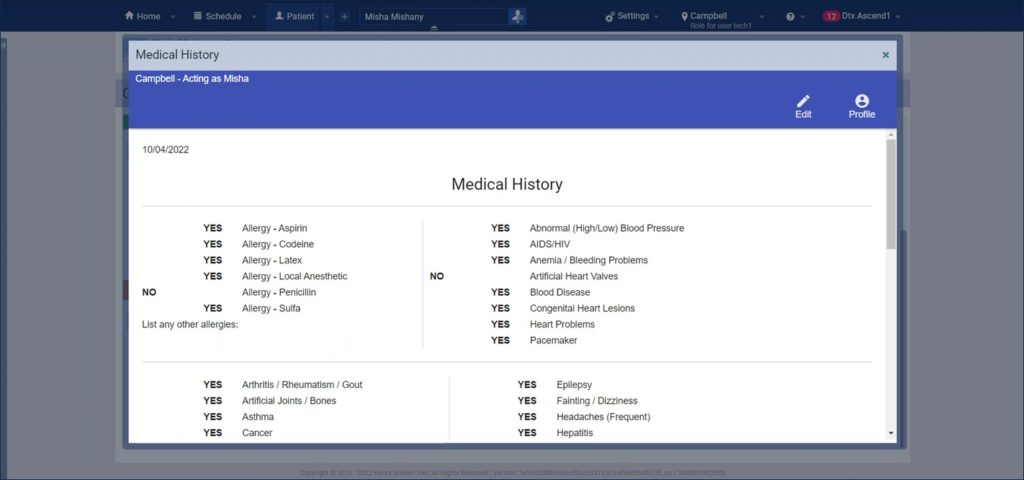
The window size has increased for all patients forms. This enhancement helps you review and analyze more information at one time and minimizes scrolling when you are reviewing a patient form.
New Window Size
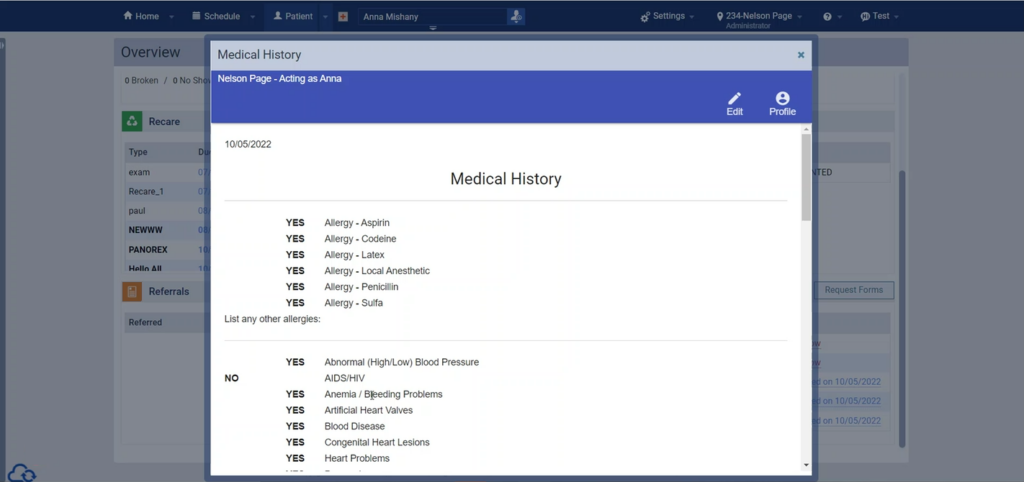
Old Window Size
Financial
Default Tags Added for Insurance Credit Card Payments
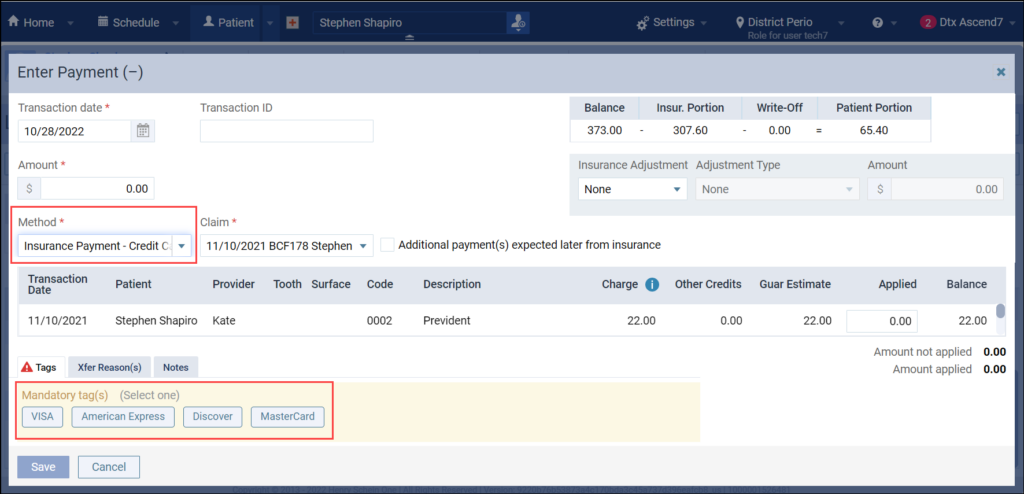
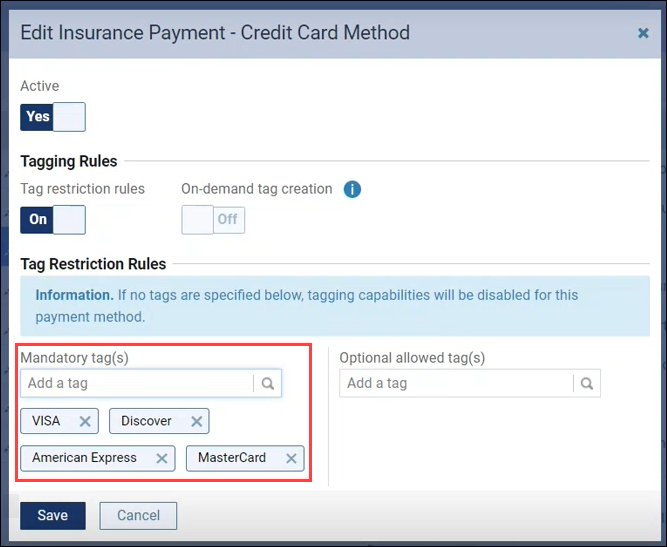
When entering a payment in a patient’s ledger, if you select the Insurance Payment – Credit Card method, you will now automatically be prompted to choose a tag for the credit card type. The default tags include VISA, American Express, Discover, and MasterCard.
To edit the default tags, from the Settings menu, select Ledger Options.

Click the pencil icon next to the Insurance Payment – Credit Card option.

In the dialog box, edit, add, or delete tags as needed. Then click Save.
We received lots of feedback on this feature, and many customers indicated that it would take a task off their plate to just have those tags already provided.
View Online Payments without the Edit Payment Right
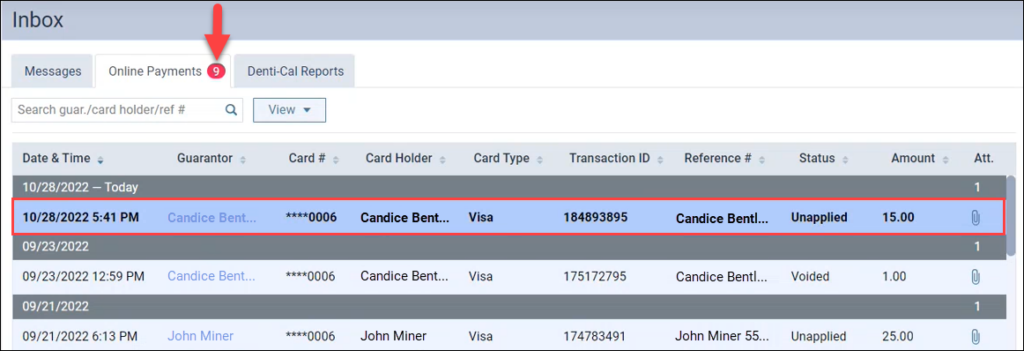
In the Inbox, users with the Review inbox messages right see a message each time a patient makes an online payment. In the past, users who did not have the Edit Payment right could not open these online payment messages, and therefore could not clear the red dot notification in the Inbox for these messages. With this release, users who do not have the Edit Payment right will be able to click the payment entry row to open a view-only record of the payment. This will allow them to see more information on the payment. Viewing the window clears the red dot notification.
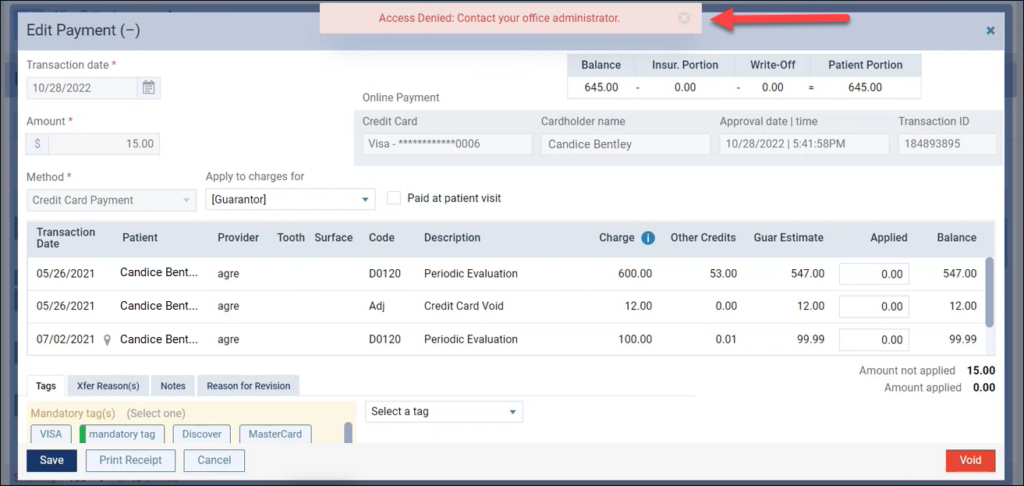
If a user without the Edit Payment right attempts to edit the payment and save those changes, they will see an Access Denied error message.
Reporting
In the Day Sheet, you can filter the report data by one provider or several providers that you choose. In this release, the Location Details table at the top of the report has been updated to reflect the selection you make for the Provider filter.

- If you select All providers in the Provider filter, the Location Details show transactions for all providers.
- If you select one provider in the Provider filter, only that provider’s transactions will be shown in the Location Details table.
- If you select None in the provider field, the Locations Details box will show only transactions that are not tied to any provider.
- If you select a provider who has no transactions attached, you will still see the Location Detail table. However, it will be blank and show this message: “There are no transactions that match to your search criteria.”
Power Reporting
UDS 6B 2022 Dental Sealants Health Metric
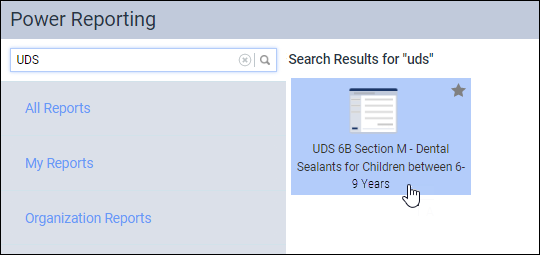
This update provides a new report for community health organizations. The purpose of this update is to provide the numbers needed for UDS 6B section M Line 22a reports for 2022. This report includes procedure codes for dental sealants for the past year.
To locate this report, open the Power Reporting page from the Home menu, type “UDS” in the Power Reporting search box, and select the report titled UDS 6B section M – Dental Sealants for Children between 6-9 Years.
The report includes:
- the total of patients meeting the criteria
- the sample size of all applicable patients
- the number of patients who received sealants
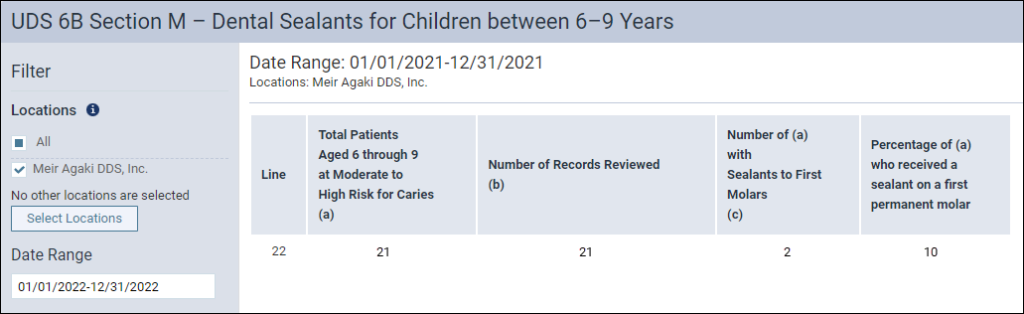
Previous users of this report will note a small update to the wording in column (b).
Imaging
This release includes enhancements to custom templates, intraoral images, and the template/mount.
Custom Templates Enhancements
The vertical and horizontal custom template place holders have been reduced by 33% so that you can create a custom template for a full mouth series of 20 images. Prior to this update, there was not enough room to accommodate 20 images for a full mouth series, and the images would overlap.
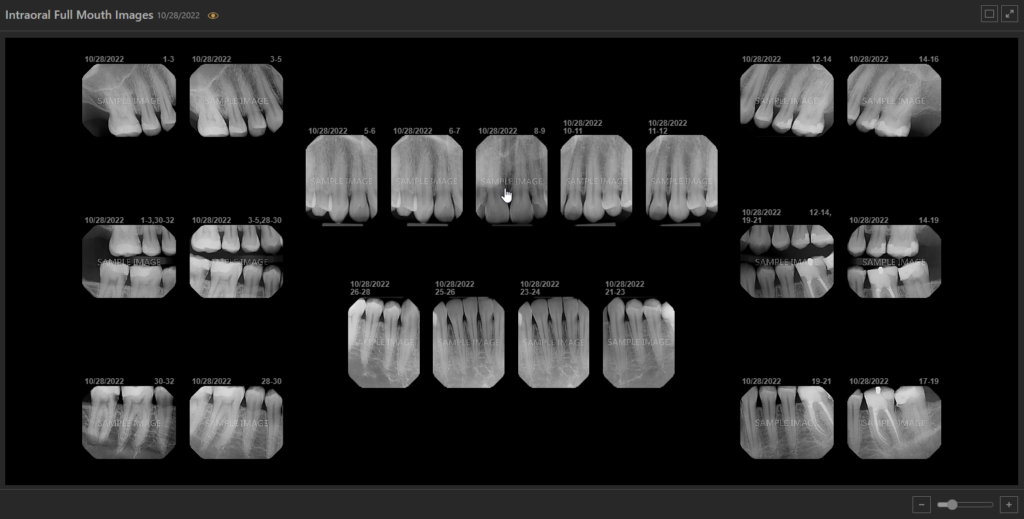
Intraoral Images Enhancements
The full screen display has been enhanced for intraoral images so they can be displayed up to 125%. This is especially helpful for smaller, low resolution intraoral images so they can be viewed better on a full screen monitor. Prior to this update many older intraoral images could not be increased and were difficult to view.
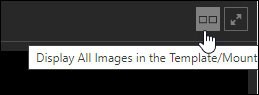
Template/Mount Loading Enhancements
Enhancements have been made to decrease the load time when you want to view all images in the template/mount mode. Now when you click Display All Images in the Template/Mount, it takes less time to load the images in the template/mount. For example, a full mouth series of 18 images used to take upwards of 30-40 seconds to load; now it takes about 10 to 15 seconds to load.
Also, if you decide to close the Display all Images in Template/Mount mode and then return to that mode again, the cache stores the full template of images so they can be re-opened immediately without having to wait.
Note: The imaging exam remains in the cache while you have the imaging exam loaded. For example, if you click another imaging exam, and then want to go back to the previous exam you were viewing, it will take about 10 to 15 seconds to load again when you click Display All Images in the Template/Mount.
User Rights
No new user rights were introduced in this update. The requirement to have the Edit Payment right in order to open and read online payment messages was removed.
New Learning Content
The Education Team continuously adds to and updates content in the Dentrix Ascend Resource Center. Below are the latest videos. Click the title to get more information about these topics.
Blog: Increasing Your Billing Frequency to Improve Cash Flow
Afraid of offending your patients by sending too many statements? No worries! Dentrix Ascend allows you to send statements to patients who haven’t received a bill within a specified period. Find out how in this blog post.
On-Demand Webinar: 5 Steps to Getting Patient Portion Estimates You Can Trust (Sept 2022)
If you missed the live webinar, you can watch this new on-demand webinar to learn how to set up computer and imaging devices, acquire images, and solve common problems in Dentrix Ascend Imaging. This webinar has something for everyone, regardless of your experience level.
Video: Updating Insurance Plan Information
From time to time, you may need to update information for an insurance plan, such as the group ID, benefits, or contact person’s information. Ascend makes it easy to update all insurance plan information in one place.
Video: Exploring the Insights Dashboard
The Insights dashboard can help you monitor how your practice is doing. This dashboard gathers important metrics for Recare, Billing, Production, Insurance, Schedule Optimization, and Patient data. If you aren’t sure where to look for reports in any of these categories, the Insights Dashboard is a great place to start.
Blog: Evaluating Your Insurance Carriers
PPO write-offs can have a substantial impact on your bottom line. But before you consider dropping a payer or negotiating with a PPO, you need the numbers on your side. Dentrix Ascend has a report that lists everything you need to know about each insurance carrier so that you can make good decisions for your practice.
Webinar: End-of-Year Best Practices (Oct 2022)
The end of the year is always a busy time in dental practices. In addition to your everyday tasks, you need to complete tasks for the end of the year and for the upcoming year. Watch this webinar to learn how to find and contact patients with remaining benefits, update fee schedules, and complete other end-of-year tasks in Dentrix Ascend.