Click the name below to learn more about a new feature or enhancement for this month in Dentrix Ascend.
- Watch notes enhancements
- Return to patient after logout
- Print route slip enhancements
- Dates for Clinical Note Template Quick-Picks
- Home page widgets update
- New sleep apnea procedure code category
- Numbers for clinical note template quick-picks
- Assign Class 5 indicators to surface-specific conditions
- New quick-pick type in clinical note templates
- Coverage table frequency exceptions
- Fee schedules No Write-off checkbox
See the new learning content that Practice Education has created to help you in Dentrix Ascend.
November 29, 2023
This release introduces watch notes enhancements and an enhancement to logout and login behavior.
Clinical
Watch Notes
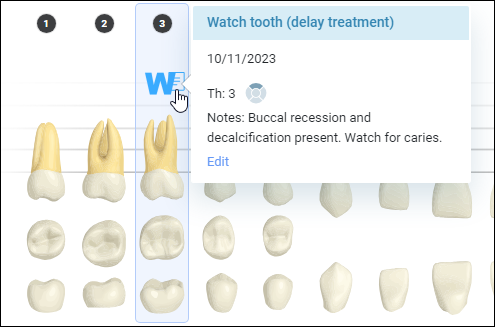
This release includes the ability to quickly view and either enter or edit a Watch note from a patient’s Chart and Quick Exam. It also includes the ability to select surfaces that you want to watch and flag a surface as class 5.
Prior to this release, you had to select the Progress Notes tab and open the Watch condition entry to read the notes. Now, if there is watch note when you are in a patient’s Chart, you can see a note icon next to the W chart symbol. When you click the W chart symbol, the Watch tooth (delay treatment) window opens, so you can quickly see a graphical representation of the surfaces involved and read the watch notes.
If there is no note, you can click Edit to add a note.
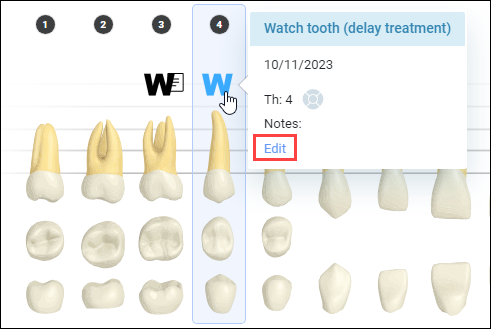
The Edit Condition dialog box opens so you can select the surfaces that you want to watch and enter a note. Click Save to save the watch note.

You can also add a watch note to a tooth in a patient’s Quick Exam. When you select Watch tooth (delay treatment) as a condition, you can select the surfaces and enter notes.

When you finish the note, you can see a graphical representation of the surfaces involved.

Usability
Return to Patient After Logout
This update introduces an enhancement to logout and login behavior. Now, when you manually log out of Dentrix Ascend and then log back in within a two-hour window using the same device and browser, you will return not just to the same page, but also to the same patient if you are in a patient-specific page!
After the two-hour window, if you were on a patient page (for example the Chart) and you get automatically logged out, when you log back in you will go straight to the Calendar.
November 15, 2023
This release introduces a new print routing slip option, another new quick-pick type for clinical note templates, and an update to the Unattached Procedures and the Unsent Claims widgets on the Home page.
Patient Scheduling
Print Route Slip Enhancements
Are you one of those practices that still likes to print out a routing slip, maybe as a hedge against an outage? And have you ever wanted to print a few days in advance, say for the coming Monday? Prior to this release, you had the option to print routing slips for today or the next business day only. This release gives you the ability to print a routing slip for a specific date through a new Print Route Slip menu located at the bottom of the Routing Panel.
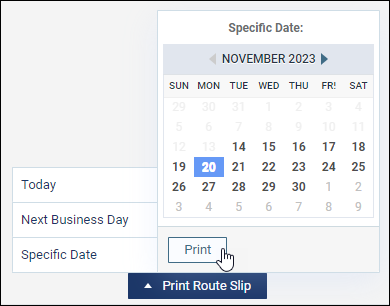
The new Print Route Slip menu provides three options:
- Today
- Next Business Day
- Specific Date (new)

When you select Specific Date, a date picker opens so you can select any future date. Then, click Print to print the routing slip for that specific date.
Clinical
Dates for Clinical Note Template Quick-Picks
This update brings a new enhancement to the Quick-Pick types for clinical note templates. You can now type in a date or click to select a calendar date.
To build a Date quick-pick response type, from any existing template click Manage Quick-Picks and then Create New. On the Give It a Name tab of the New Quick-Pick window, enter a quick-pick name and a question to be answered. Then, click Next.
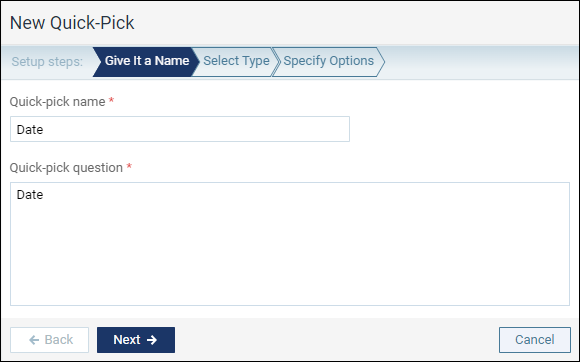
On the Select Type tab, select Date as the response type. Then, click Next.

On the Specify Options tab, select from the following choices:
- Empty field (this always requires you to enter a date)
- Today’s date (this automatically selects “today” using the date you create the note, but you can change it)
- Specific date (the date you choose will always be automatically selected, for example the beginning or the end of the year, but you can change it)

Click Done to save the new prompt. If you have been building a prompt for a specific clinical note template, close the window by clicking Insert & Close. Otherwise, click Cancel to get out of the Quick-Pick Manager.
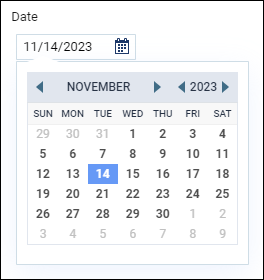
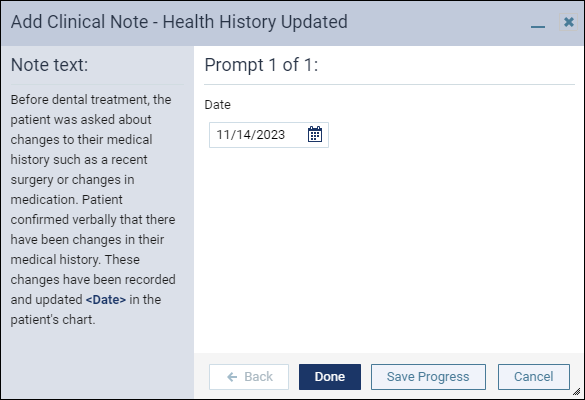
The prompt appears as a date picker when you use an applicable clinical note template.
Your user role must have the Manage clinical note templates right to add, edit, or delete Quick-Pick prompts.
Home Page Widgets Update
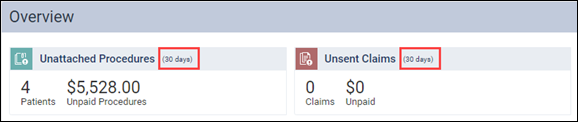
This release introduces an update to the Unattached Procedures and the Unsent Claims widgets on the Home page. The qualifier “30 days” has been added to both widgets. This means that the numbers in each widget are as of the last 30 days. This improves the performance of the widgets. When you click to open the page associated with the widget, that page will have all the data.
November 9, 2023
The release includes a new procedure code category for sleep apnea and another new quick-pick type for clinical note templates.
Clinical
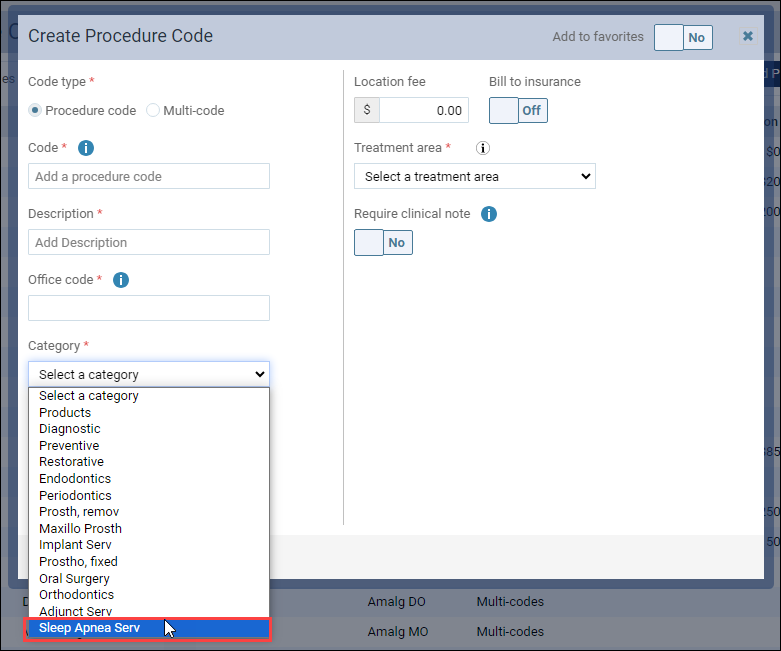
New Sleep Apnea Procedure Code Category
This release introduces a new procedure code category for sleep apnea procedure codes. Prior to this release, sleep apnea procedure codes were in the Adjunct Services procedure code category.
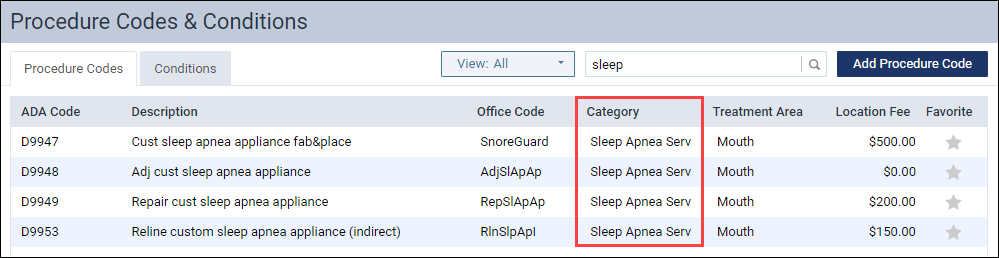
With this release, sleep apnea procedures will appear in the Sleep Apnea Serv procedure code category. This change affects procedure codes D9947, D9948, D9949, and D9953.
You can see the Sleep Apnea Serv category on the following area of Dentrix Ascend:
- Procedure Codes tab on the Procedure Code & Conditions page.
- Create Procedure Code window.
- TxPlan, Completed, and Existing tabs on the Add Procedure window.
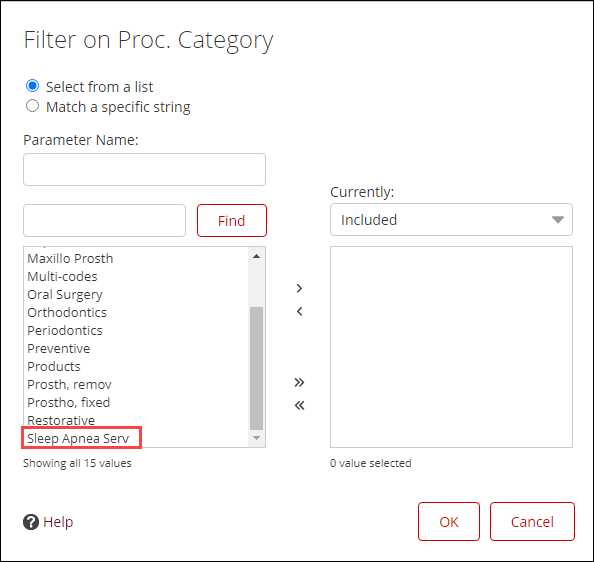
- Proc. Category under Procedures as a field or filter in a Power Report.

Numbers for Clinical Note Template Quick-Picks
This update brings a new enhancement to the quick-pick types for clinical note templates. Just as you can use a number pad to enter perio values, you can now use a number pad to enter clinical note values. You can also use the + and – controls on the number entry box to easily increase or decrease any default value.

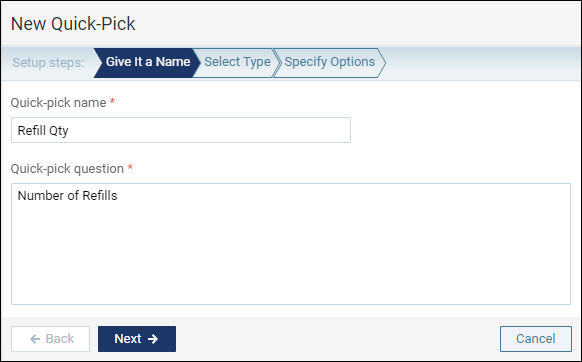
To build a Number quick-pick response type, from any existing template click Manage Quick-Picks and then Create New. In the New Quick-Pick window’s Give It a Name tab, enter a quick-pick name and a question to be answered. Then, click Next.
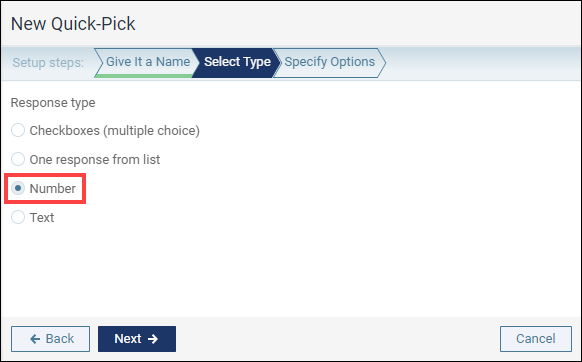
In the Select Type tab, select Number as the response type. Then, click Next.
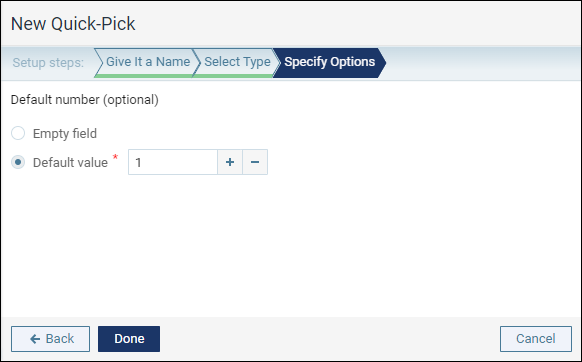
In the Specify Options tab, choose whether you would like the number box to start out empty or with a default value by selecting Empty field or Default value. If you select Default value, enter that value in the field next to that option. When you are done, click Done.
If you have been building a prompt for a specific clinical note template, close the window by clicking Insert & Close. Otherwise, click Cancel to get out of the Quick-Pick Manager.
The prompt appears with a number pad when you use a clinical note template with this quick-pick type. Note that this number entry box only accepts zeros and positive whole numbers, not decimal points nor negative signs.

Your user role must have the Manage clinical note templates right to add, edit, or delete quick-pick prompts.
November 6, 2023
This release introduces class 5 indicators for surface-specific conditions and a new “pick one” response type for clinical note templates. Also with this release, coverage table frequency exceptions have been added. No Write-off checkboxes have been added to the Fee Schedules page, and you can decide how to handle $0.00 or missing fee amounts for procedure codes when you are importing a fee schedule.
Clinical
Assign Class 5 Indicators to Surface-Specific Conditions
This release introduces class 5 indicators for surface-specific conditions and a new “pick one” response type for clinical note templates.
When you click Conditions on a patient’s Chart and select a surface-specific condition, you now have the option to toggle the Class 5 switch to On with an applicable surface selected.
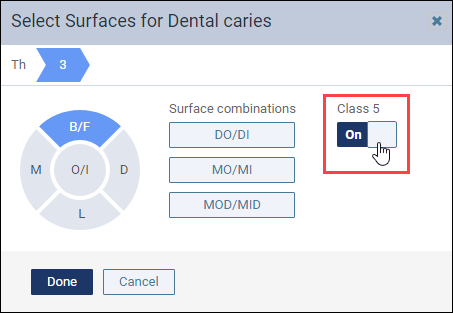
Note: By default, the Class 5 switch is not available. You must select a surface first. If you select the occlusal surface, the Class 5 switch will not be available because it is not applicable for that surface.
New Quick-Pick Type in Clinical Note Templates
The latest update to Quick-Picks for Clinical Note Templates allows you to create a “one response from list” response type. You can use this feature when you are creating a new clinical template or if you want to edit an existing clinical note template. If you are using clinical note templates to standardize your clinical notes, we hope that this new functionality aids in that effort.
To build a “pick one” quick-pick response type, from any existing template click Manage Quick-Picks. In the New Quick-Pick window, on the Give It a Name tab, enter a quick-pick name and a question to be answered. Then, click Next.
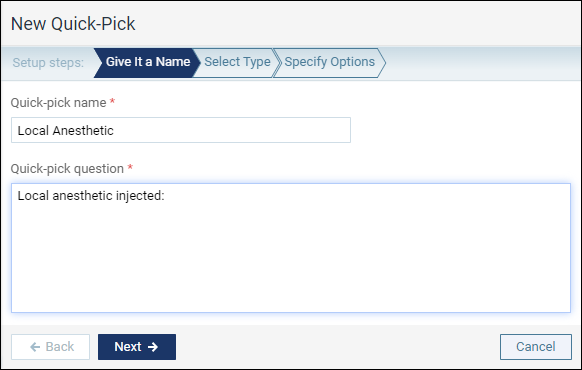
On the Select Type tab, select One response from list as the response type. Then, click Next.

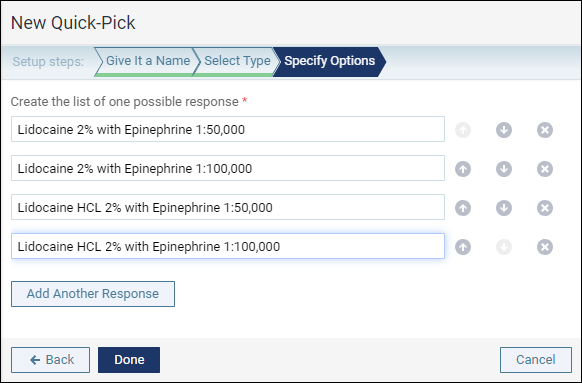
On the Specify Options tab, type a response in the Enter a response option here text box. Then, click Add Another Response. Repeat this process until you have entered all the response options for this prompt. When you are done, click Done.
If you have been building a prompt for a specific clinical note template, close the window by clicking Insert & Close. Otherwise, click Cancel to get out of the Quick-Pick Manager.
When the prompt comes up in a clinical note template, the specified options appear in the list, so the person using this template for a clinical note can only select one item from the list. The first option is selected by default.

As in prior releases, your user role must have the Manage clinical note templates right to add, edit, or delete Quick-Pick prompts.
Insurance
Coverage Table Frequency Exceptions
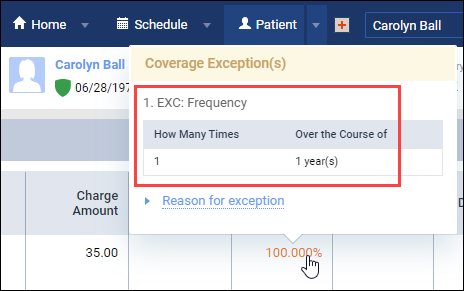
Many dental plans will only cover some procedures at stated intervals as determined by the plan. For example, cleanings and examinations are commonly covered twice in a plan-year or every six months. You may now enter frequency exceptions in your coverage tables, which will help Dentrix Ascend to automatically calculate insurance and guarantor portion estimates.
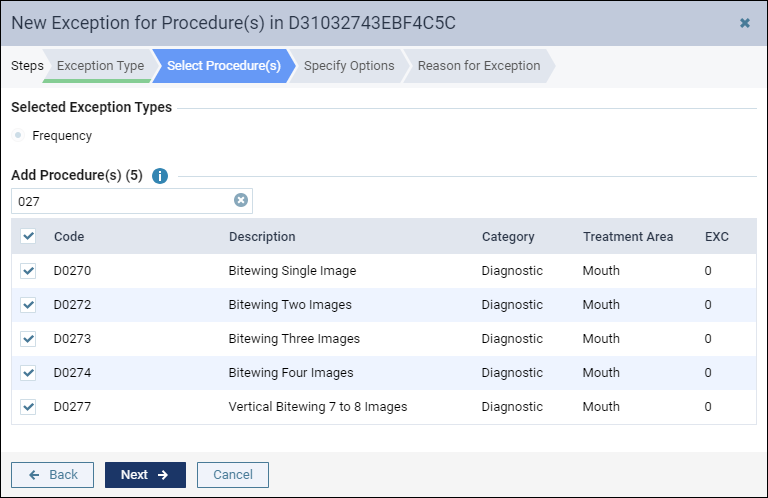
In the Manage Exceptions dialog box, click Add New Exception. On the Exception Type tab, select Frequency, and then click Next.

On the Select Procedures tab, search for the procedures with a frequency limitation. You can search by the procedure description or code. Select one or more codes that share the same frequency interval, and then click Next.
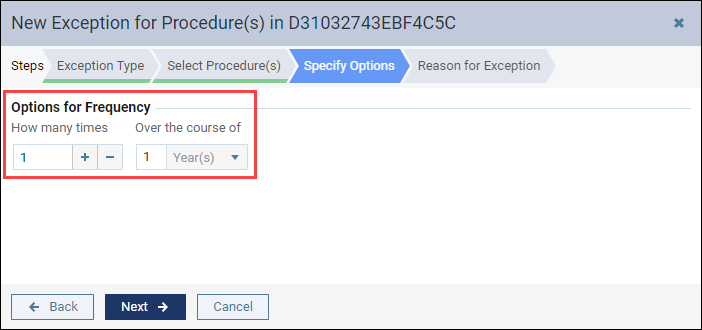
On the Specify Options tab, use the fields to specify how many times and in what time frame the procedure will be covered. In this example, “one time per year” is specified. Then, click Next.
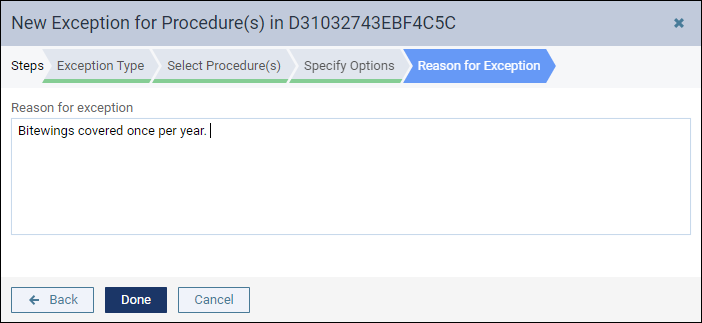
On the Reasons for Exception tab, add a short note about why you entered this exception, and then click Done.
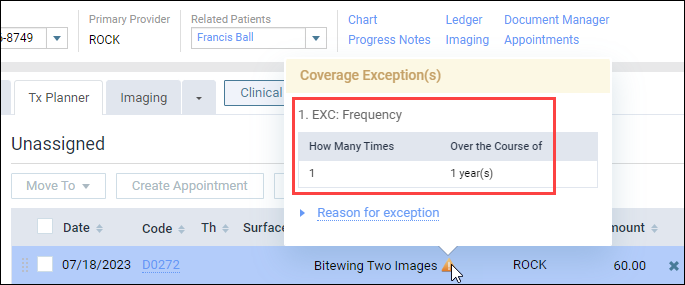
As with other coverage table exceptions, the Ledger and the Treatment Planner highlight those procedures where exceptions apply. Also, in the Detailed View of the Patient Portion and Guarantor Portion explanations, you can click a value in the Primary Coverage % column to see the exception information.
Finance & Estimates
No Write-off Checkbox
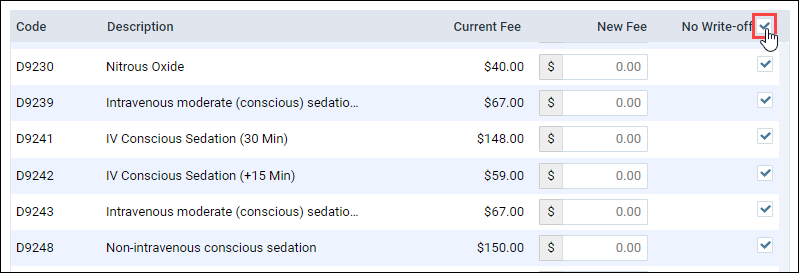
This release introduces No Write-off checkboxes on the Fee Schedules page. This feature gives you the ability to decide if you don’t want a write-off for a procedure code in a contracted fee schedule.
Typically, when a dentist performs a procedure for an insured patient, a write-off is calculated by subtracting the maximum allowable fee from the office UCR fee, and that amount appears on the patient’s ledger as an adjustment.
There may be situations when your office does not want a write-off for a procedure code in a fee schedule. For example, your office may have a policy that the patient pays the full fee for certain procedures that the insurance carrier doesn’t pay for, like nightguards, specialty procedures, and nitrous.
In these situations, you can select the No-Write checkbox for a procedure code in a fee schedule and charge the difference to the patient.
When the No Write-off checkbox is selected for a procedure, Dentrix Ascend will not estimate or post any write-offs to the patient’s ledger for the associated procedure even if the provider is contracted with the patient’s insurance plan that is associated with the fee schedule.
Note: By default, No Write-Off checkboxes are not selected. When a No Write-off checkbox is not selected, Dentrix Ascend will estimate and post write-offs to the patient’s ledger for the associated procedure.

Selecting All Write-off Checkboxes
To select all No Write-off checkboxes in a fee schedule, select the checkbox next to the No-Write off column heading.
Importing Fees Schedules with $0.00 Amounts
By default, a$0.00 fee for a procedure in a contracted fee schedule may result in a 100% write-off.
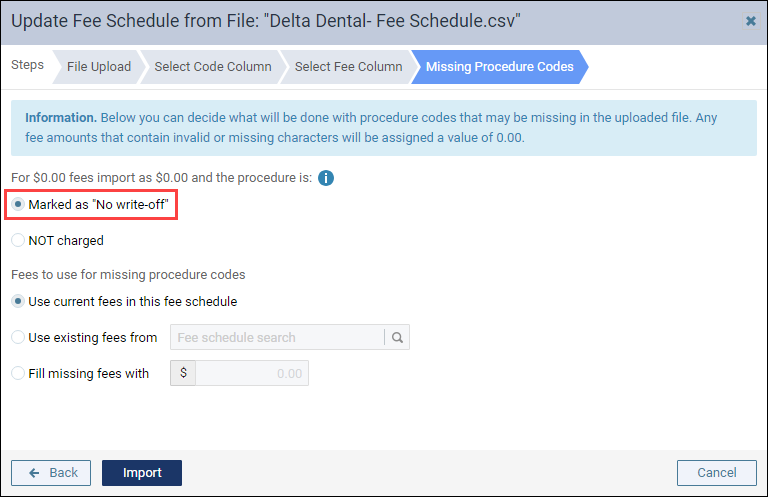
With this release, you can decide how to handle $0.00 or missing fee amounts for procedure codes when you are importing a fee schedule. Prior to this release, fee amounts that contained invalid or missing values were assigned a value of $0.00. Now, when you import a fee schedule, Dentrix Ascend detects these situations and lets you decide how to handle them. You can decide to mark them all as No Write-off or as NOT charged.
On the Missing Procedure Codes tab, you can choose:
- Marked as ‘No write-off” – Choose this optionto ensure write-offs are never posted for $0.00 procedures and patients will be billed the difference.
- NOT charged – Choose this option only if the procedures in the imported fee schedule should have no charge.
Note: By default, Marked as “No write-off” is selected. The main value of this choice is as a safety net – you will not give away a free product or service if your imported fee schedule is missing a procedure code or fee.
New Learning Content
Videos
Dentrix Ascend Detect AI Overview
Dentrix Ascend Detect AI is an X-ray analysis software that uses artificial intelligence software that identifies potential carious lesions and measures interproximal bone levels. Watch this new video to see how you can show or hide indications to help you when you are presenting treatment plans. This video also includes closed captions.
Blog Posts
Settings to Simplify the Ledger
Your first impression might be that the Dentrix Ascend ledger is complicated. It doesn’t have to be. With just a few clicks, you can adjust the settings in the ledger to keep it looking clean and less complicated for daily posting. Read this article to learn more.
Focusing on Specific AI Indications
Do you want to learn how to maximize Detect AI as a patient education tool? Read this blog post to find out how Dentrix Detect AI has already become an amazing virtual assistant to hundreds of dental practices, enhancing their patient education and treatment planning abilities.
When patients have an extensive treatment history, it can be difficult to find the treatment details or notes about a specific tooth or teeth. Read this tip to learn how to quickly review the history of a tooth in Dentrix Ascend.