This iteration release introduces the new 3D Volume Cone-beam Computed Tomography (CBCT) imaging procedure to enhance the standard of care and expand practice services for general dentists. New estimate fields have also been added to the Interactive Ledger Report builder to help you capture the values calculated on the Ledger.
Clinical
3D Volume Cone-beam Computed Tomography
What is CBCT and How is It Useful for General Dentists?
Dentrix Ascend introduces the new 3D Volume Cone-beam Computed Tomography (CBCT) imaging procedure. This feature is intended to enhance the standard of care and expand practice services for general dentists It is not intended for specialty doctors such as Oral Surgeons, Orthodontists, and Implant Specialists.
3D CBCT is an imaging technology that allows dentists to evaluate the underlying bone structure, nerve pathways, and surrounding soft tissues. During a 3D CBCT scan, the imaging machine rotates around the patient’s head. In less than a minute, about 150 to 200 images are captured from a variety of angles that are compiled into a single 3D image.
The 3D CBCT imaging feature has been designed to bring 3D imaging capabilities into the existing workflows of Dentrix Ascend Imaging and run on any standard desktop computer.
Like the existing workflows of Dentrix Ascend, when you import or acquire a 3D image, it appears on the Show Most Recent Images dashboard.
Note: Initially, CBCT is only available after Support turns it on by request. To contact Support, call 855-232-9493, option #2.

3D Imaging Acquisition Workflow
Acquiring the 3D CBCT Image
The imaging workflows in Dentrix Ascend have not changed. When you are ready to acquire a 3D image:
- Click 3D Volume from either the Favorites or Standard tab under Imaging Procedures.
- Select the 3D image Acquisition type. There are 5 acquisition types that offer different field of view options:
- D0364 Limited field of view
- D0365 Mandible
- D0366 Maxilla
- D0367 Both Jaws (Maxilla and Mandible)
- D0368 TMJ
- Select the 3D software device that you will use. Dentrix Ascend imaging includes several bidirectional software device bridges that automatically open your manufacturer’s software device to acquire and render the image. We anticipate that more software bridges will be added in the future.
- Romexis Software
- Sidexis Software
- i-Dixel Software
- Carestream Imaging Software
- Click Proceed with Acquisition to acquire the 3D CBCT image.

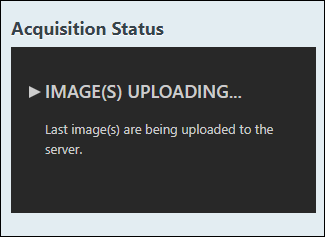
After the image is acquired, the 3D image automatically imports from your 3D imaging device to Dentrix Ascend Imaging. The upload may take up to 1 minute because of the large size of the 3D image. To keep you informed of the upload progress, the status of the image upload appears in the image Acquisition Status display. You can see the status change from image transfer, transferring, receiving, rendering, image(s) uploading, and image(s) uploaded.
IMPORTANT: The 3D volume image uploading feature only works on a Windows desktop computer.
If you are using a Mac device with the Romexis software bridge, the image will only be imported into Dentrix Ascend as a 2D image. You must use the Romexis 3D software to view and manipulate the 3D volume image.
Viewing and Navigating the 3D CBCT Image
Multiplanar Reformatted (MPR) Orthogonal Views
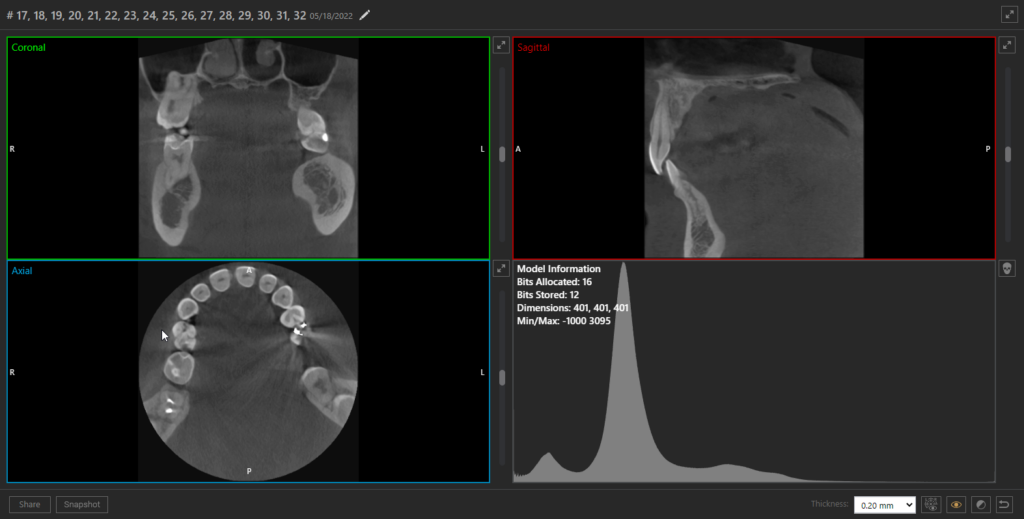
When you open a 3D CBCT image in Dentrix Ascend, the image loads into the Multiplanar Reformatted Orthogonal (MPR) view mode. The MPR Orthogonal view mode is the most common view for 3D CBCT imaging. The MPR view mode includes the axial view, the coronal view, and the sagittal view.
- Axial view: Includes a series of images that start at the chin and move to the top of the head.
- Coronal view: Includes a series of images that start at the back of the head and move towards the face.
- Sagittal view: Includes a series of images that start on the left side of the head and move to right side of the head.
There is an additional view called the volume rendering view, which includes the front, left and right skeletal view to help dentists see the full anatomy. By default, the volume rendering view is not displayed, to reduce the workload of your graphics card.
If you want to display this view, click the Snap to front view (skull) icon. The volume rendering view takes approximately 20 to 30 seconds to load.
By default, the volume rendering opens to the front view with the volume plane indicators shown. To change views of the volume rendering, click the Snap to front view, Snap to left view, or Snap to right view (skull) icons.
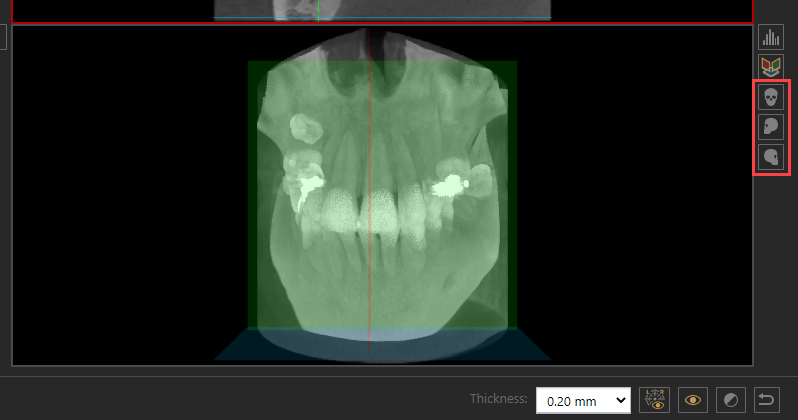
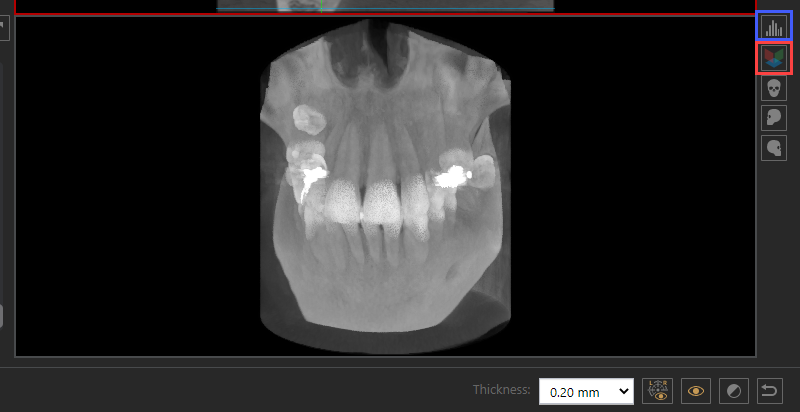
To hide the volume plane indicators, click the Show/hide volume plane indicators icon (highlighted below in red). To swap the volume rendering view to the histogram view, click the Swap for Histogram Panel icon (highlighted below in blue).
Note: The Volume Rendering feature has been minimally implemented and is not fully complete in this release.
Slice Plane Indicator Lines
When a dentist is evaluating a tooth or a region of interest, the Slice plane indicator lines are used to select the specific anatomy on the 3D image slice to be viewed. The Slice plane indicator lines are color-coded to represent the axial, coronal, and sagittal views. The red line represents the sagittal view, the green line represents the coronal view, and the blue line represents the axial view.
To use the slice plane indicator lines, click the Show/hide slice plane indicator lines icon.

Then click the axial, coronal, or sagittal view and drag the Slice plane indicator lines to the tooth or region that you want to see within that view. As you navigate one view, the slice plane indicator lines automatically move on the other views to display that same tooth or region of interest.
3D CBCT Image Navigation
When you are finished acquiring the 3D image, you can use the same navigation functions in the Image Preview that you normally use to navigate 2D images. To navigate the 3D image views, you can:
- zoom in by rolling your mouse wheel forward
- right-click to pan across the image (in zoom in mode)
- zoom out by rolling your mouse wheel backward
- expand each view to either a full panel view or a full screen view by clicking the expansion arrows
In addition to the other navigation functions, 3D CBCT imaging includes a slider tool. When you drag the slider tool up or down in each view, it allows you to view each slice of the 3D image.

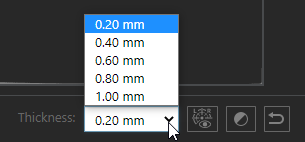
By default, the image slice thickness is 0.20 mm. If you want to change the slice thickness, click the Thickness dropdown, and select a slice thickness that you prefer.
To reset the image to its original view, click the Reset Workup icon.

Annotation and Measuring Tools
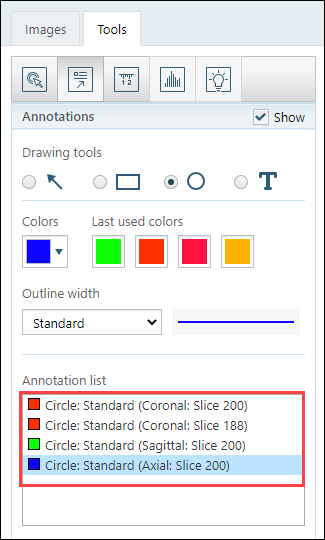
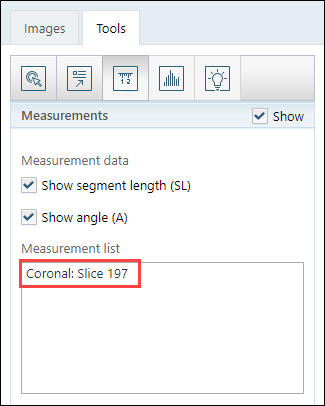
When you are finished acquiring the 3D image, you can use the same tools in the Image Preview that you normally use to add annotations or measurements to your 3D images. The only difference is that when you add an annotation or a measurement to a 3D image, the annotation or measurement is added to the specific 3D image slice that you are currently viewing. Additionally, the annotations and measurements listed under the Annotation list and Measurement list include the name of the view (axial, coronal, or sagittal view) and the slice number.
To view the annotation or measurement, click the annotation or measurement listed under the Annotation list or Measurement list.
Note: The annotation colors that display under the Annotation list represent the annotation color you select; the colors do not represent the axial, coronal, and sagittal views.
Annotation List:
Measurements List:
Important: To begin acquiring 3D images, you must download the most recent acquisition agent. To learn how to update your acquisition agent, read Updating the acquisition agent.
Sharing Images
Below the Multiplanar Reformatted Orthogonal (MPR) views, there are two buttons that allow you to share your 3D images: the Share button and the Snapshot button.
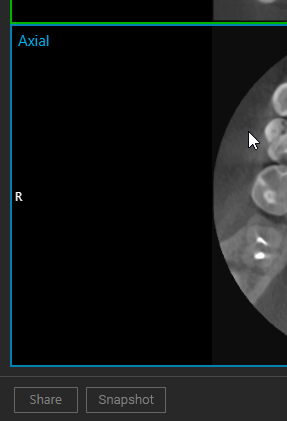
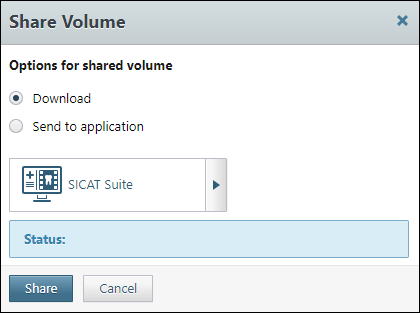
When you want to share an image with a specialist or another provider, click the Share button to send 3D images the same way as you do now. When you click Share, you have the option directly to download and share the image, or to send the image to SICAT Suite or BlueSky Bio One-Way Bridge Integration applications.
When you want to capture an image to attach to an insurance claim or a predetermination, you can click the Snapshot button to capture the image and save it as a 2D JPEG image.
Power Reporting
Current Insurance Estimates Added to the Interactive Ledger Report Builder
Every time you post a procedure for a patient, Dentrix Ascend attempts to calculate the primary and secondary insurance estimates, the write-off amount, and the guarantor estimate for that procedure. You can see these values in the expanded transaction history of the Ledger.

New estimate fields have been added to the Interactive Ledger Report builder to help you capture the values calculated on the Ledger, to the effect that you could see the estimates for all your ledgers in one report.
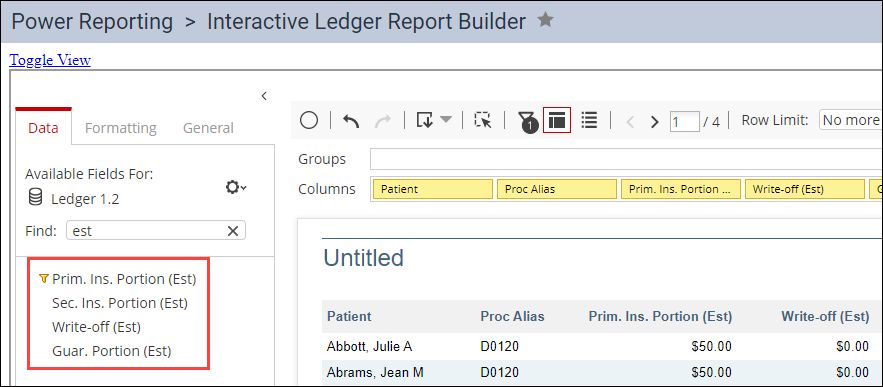
IMPORTANT: You cannot use these fields to see historical information. They are only a snapshot of the current state of the Ledger and always reflect the most recent modifications.
User Rights
No new user rights were introduced in this release.
New Learning Content
The Education Team has added new content to the Dentrix Ascend Resource Center. Below are the latest videos. Click the title to get more information about these topics.
Essentials Videos
Dentrix Ascend 3D CBCT Imaging
The Dentrix Ascend 3D cone beam computed tomography imaging procedure allows you to diagnose, plan and provide the highest standard of care for your patients. Watch this video to learn about the Dentrix Ascend 3D CBCT Imaging procedure.
Dentrix Ascend has excellent tools for handling insurance claims. Two of these tools are the Unresolved Claims widget and Unresolved Claims list. Watch this video to learn how to process unresolved claims.
Blog Tip
Updating a Procedure Fee in Seconds
Sometimes procedure fees in the fee schedule may be inaccurate. Your time is valuable. Why spend time scrolling through the fee schedule to locate a procedure when there is a shortcut? Read this blog tip to learn this shortcut.