Image Stacking (Recapture)
In Dentrix Ascend Imaging, the recapture functionality has been redesigned to allow multiple images to be stored per slot in a series.
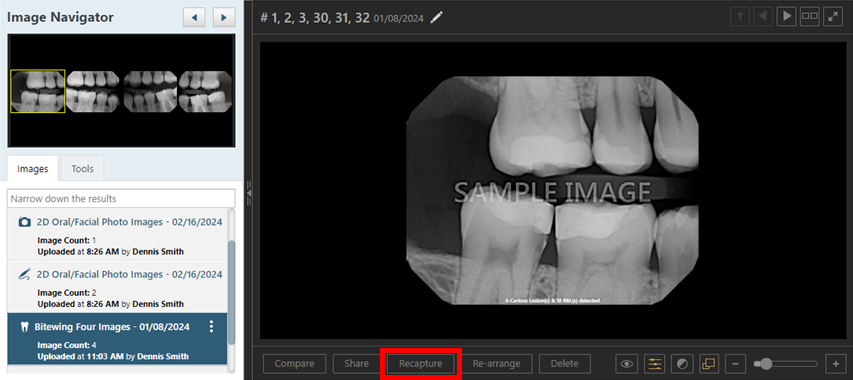
While you are acquiring a new series of images, or while you are viewing an individual image or an image in a series, click Recapture. Then, acquire the new image.
The Select Image dialog box appears.
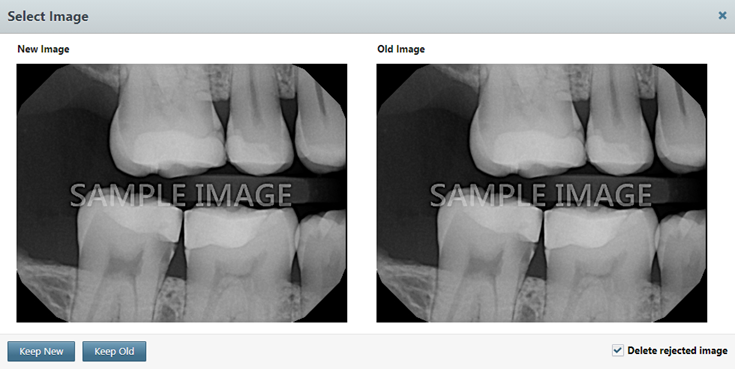
The following changes have been made:
- The recaptured image now appears on the left under New Image.
- The existing image now appears on the right under Old Image.
- The button to keep the recaptured image is now named Keep New. Clicking Keep New keeps the recaptured image and puts it on the top of the image stack for the template slot.
- The button to keep the existing image is now named Keep Old. Clicking Keep Old keeps the existing image and leaves it on the top of the image stack for the template slot.
- A Delete rejected image checkbox has been added in the lower-right corner of the dialog box, and it is selected by default.
- If the checkbox is selected when you click one of the “Keep” buttons, the rejected image is deleted.
- If the checkbox is clear when you click one of the “Keep” buttons, the rejected image is hidden.
Image Stacking (Scan/Import)
In Dentrix Ascend Imaging, the functionality for assigning images to a template during a scanning or importing session has been redesigned to allow multiple images to be stored per slot in a series.
While you are acquiring a series of images using a scanner (or by selecting files to import) and are assigning those images to slots in the template, drag a thumbnail image from the panel at the bottom to a box of the template that already has an image assigned. The image is now put on the top of the image stack for that template slot (previously, the image already assigned would be kicked out of the slot).
Arrow buttons now appear above that box so you can quickly navigate between the stacked images. The image that is visible in the stack when you click Begin Uploading is set as the top image of the stack (but this can be changed later).
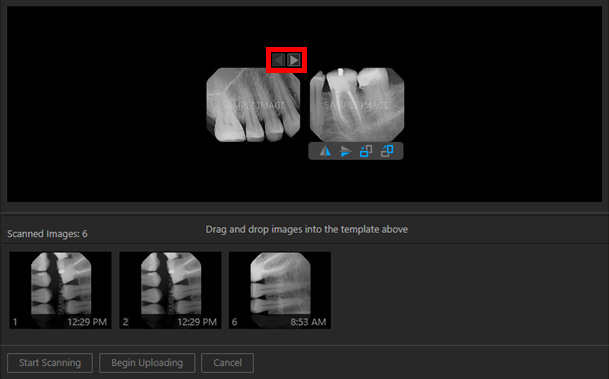
You can also drag the image that is visible in the stack to the panel at the bottom or to another box of the template.
Additionally, prior to this update, unassigned images were lost when you clicked Begin Uploading or Cancel. Now, those images can be stored indefinitely for the patient, allowing them to be recovered later. A message still appears, stating that any unassigned images will not be added to the patient record, but now the message provides options to store or discard the images.
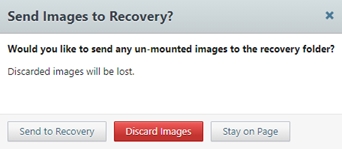
Click one of the following buttons:
- Send to Recovery – To save the unassigned images. You can assign them to the patient later using the existing functionality for recovering images.
- Discard Images – To delete the unassigned images permanently.
- Stay on Page – To return to where you were so you can assign unassigned images or make other changes.
Viewing Stacked Images
To allow for quick navigation through stacked images in Dentrix Ascend Imaging, the image viewing area has been enhanced.
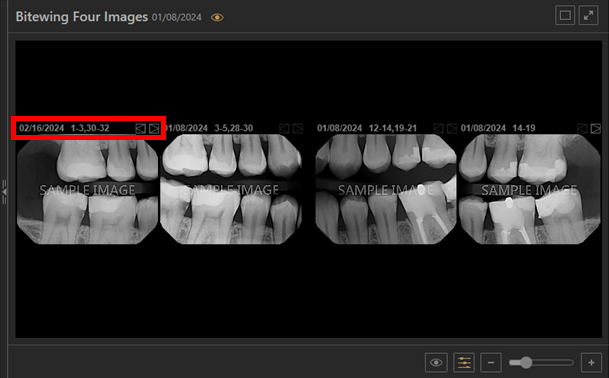
While you are viewing an entire series, the teeth and date on the header of an image slot have been shifted to the left, and left and right arrow buttons now appear on the right so you can navigate between the images in the stack.
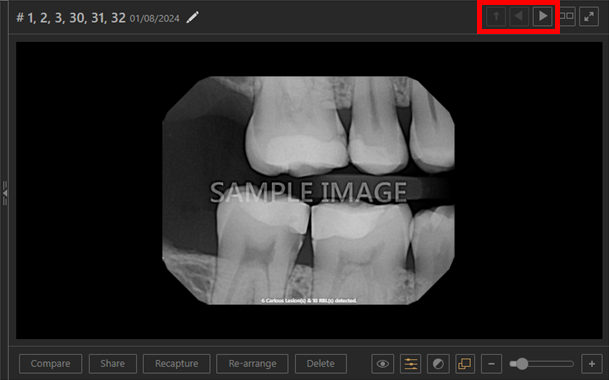
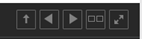
While you are viewing one image, in the upper-right corner, a button to set an image as the top one of the stack now appears, and left and right arrow buttons now appear so you can navigate between the images in the stack.
Notes:
- To set the currently viewed image as the top one of the stack, the “Manipulate Patient Images” security right is required.
- The up arrow button is not available if you are already viewing the top image or if there is only one image.
- The left arrow button is not available if you are viewing the top image or if there is only one image.
- The right arrow button is not available if you are viewing the bottom image or if there is only one image.
Moving Stacked Images
In Dentrix Ascend Imaging, you can now move an image in a stack from one slot of a template to another slot.
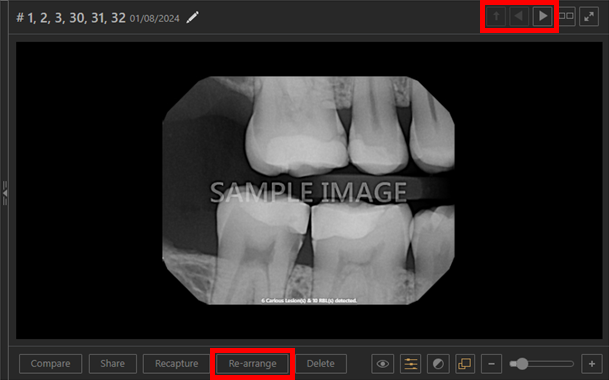
Note: The View Recaptured button has been removed and replaced with the Re-arrange button.
Do the following:
1. View the image in the stack that you want to move, and then click Re-arrange. The button is available only if there is more than one image for the slot.
The Move Image dialog box appears.
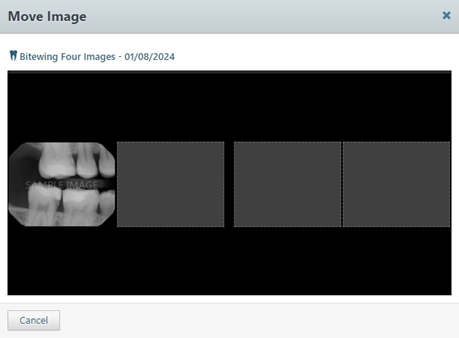
2. Drag the image to another slot of the template. The image will become the top one in the stack for the destination slot and will be selected by default.
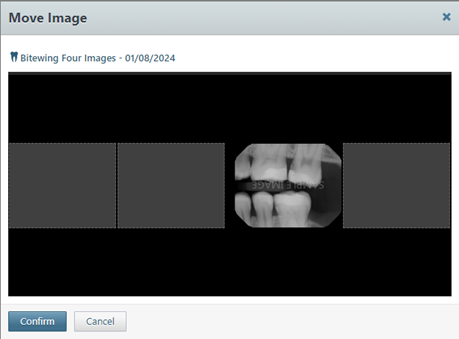
3. Click Confirm.
Deleting Stacked Images
In Dentrix Ascend Imaging, you can now delete any image in a stack of images that pertains to a slot in a template.
While you are viewing an individual image or an image in a series, navigate to the image that you want to delete in the stack for that template slot, and then click Delete. When you delete an image in the stack, instead of the entire stack being deleted, only the visible image is deleted.
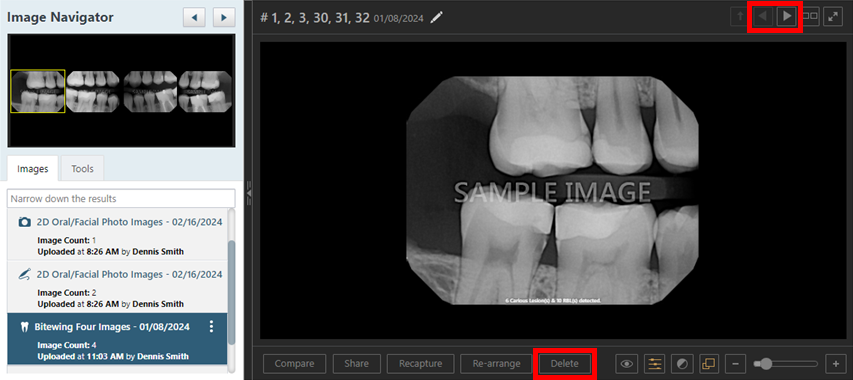
Note: If you delete an image that has been set as the top of the stack, the next image down in the stack becomes the top, and it is selected. If you delete an image other than the top image, the top image is selected.
Sharing Images
In Dentrix Ascend Imaging, you can now select individual images from an exam and export/print them as one image.
While viewing an image, click Share.
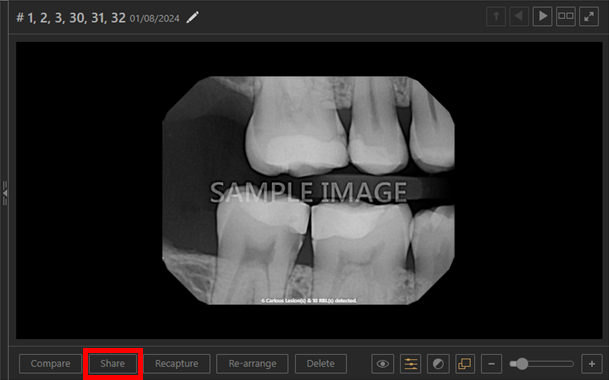
The Exam or Image(s) to be shared dialog box appears.
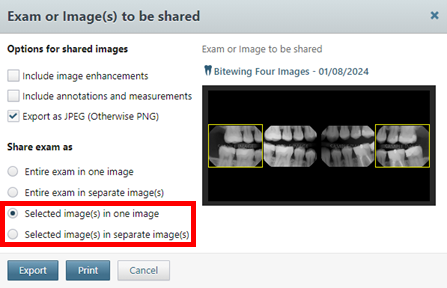
The following changes have been made:
- The Selected image(s) option has been renamed to Selected image(s) in separate image(s). The export and print functionality are the same as in previous versions:
- Export – Exports a .zip file containing the individual image files for the selected images.
- Print – Creates a PDF containing pages for the individual image files for the selected images.
- A Selected image(s) in one image option along with its accompanying new export and print functionality have been added:
- Export – Export a single image containing only the selected images in the layout of the template.
- Print – Creates a PDF containing only the selected images in the layout of the template. The PDF has two pages. The first page is the images in the layout. The second page has the images in the layout colored green with the tooth numbers added over the corresponding image (similar to the existing functionality of printing an entire exam in one image)
- If the Entire exam in one image option is selected, and you select an image, the Selected image(s) in separate image(s) option is selected automatically.
Pixel Size for TWAIN Sources
In Dentrix Ascend Imaging, you can now use the Measurement tool without having to perform a calibration for an image that was acquired using a TWAIN source just like you can with an image that was acquired using a directly integrated device.
To allow this, you must specify a pixel size for that TWAIN source in the acquisition agent’s preferences by doing the following (Windows only):
1. Click the Acquisition Agent icon in the notification area of the Windows taskbar, and then select Preferences.
2. In the Preferences dialog box, select the TWAIN tab.
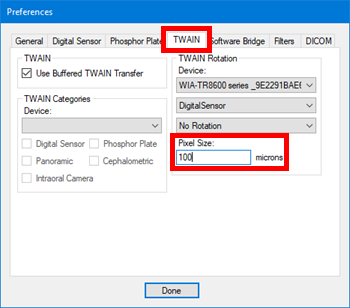
3. Under TWAIN Rotation, select a Device, select a type and rotation option, and then enter the correct number of microns in the Pixel Size box.
4. Click Done.
Supported 3D Imaging Device
Direct acquisition of 3D volumes using an Owandy CBCT machine is now supported (Windows only).