The product update released February 14, 2022 features a new workflow for managing predeterminations. This update includes the ability to run the Day Sheet by modified date and a redesigned Patient Follow-Up page. This update introduces changes to select power reports. Billing statement postage has changed for the Print & Mail for Me feature.
Insurance
Manage Predetermination Requirements
Dentrix Ascend has a new feature set designed especially for treatment or insurance coordinators. You can select which procedures require predetermination, and Dentrix Ascend will automatically prompt team members to create a predetermination claim when they add one of the selected procedures to a treatment plan case. Sending predetermination claims can help you avoid financial surprises when working with an insurance carrier.
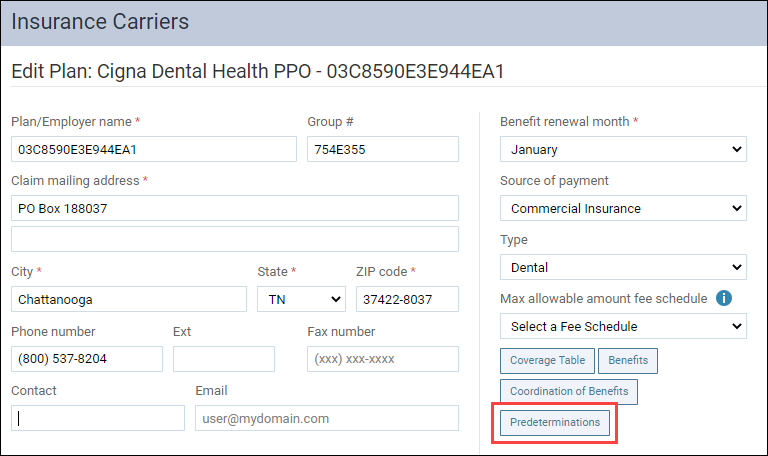
Predetermination management starts in a new Manage Predeterminations window. To open this window, open an insurance plan, and click Predeterminations.
In the Manage Predeterminations window, select the procedures that require predeterminations for this specific plan. Note that the entire organization will share the plan settings.

When you select a procedure, an icon appears next to that procedure code.
The window has three tools to help speed up the configuration of your insurance plans.
- Load Defaults
- Require predetermination for procedures over $ amount
- Replace with existing plan
Load Defaults
Based on a survey of eighteen months’ worth of data, Dentrix Ascend engineers came up with a list of procedures for which most carriers requested predeterminations. We consider these procedures “common” procedures. To load this list of preselected procedures, click Load Defaults.
WARNING: Loading the defaults replaces any work you have done to this point. The recommended workflow is to load the defaults first and then refine your selections.
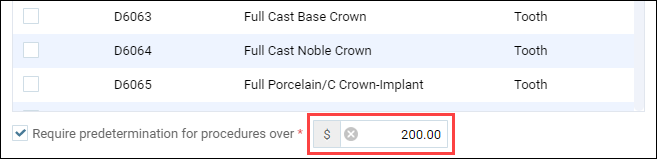
Require predetermination for procedures over $ amount
The Require predetermination for procedures over field allows you to set predetermination requirements based on a financial threshold, as directed by the carrier. Select the check box and enter a dollar amount. Unlike the other tools in this window, applying a financial threshold will not wipe out any configuration you may have already done.
Note: This method does NOT select or highlight any procedures. You will not see the effects of this setting until you are in the Treatment Planner.
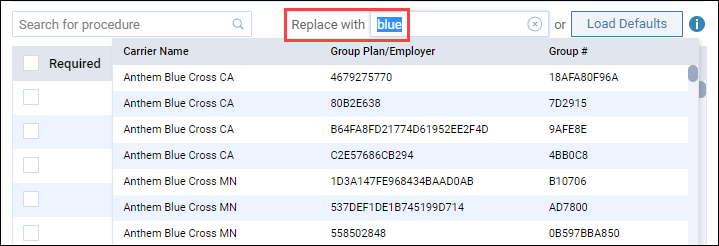
Replace with existing plan
If you have already done the work of configuring which procedures require predeterminations in one plan, you can import those settings to another plan using the Replace with search box. Open the plan you want to import the settings to. Use the Replace with search box to find the plan with the desired settings. When you select the plan in the search box, the current settings are replaced with the settings from the selected plan.
WARNING: As with the Load Defaults option, you will be instructing Dentrix Ascend to replace any existing selections. The best workflow is to import the settings of another plan and then make your adjustments.
To manually select procedure codes, use the Search for procedure field to find a procedure by code number or description (for example, “crown” or “2721”). When you find the desired code, select the procedure to add it to the list. Click Save to save the settings to the insurance plan.
Distribute Settings
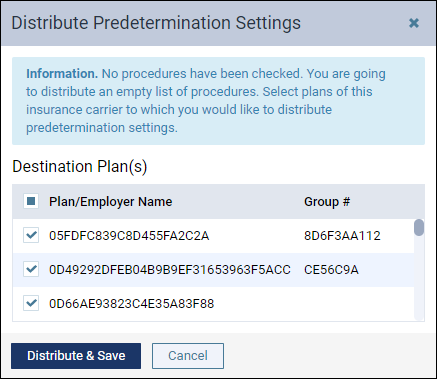
Another tool to help speed up the configuration of your insurance plans is the Distribute Settings button.

Click Distribute Settings to open the Distribute Predetermination Settings dialog box. In this box, select other plans belonging to the currently selected carrier that you know have the same requirements for predeterminations. Then, click Distribute & Save to copy the procedure code selections of this plan to those plans. If you have chosen to enter an amount in the Required predetermination for procedures over field, that configuration will be distributed as well.
To clarify the difference between replace and distribute, the Replace with tool lets you copy in selections from any plan across all carriers, while the Distribute tool lets you copy out selections to plans within the same carrier.
Predetermination Notifications in the Treatment Planner
Once you have configured which procedures require predeterminations, you will start seeing predetermination warnings in the treatment planner. You will see two warnings:
- A warning banner at the top of the page
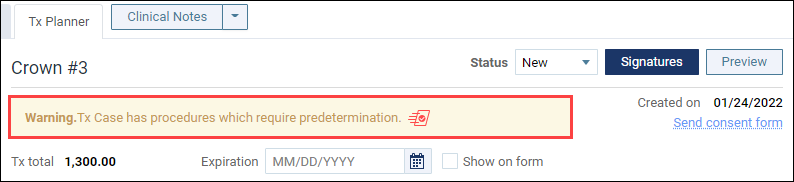
- A predetermination icon next to the specific procedure that requires the predetermination
This same icon appears in the treatment planner preview and the case list.

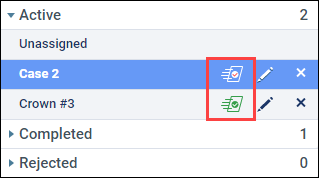
When you see the predetermination icon in the treatment plan case or in the case preview, position your pointer over the icon to see whether the primary and/or secondary insurance requires a predetermination.
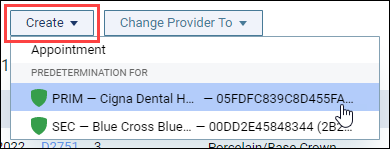
Select the procedure, open the Create menu, and then select a carrier to create a predetermination for the primary (PRIM) or secondary (SEC) insurance carrier.
The Predetermination Detail window opens. Make any changes as usual, and then submit the predetermination. Once you submit the predetermination, the predetermination icon changes from red to green as a visual indicator that the task was completed. The warning banner goes away when all required predeterminations have been submitted.

The procedures you select in the Manage Predeterminations window trigger warnings in the treatment planner. You can still select and create a predetermination for any procedure, whether or not it was set up to trigger a predetermination warning.
The Audit Log records the creation, modification, or deletion of predetermination claims.
Reports
Run Day Sheet by Modified Date
In the past, you could only run the Day Sheet by transaction date. Now, you can choose whether to run the Day Sheet by transaction date or modified date. When you choose to run the Day Sheet by modified date, the metrics in the Day Sheet take into account the changes, corrections, and transfers of responsibility made to transactions in the Ledger. Run the Day Sheet by modified date to check entries made for the current day to make sure that backdating or corrections have been recorded.
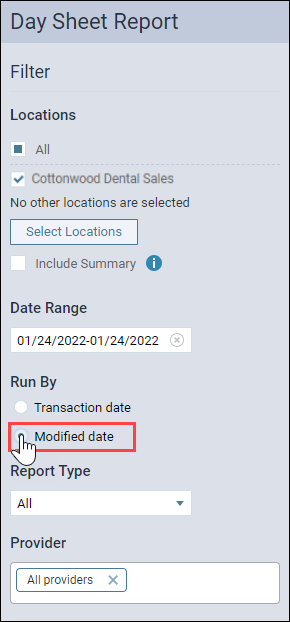
Note: When you run the Day Sheet by transaction date, you have the option to include charge adjustments or unapplied credit adjustments in the calculation of Estimated Net Production. You do not have this option when you run the Day Sheet by modified date.
Patient Information
Patient Follow-Up Page Updates
With this release, the Patient Follow-Up page has been redesigned with a date range filter, status tabs, a button to mark follow-ups complete, and pagination. These updates focus on giving you quicker access to your patient appointment follow-ups.
Date Range Filter
With this update, a new Period filter has been added so you can review and follow-up on patient appointments within a specific date range. It allows you to filter appointments by:
- Last 30 days
- Last 4 months
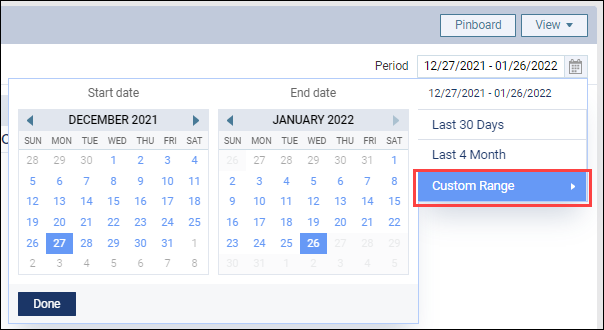
- A Custom Date Range (start and end date)

To change the date range, click in the Period field, and select the desired date range. By default, the Last 30 days is selected. If you select Custom Range, you can choose a specific start date and end date from the calendars that appear. Then, click Done to generate the appointments within the date range you selected.
Note: When you select a date range, Dentrix Ascend remembers the selection on this device for the next time the Patient Follow-Up page is accessed.
Status Tabs and Complete Button
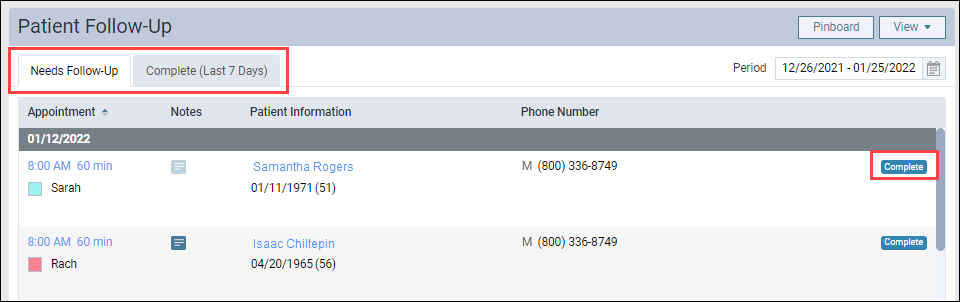
Also included in the Patient Follow-Up page redesign are two status tabs: a Needs Follow-up tab and a Complete (Last 7 Days) tab. Additionally, there is a new Complete button. Now when you have followed up on a patient appointment, click Complete to move the appointment from the Needs Follow-up tab to the Complete (Last 7 Days) tab.
Pagination
In addition to the other updates, a new pagination feature has been added to the Patient Follow-Up page. By default, you can view 50 appointments at one time. This allows for faster load times because it limits the initial viewable list to 50 entries. You can change the view to show up to 100 appointments by selecting 100 from the Showing list. To navigate the pages of patient appointments, you can either click the page numbers or click the Previous or Next links.

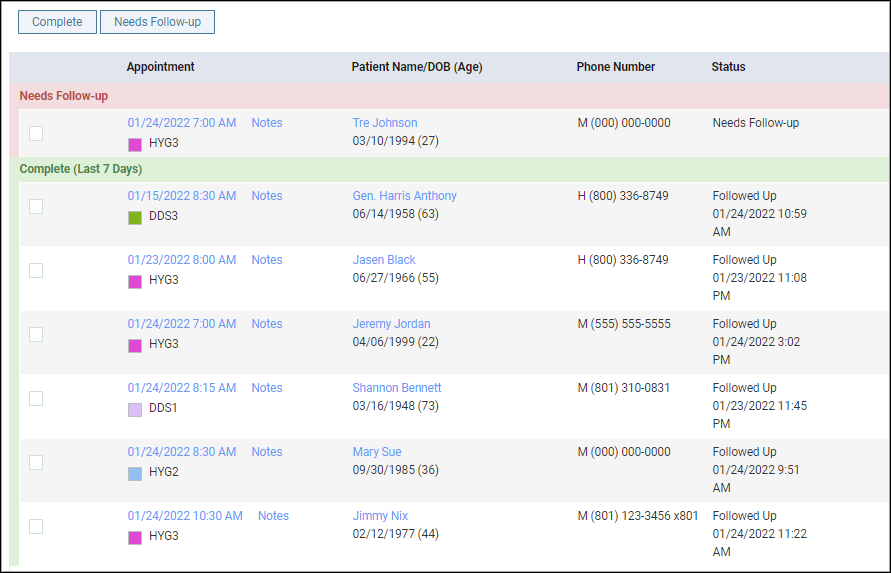
Patient Follow-Up Page Before
Patient Follow-Up Page After

Billing Statements
USPS Postage Price Change
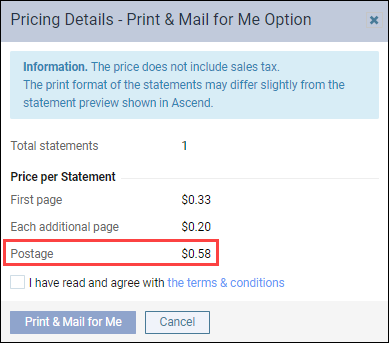
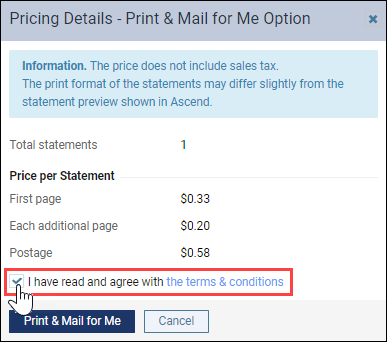
The price of postage for USPS first-class mail has increased from $0.55 to $0.58. This change is reflected in the cost of sending billing statements using the Print & Mail for Me feature. Now when you send a patient a billing statement using the Print & Mail feature, you will see the $0.58 postage rate listed under Price per Statement.
Because of this USPS postage price increase, you will once again be required to agree to the terms and conditions before using the Print & Mail for Me Feature. You will only need to do this once for each location.
The Print & Mail for Me button will remain inactive until you acknowledge the new terms and conditions. Once you select the I have read and agree with the terms & conditions check box, the Print & Mail for Me button becomes active.
Note: Once you select the check box, you will not be required to select it again unless the terms and conditions are updated again in the future.
Power Reporting
Modifications to Select Predefined Reports
This update brings a shift in focus for several of the Power Reporting reports already built for you. The modifications will help the reports focus more on trends. As you know, many reports make use of the modified date because it is an excellent way to reproduce the same data results without changing past periods. But it does have some practical limitations. Therefore, the following reports now use other dates to achieve a desired result.
- The Production Trends – Chart Report now uses the Service Month filter. the report now also uses the Revision History filter to include Current transactions. Combining these filters allows this report to display the latest information. Remember the purpose of the report is not to pinpoint reproducible numbers but to accurately depict production trends.
- The Daily Huddle Completed Production – MTD Report now uses the Service Month filter. This lets you see—after all the changes from the previous month are concluded—how this month’s production compares to the previous month. The report now also uses the Revision History filter to include Current transactions so that you can see the latest amounts.
- The Daily Huddle Collections – Yesterday report now uses Revision History filter to include Current transactions so that only the latest information is represented.
- The Daily Huddle Collections – MTD Report now uses the Transaction Month filter. The report now also uses the Revision History filter to include Current transactions. Therefore, the report numbers are current at the time you run the report and can be expected to change as collection activity continues throughout the month. The same is true of the Daily Huddle Collection % – MTD Report.
- The Daily Huddle New Patients Seen – MTD Report now uses the Transaction Month filter. The report now uses the Revision History filter to include Current transactions. The report now also uses the Procedures category filter to make sure that the count is correct and matches the regular New Patients Seen Report.
New Field Names
Update 386 introduced new fields to the Analysis Patient Insurance Report Builder to help show the dates when an insurance plan changed from being secondary to primary and so forth. We have updated the names of those fields to make them more consistent with terminology used elsewhere in Dentrix Ascend. The field names are now Insurance Plan Order, Plan Order Start Date, and Plan Order End Date.

User Rights
No new user rights were introduced in this release.
New Learning Content
As the Dentrix Ascend software continues to change and improve, the Practice Success library also expands and updates when needed. Click the title below for some great new content.
Block Scheduling in Dentrix Ascend
Our latest Practice Success webinar broke all previous attendance records. Don’t miss the opportunity to learn how using block scheduling can help you achieve your production goals. Join many of your peers and watch this on-demand webinar today!