
Released 5/20/26
When you refund a payment, you can now apply a specific refund amount per charge that is associated with that payment. You can use this new refund method if you need to refund amounts only for certain charges that are associated with the payment. This can help ensure accurate provider production and collection totals if the payment being refunded has been applied to multiple procedures that were performed by different providers.
Post a refund (any type of payment)
1. Expand the Charge (+) Adj. button’s menu, and then select Refunds.
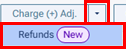
The Enter Refund Adjustment Amount dialog box appears.
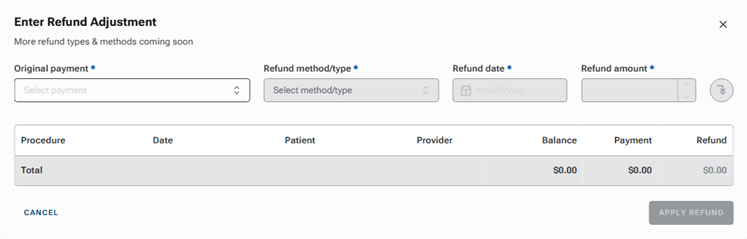
2. From the Original payment list, select the payment for which you are posting a refund.
The associated charges appear.
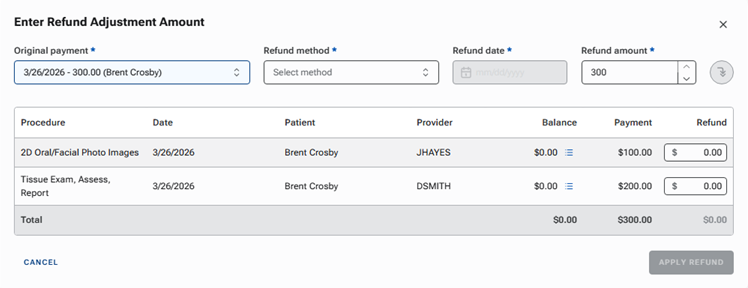
3. For Refund method/type, do one of the following:
- If the Original payment is a check payment, cash payment, patient financing payment, EFT payment, or credit/debit card payment that was not processed through Dentrix Ascend Pay, Record External Refund is selected automatically and cannot be changed. With this option selected, a refund will be recorded in the ledger, but nothing will be processed (no movement of any funds will be initiated). Skip to the next step.
- If the Original payment is a credit/debit card payment that was processed through Dentrix Ascend Pay, select one of the following options from the list:
- Record External Refund – Select this option to record a refund in the ledger without returning funds to a credit/debit card (no movement of any funds will be initiated).
- Original Payment Method – Select this option to return funds to the credit/debit card that was used for the original payment.
- Worldpay IQ Portal – Select this option to open the Worldpay IQ portal on a new browser tab and handle the refund on that website. After that, come back to this point and select Record External Refund.
- Lanes – Select one of the payment devices (card readers) to put funds on a credit/debit card that was not used for the original payment. Later, the cardholder will need to interact with the payment device.
- Saved Cards – If the patient has any cards on file, select one of those saved cards to put funds on that credit/debit card.
- Record External Refund – Select this option to record a refund in the ledger without returning funds to a credit/debit card (no movement of any funds will be initiated).
4. For Refund date, do one of the following:
- If Record External Refund is selected as the Refund method/type, the Refund date is today’s date by default but can be changed. To change the date, click the box to open a calendar, and then select the correct date of the refund.
- If Original Payment Method (under Quick options), a card reader (under Lanes), or a card on file (under Saved Cards) is selected as the Refund method/type, the Refund date is the date of the original payment and cannot be changed. Skip to the next step.
5. By default, the Refund amount is the amount of the original payment. If necessary, change the amount to reflect the correct amount of the refund.
6. To distribute the Refund amount proportionally to all associated procedures, click the Distribute proportionally button
 ; otherwise, skip to the next step.
One of the following occurs:
- If the Refund amount equals the payment amount (it is a full refund), for each line item, the applied amount (in the Payment column) is inserted in the Refund box automatically.
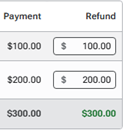
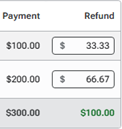
- If the Refund amount is less than the payment amount (it is a partial refund), for each line item, a portion of the total refund amount (proportional to the total; a percentage of the applied amount) is inserted in the Refund box automatically. The percentage of the total refund that is applied to a charge is equal to the ratio of the applied amount to the total payment amount.
7. Do one of the following:
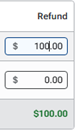
- If you skipped the previous step, for each charge, in the Refund box, enter the amount of the total refund to be applied, or leave 0.00 entered.
- If you want to change any amounts that were proportionally distributed between the charges, in the Refund box of any charges, enter the amount of the total refund to be applied.
Notes:
- If the sum of each box in the Refund column does not equal the Refund amount, the total at the bottom of the Refund column is displayed in orange text.
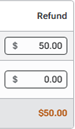
- If the sum of each box in the Refund column equals the Refund amount, the total at the bottom of the Refund column is displayed in green text.
8. Select Tags for the refund as needed.
9. Enter Notes for the refund as needed.
10. Click Apply Refund.
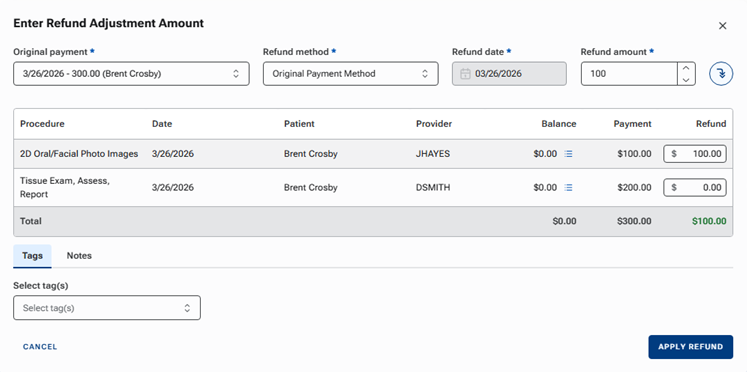
Note: This button is available only if the total at the bottom of the Refund column equals the Refund amount.
11. If a card reader was selected as the Refund method/type (in step 3), the cardholder interacts with the payment device to process the refund using the debit/credit card of choice.
Post a refund (credit card payment through Dentrix Ascend Pay only)
Note: These steps apply only if the payment to be refunded is a credit card payment that was processed through Dentrix Ascend Pay up to 45 days ago.
1. Click a credit card payment on the ledger that is up to 45 days old.

The Edit Payment dialog box appears.
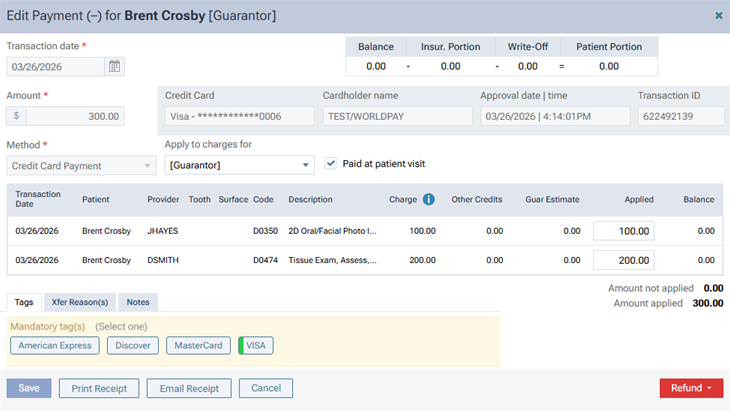
2. On the Refund menu, select Partial Refund.

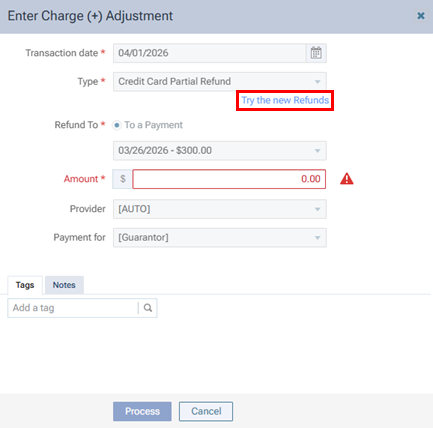
The Enter Charge Adjustment dialog box appears.
3. Click the Try the new Refunds link.
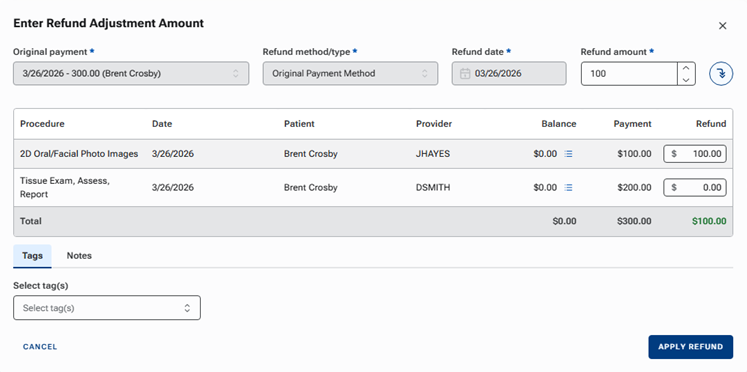
The Enter Refund Adjustment Amount dialog box appears.
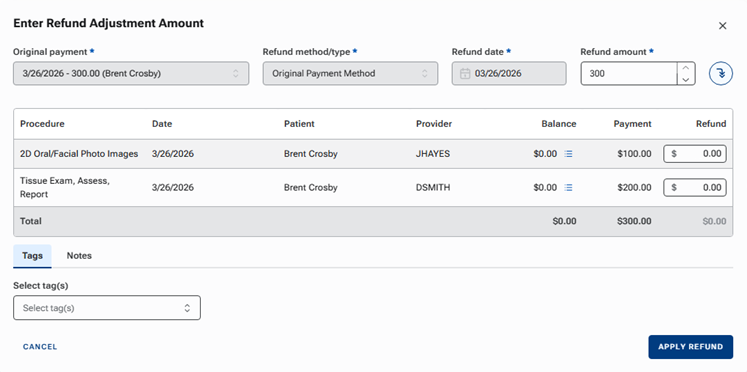
The payment that you clicked on the ledger (in step 1) is selected as the Original payment automatically.
The associated charges appear.
Original Payment Method is selected for Refund method/type automatically. With this option selected, funds will be returned to the credit/debit card that was used for the original payment.
The Refund date is the date of the original payment and cannot be changed.
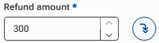
4. By default, the Refund amount is the amount of the original payment. If necessary, change the amount to reflect the correct amount of the refund.
5. To distribute the Refund amount proportionally to all associated procedures, click the Distribute proportionally button
 ; otherwise, skip to the next step.
One of the following occurs:
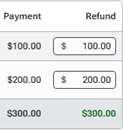
- If the Refund amount equals the payment amount (it is a full refund), for each line item, the applied amount (in the Payment column) is inserted in the Refund box automatically.
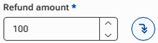
- If the Refund amount is less than the payment amount (it is a partial refund), for each line item, a portion of the total refund amount (proportional to the total; percentage of the applied amount is the ) is inserted in the Refund box automatically. The percentage of total refund that is applied to a charge is equal to the ratio of the applied amount to the total payment amount.
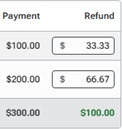
6. Do one of the following:
- If you skipped the previous step, for each charge, in the Refund box, enter the amount of the total refund to be applied, or leave 0.00 entered.
- If you want to change any amounts that were proportionally distributed between the charges, in the Refund box of any charges, enter the amount of the total refund to be applied.
Notes:
- If the sum of each box in the Refund column does not equal the Refund amount, the total at the bottom of the Refund column is displayed in orange text.
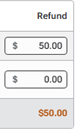
- If the sum of each box in the Refund column equals the Refund amount, the total at the bottom of the Refund column is displayed in green text.
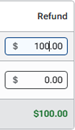
7. Select Tags for the refund as needed.
8. Enter Notes for the refund as needed.
9. Click Apply Refund.
Note: This button is available only if the total at the bottom of the Refund column equals the Refund amount.
Refund on the ledger
The refund adjustment appears in the patient’s ledger. If the refund is split between providers, an adjustment appears for each provider.
The adjustment type for the refund adjustment depends on the selected Refund method:
- If Original Payment Method (under Quick options), a card reader (under Lanes), or a card on file (under Saved Cards) was selected as the Refund method/type, the “Credit Card Partial Refund” adjustment type is used for a refund adjustment.

- If Record External Refund was selected as the Refund method/type, the “Patient Refund” adjustment type is used for a refund adjustment.

You can click the refund adjustment to view the details of the adjustment in the Edit Charge (+) Adjustment dialog box.
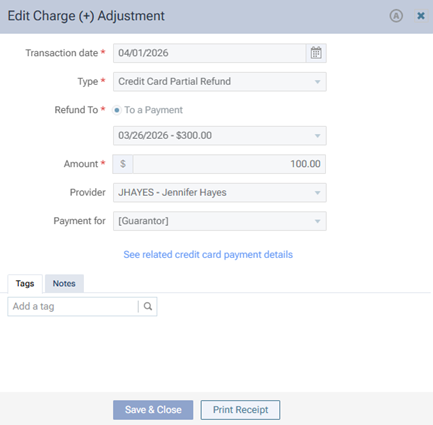
If the refund adjustment is associated with a credit card payment that was processed through Dentrix Ascend Pay, you can click the See related credit card payment details link to view the details of that linked payment in the View Payment (-) dialog box.
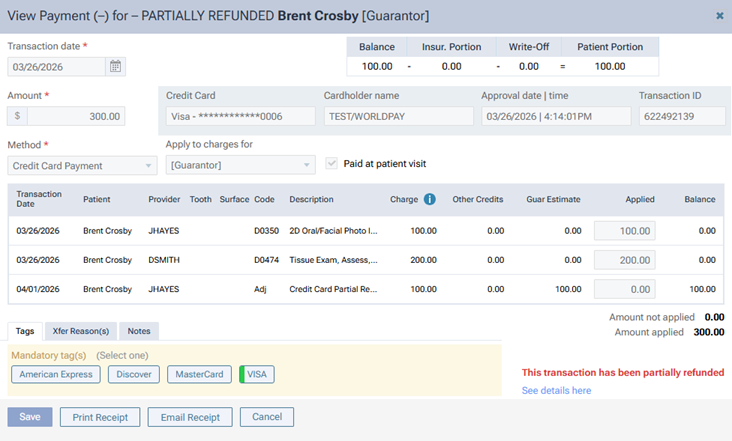
In the lower-right corner of the dialog box, a red message indicates that the payment was partially refunded. You can click the See details here link to return to the Edit Charge (+) Adjustment dialog box.