Prior to this update, the only way to schedule appointments across locations in Dentrix Ascend was by switching locations. Now, you can schedule an appointment in various locations without having to switch locations. This new multi-location scheduling functionality can help you boost scheduling efficiency and find openings for patients at other locations throughout your organization.
Calendar Performance
To implement multi-location scheduling, the performance of the calendar was improved.
Operatory Groups
The existing Operatory Groups page was updated to allow you to add operatories from multiple locations to an operatory group.
Notes:
- To add, edit, or delete an operatory group, the “Manage Location Information” security right is required for the location that you are currently logged in to.
- Operatory groups are location specific.
To add an operatory group
1. If you are not already logged in to the location that you want the operatory group to be associated with, switch to the correct location.
2. Go to Settings > Operatory Groups to open the Operatory Groups page.
3. Click Create New to view the options for adding a group.

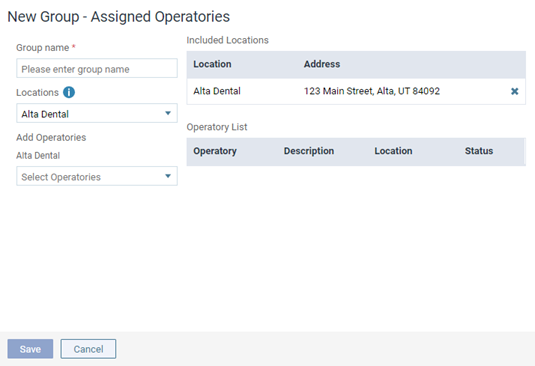
4. Set up the following options:
- Group name – Enter a name. The name must be unique for the current location.
- Locations – By default, the location that you are currently logged in to is selected. To assign additional locations to the group, expand the Locations menu, and then select the checkbox of each desired location.

To search for a location, begin typing a location name in the Search box, and then select the correct location; repeat as needed to search for other locations.
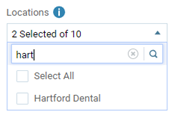
The selected locations appear in the Included Locations list.

Notes:
- Only locations that you have been granted the “Review Location Information” security right for appear in the Locations menu.
- To remove a location in the Included Locations list, click the corresponding X, and then click Remove on the confirmation message that appears. Additionally, the operatories assigned to that location are removed from the Operatory List.
- If the group has multiple locations assigned to it, it is available on the Calendar page only if the Multi-location View switch on that page is set to On.
- Add Operatories – For each included location, select the desired operatories to assign to the group. Expand a location’s menu under Add Operatories, and then select the checkbox of each desired operatory (or select the Select All checkbox); repeat as needed to assign other operatories from the other locations.
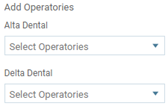
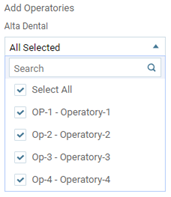
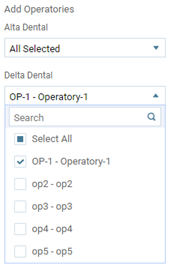
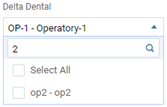
To search for an operatory, begin typing an operatory name in the Search box, and then select the correct operatory; repeat as needed to search for other operatories.
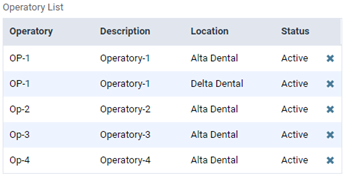
The selected operatories appear in the Operatory List.
Notes:
- You must select at least one operatory for each location that is assigned to the group.
- To remove an operatory in the Operatory List, click the corresponding X.
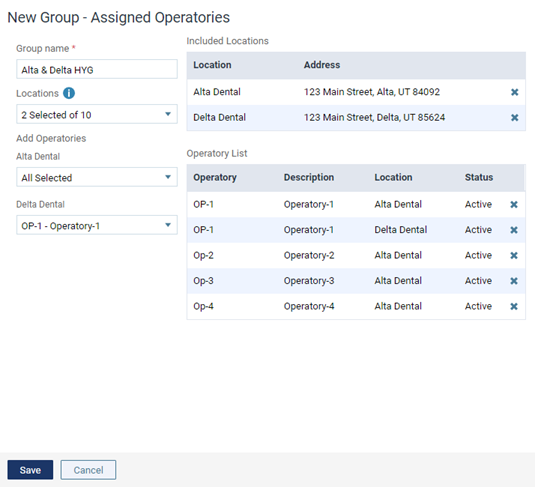
5. Click Save.
Notes:
- Be aware that the number of columns displayed on the Calendar page can affect the schedule’s performance.
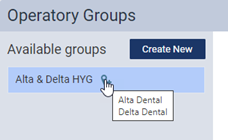
- In the Available groups list, position your pointer over the multi-location icon
 next to a group name to view the associated locations. This icon appears only if multiple locations are associated.
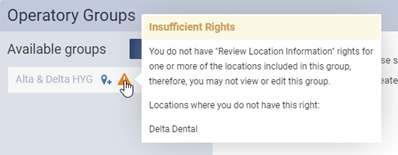
- An operatory group is available on the Operatory Groups page only if you have been granted the “Review Location Information” security right for all the locations that are assigned to the group. If you do not have sufficient access, you can click the orange warning icon
 to view the restricted locations.
Calendar View
You can activate the new multi-location calendar view and set up options for the view. For the view, you can select an operatory group or create an operatory group to use.
New Security Right
There is a new security right that controls the visibility of the switch for turning the multi-location view on and off. The new security right “Multi-Location Scheduling” is located in the “Schedule” category.
To turn on the multi-location view
1. On the Calendar page, set the Multi-location View switch to On.

Notes:
- The Multi-location View switch is available only if you have access to more than one location and if your user role has been granted the “Multi-location Scheduling” security right.
- Whether you are viewing the schedule by day or by week, when you switch to the multi-location view, the schedule is displayed by day.
2. On the View menu, set up the following options:
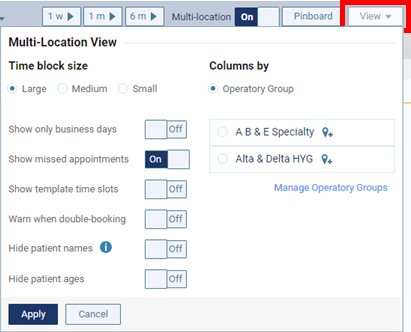
- Time block size – Select Large, Medium, or Small.
- Show only business days – Set the switch to On or Off.
- Show missed appointments – Set the switch to On or Off.
- Show template time slots – Set the switch to On or Off.
- Warn when double-booking – Set the switch to On or Off.
- Hide patient names – Set the switch to On or Off.
- Hide patient ages – Set the switch to On or Off.
- Columns by:
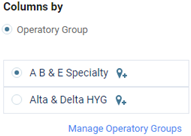
Operatory Group – Currently, this is the only available option, and it is selected by default. Select the desired operatory group.
Notes:
- To add, edit, or delete operatory groups as needed, click the Manage Operatory Groups link.
- Position your pointer over the multi-location icon
 next to a group name to view the associated locations.

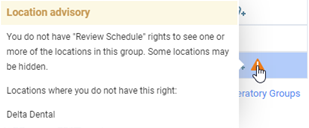
If you have not been granted the “Review Schedule” right for one or more locations that are assigned to an operatory group, an orange warning icon appears next to that group’s name.

You can click the orange warning icon ![]() to view the restricted locations. Those locations will not appear on the calendar.
to view the restricted locations. Those locations will not appear on the calendar.
3. Click Apply.
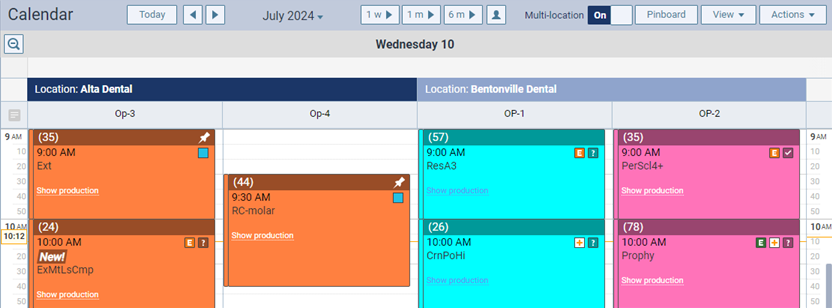
The calendar displays a column for each location with sub-columns for each operatory in the selected group. The left-most column is for the location that you are currently logged in to.
Notes:
- Of the locations that are assigned to the operatory group that is selected for the current multi-location view, the calendar displays only the locations that you have not been granted the “Review Schedule” right for.
- If you navigate away from the schedule while using the multi-location view and then return to the schedule, the Multi-location View switch remains On by default, and the multi-location view options that you last selected are selected by default.
- If you log out and then back in, the Multi-location View switch is set to Off by default. When you turn the switch back On, the multi-location view options that you last selected are selected by default.
Location Header
You can position your pointer over a location column header on the Calendar page to view the location’s address, phone number, and time zone.

Appointment Information Panel
The Appointment Information panel, which appears when you select an appointment tile or are creating an appointment, was updated.
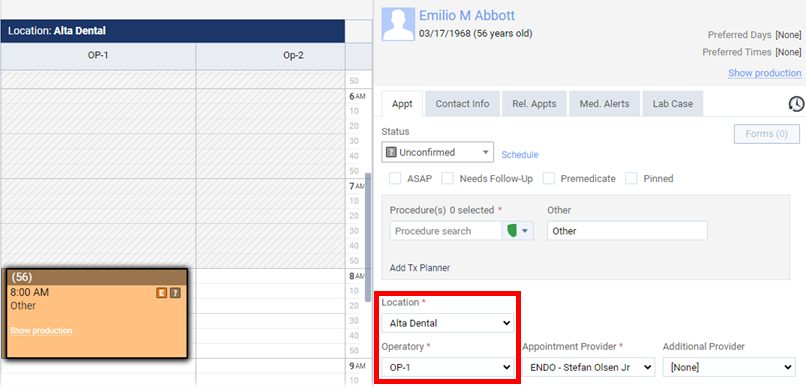
- Location – This list includes only the locations that are assigned to the operatory group that is selected for the multi-location view and, of those locations, only the ones that you have been granted the “Review Schedule” security right for.
If you are creating an appointment, the default selection is determined as follows:
- If you initiated the creation of the appointment by clicking a time slot on the schedule, the corresponding location is selected by default.
- If you initiated the creation of the appointment from the Action menu, the location that you are currently logged in to is selected by default.
Note: If the location that you are currently logged in to is not selected, an orange warning icon appears ![]() , which you can click to display a Location Warning pop-up message.
, which you can click to display a Location Warning pop-up message.

- Operatory – This list includes only the operatories that are assigned to selected location and that pertain to the operatory group that is selected for the multi-location view.
If you are creating an appointment, the default selection is determined as follows:
- If you initiated the creation of the appointment by clicking a time slot on the schedule, the applicable operatory is selected by default.
- If you initiated the creation of the appointment from the Action menu, an operatory is not selected by default.
- Providers – The Appointment Provider and Additional Provider lists include only the providers who work in the selected location.
Notes:
- For an appointment that was booked online, you cannot change the location until after you either create a new patient record or select an existing patient record to associate with the appointment.
- You can create, edit, or delete an appointment only if you have been granted the “Manage Appointments” security right for the location that is associated with the appointment.
- You can move an appointment from one location to another, only if you have been granted the “Manage Appointments” security right for both the original location that is associated with the appointment and the new location that you want to associate with the appointment.
- The Audit Log tracks when an appointment is created, updated, or deleted in another location in the multi-location view.
Event Information Panel
The Event Information panel, which appears when you select an event tile or are creating an event, was updated.
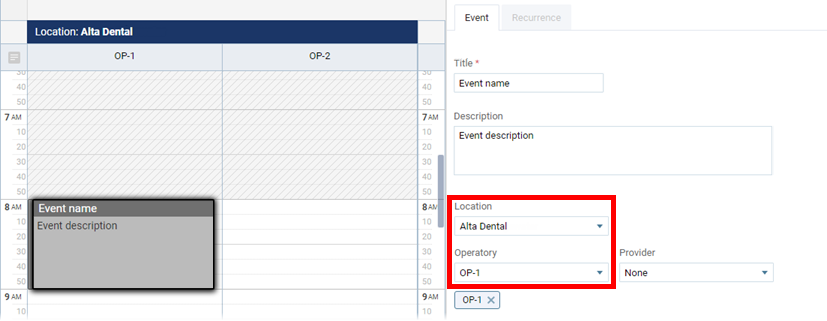
- Location – This list includes only the locations that are assigned to the operatory group that is selected for the multi-location view and, of those locations, only the ones that you have been granted the “Manage Events” security right for.
If you are creating an event, the default selection is determined as follows:
- If you initiated the creation of the event by clicking a time slot on the schedule and then clicking Create Event on the Event Information panel, the corresponding location is selected by default.
- If you initiated the creation of the event from the Action menu, the location that you are currently logged in to is selected by default.
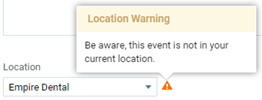
Note: If the location that you are currently logged in to is not selected, an orange warning icon appears ![]() , which you can click to display a Location Warning pop-up message.
, which you can click to display a Location Warning pop-up message.
- Operatory – This list includes only the operatories that are assigned to selected location and that pertain to the operatory group that is selected for the multi-location view.
If you are creating an event, the default selection is determined as follows:
- If you initiated the creation of the event by clicking a time slot on the schedule and then clicking Create Event on the Event Information panel, the applicable operatory is selected by default.
- If you initiated the creation of the event from the Action menu, an operatory is not selected by default, so Practice Event appears in the Operatory list.
- Provider – This list includes only the providers who work in the selected location.
Notes:
- You can create, edit, or delete an event only if you have been granted the “Manage Events” security right for the location that is associated with the event.
- You can move an event from one location to another, only if you have been granted the “Manage Events” security right for both the original location that is associated with the event and the new location that you want to associate with the event.
- The Audit Log tracks when an event is created, updated, or deleted in another location in the multi-location view.
Additional Information
- The ASAP, Broken/No Show, and Pinboard lists display appointments for only the location that you are currently logged in to.
- The Day Note dialog box displays notes for only the location that you are currently logged in to.
- The routing panel (Status Tracker and Schedule Peek) displays appointments for only the location that you are currently logged in to.
- Currently, the following features are not available with the multi-location view:
- Production – You cannot see overall production amounts.
- Printing – You cannot print the schedule.
- Clinical Buttons – The Chart, Ledger, and Tx Planner buttons do not appear on the Appointment Information panel.
- Production – You cannot see overall production amounts.
Additional Resources
- Video – Multi-Location Scheduling
