
Released 5/12/26
Important Note: An updated acquisition agent may be required for features in this release. For instructions on checking for updates, refer to the “Updating the acquisition agent” Help topic.
Enhancements
This release provides the following enhancements.
Tabs on the AI Panel
With Detect AI enabled, while you are viewing an image, the AI panel (on the right) has two tabs: Image Verify and Detect AI. Now, as you navigate between images in a series/set, the selected tab remains selected.
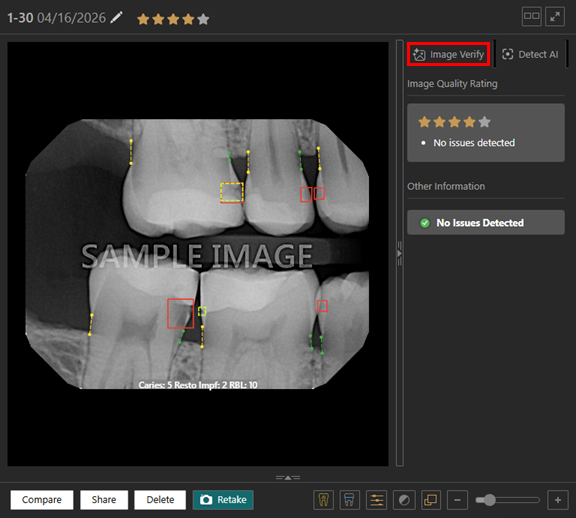
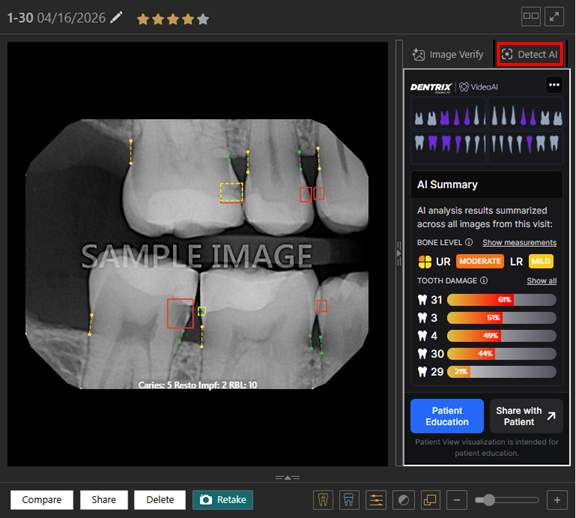
Enhanced Image Verify Tab
With Detect AI enabled, while you are viewing an image, the details that appear on the Image Verify tab of the AI panel (on the right) have been enhanced. On the Image Verify tab, the Image Quality Rating and Other Information are presented separately. The star-based image quality rating appears with contextual issue messaging so you can quickly and confidently assess image quality without ambiguous guidance. Based on the star rating of an image, the messaging that appears clearly explains the detected quality concerns or confirms that no issues were found.
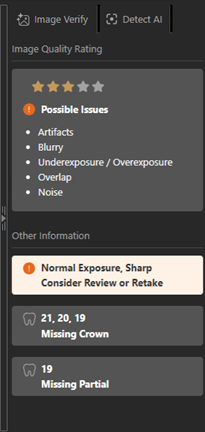
Image Quality Rating:
The following quality information may appear:
- A star-based rating from 1 to 5 stars.
- Depending on the rating, the applicable messaging appears:
- For a 1-star rating, the applicable Possible Issues appear:
- Artifacts
- Blurry
- Underexposure / Overexposure
- Missing anatomical structures
- Overlap
- Artifacts
- For a 2-star rating, the applicable Possible Issues appear:
- Artifacts
- Blurry
- Underexposure / Overexposure
- Partial anatomical cut-off
- Overlap
- Contrast
- Artifacts
- For a 3-star rating, the applicable Possible Issues appear:
- Artifacts
- Blurry
- Underexposure / Overexposure
- Overlap
- Noise
- Artifacts
- For a 4- or 5-star rating , the following text appears:
- No Issues Detected
- No Issues Detected
- For a 1-star rating, the applicable Possible Issues appear:
Other Information:
- Non-quality information may appear.
- Missing tooth, apex, and/or crown information may appear.
Show Retake Banner Only When Image Verify Tab Is Selected
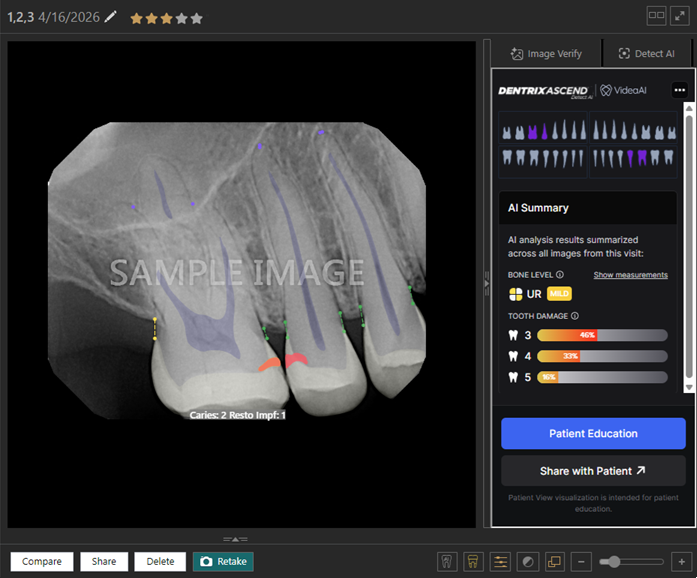
With Detect AI enabled, while you are viewing an image that has a 3-star rating or less, the “Consider Review or Retake” banner appears above the image only if the Image Verify tab is selected on the AI panel (on the right).
Note: This holds true whether the AI panel is currently visible or hidden.
You will notice that, in the following image, the Detect AI tab is selected, so the banner does not appear:
Align iTero Software Bridge
You can now acquire intraoral color photos, extraoral color photos, and CAD/CAM images with the Align iTero software bridge. This bridge is available for Windows only.
To configure the settings for the Align iTero software bridge
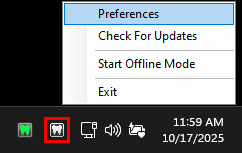
1. Click (or tap) the Acquisition Agent icon
 in the notification area of the Windows taskbar, and then select Preferences.
The Preferences dialog box appears.
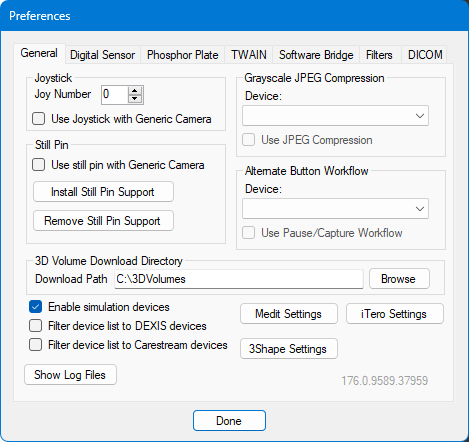
2. On the General tab, click iTero Settings.
3. In the iTero Pair Account dialog box, click Login.
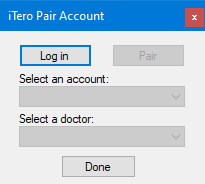
The iTero Authorization dialog box appears.
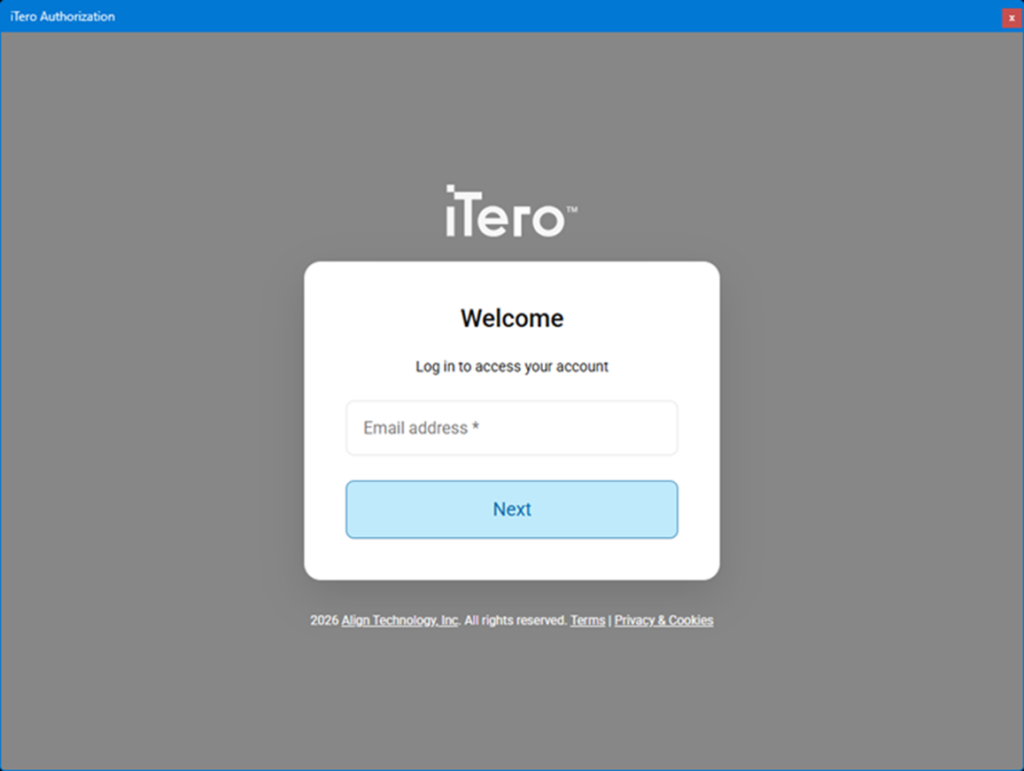
4. Enter the email address that is associated with your iTero account, and then click Next.
The next page of the login opens.
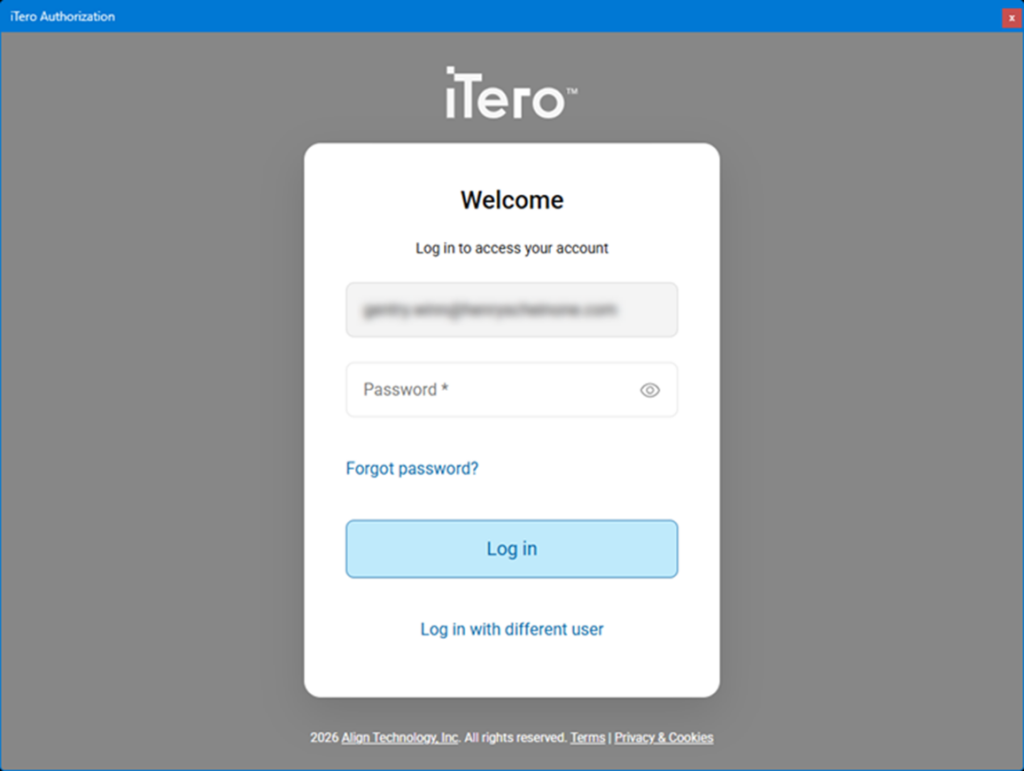
5. Enter the password that is associated with your iTero account, and then click Log in.
You are returned to the iTero Pair Account dialog box.
6. Select your account from the Select an account list.
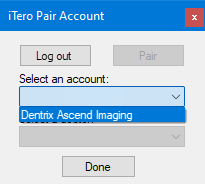
7. Click Pair.
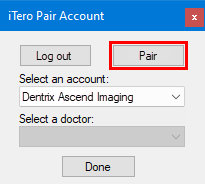
8. Select a doctor from the Select a doctor list.
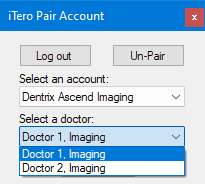
98. Click (or tap) Done.
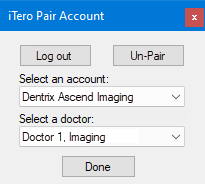
You are returned to the Preferences dialog box.
9. Click Done.
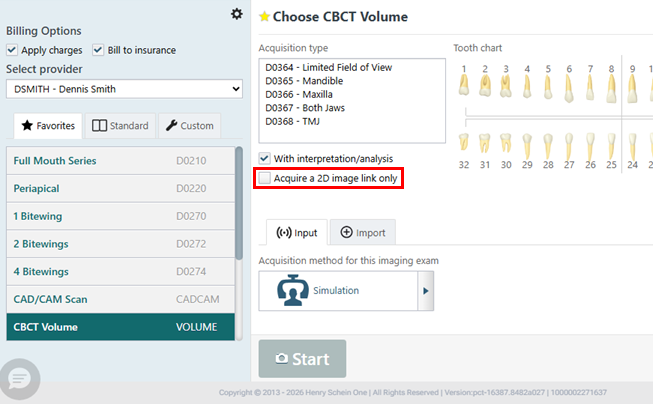
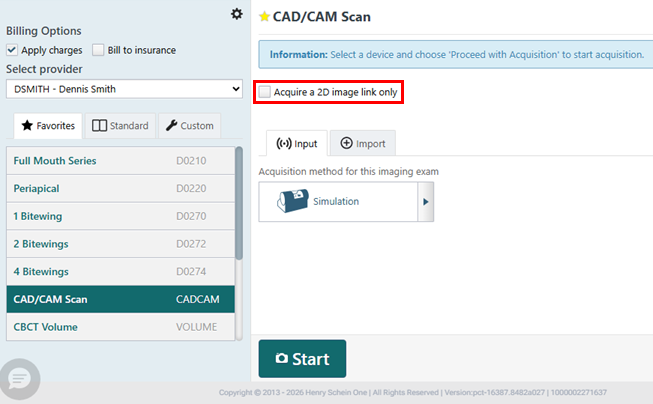
Default for “Acquire a 2D image link only” Checkbox
Now, for both CBCT Volume and CAD/CAM Scan acquisitions, the Acquire a 2D image link only checkbox is clear by default.
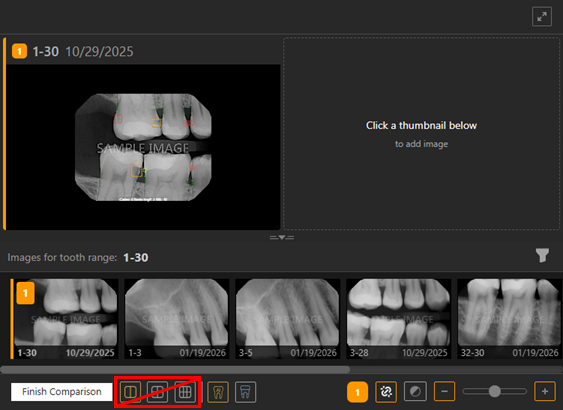
Automatic Layout for Image Comparison
In the image comparison view, the layout adjusts automatically as images are added or removed, so you no longer have to select a layout option.
Miscellaneous
- The acquisition agent version is now captured in telemetry data.
- Any instances of “VideaHealth” and “VideaAI” have been replaced with “Videa,” and all Videa-related buttons have an updated color.
- The title of the “About Dentrix Ascend Imaging” dialog box has been renamed to “About Imaging,” and the link to access that dialog box has been renamed to “About Imaging.”
Fixes
This release resolves the following issues:
- An error appears when certain SOTA images are extracted. (IMG-156)
- You cannot merge patients because the count for the number of exams is incorrect. (IMG-183)
- With the Sidexis extractor, an error is not logged when MediaInfo returns code 400, and the log for the patient card ID is not descriptive. (IMG-314)
- The Sidexis extractor returns the incorrect total number of extracted images. (IMG-315)
- The RealCloud extractor stops, and the following error appears: “System.InvalidOperationException: ‘Each parameter in the deserialization constructor on type ‘RealCloud.Common.Models.PatientData’ must bind to an object property or field on deserialization. Each parameter name must match with a property or field on the object. Fields are only considered when ‘JsonSerializerOptions.IncludeFields’ is enabled. The match can be case-insensitive.’” (IMG-491)
- When you are viewing a CBCT 2D snapshot exam, in the brightness/contrast editor, you can change the brightness and contrast, but instead of black and white levels, it displays “Window Width” and “Window Center.” (IMG-549)
- When you are syncing offline procedures, the list of patients to select from displays the incorrect exam count. (IMG-559)
- With Image Verify, error messages for code 500 (Internal Server Error) appear in the console. (IMG-606)
- In the Modality View, when you select “More” while using Tiled View, the “Use Five Anterior Positioning” checkbox is available but should not be. (IMG-610)
- In the Modality View, with the Overview tab selected, when you click an image, the single image view of that image does not open, and there is an UncaughtType Error. Also, for Intraoral X-ray images in the Tiled View, UncaughtType Errors are more common. (IMG-620)
- In compare mode, the state of the B/C button is not updating until the you select a different image, and then goes back to the original. (IMG-624)
- If your computer’s display setting for magnification/scale is set to a value other than 100%, the quadrants for a 3D volume are not rendered correctly. (IMG-628)
- In the Exam View, if Detect AI is enabled, the side panel does not display any results, and there is a white bar at the top. (IMG-653)
- If you take a single image exam, the “No Quality Information Available” message appears for a while before the correct results appear. (IMG-659)
- The patient search dialog box for the offline sync does not have a scroll bar. (IMG-660)
- You can start an acquisition by using the keyboard shortcut X + ALT even if you have not been granted the “Acquire Patient Images” right. (IMG-663)
- In Exam View, the “Reassign” button for an image appears briefly and then disappears. (IMG-668)
- Without having been granted the security right to edit images, a user can adjust brightness and contrast in the compare view. (IMG-700)
- In the Modality View, in the More Options dialog box for Intraoral X-ray, the active options under Preferences are not selected when they should be. (IMG-704)
- For certain exams and initial acquisition methods, switching between devices causes an Uncaught TypeError. (IMG-714)
- In the Modality View, for categories with Tiled modalities, the Tools tab is not selected automatically for an image that you open in the single image view. Also, if you select another modality that does not have any images, the Tools tab is still available, and you can manipulate the image that was selected previously. (IMG-715)
- The acquisition agent’s RCI_LogAggregation folder is not accessible to all users. (IMG-750)