Released 6/18/25
For the new patient forms, a patient type (new or existing) can now be assigned to a form. With a patient type assigned to a form, in Dentrix Ascend, the form will be due only for the applicable patients.
To change a form’s settings
1. On the Settings menu, select Form Builder.
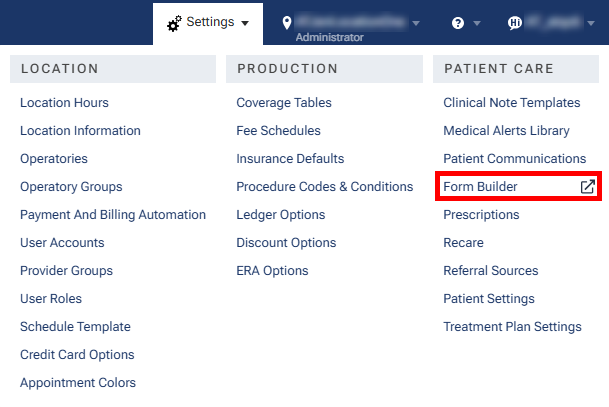
The Patient Forms page opens on a new browser tab.
Notes:
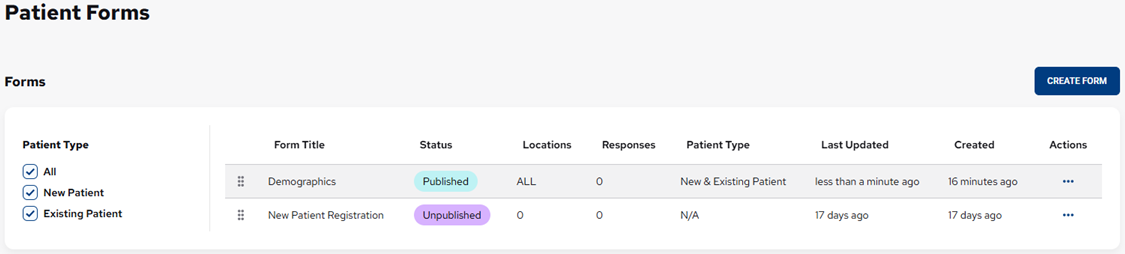
- You can now filter the list of forms by their assigned patient types. Under Patient Type (on the left), either select All, or select New Patient or Existing Patient.
- There is now a Patient Type column for the list of forms so you can quickly see the patient types assigned to each form: New Patient, Existing Patient, New & Existing Patient, or N/A.
2. In the Actions column, click the ellipsis of the form whose settings you want to modify. On the menu that appears, select Settings.
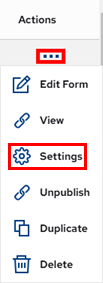
The Form Settings appear.
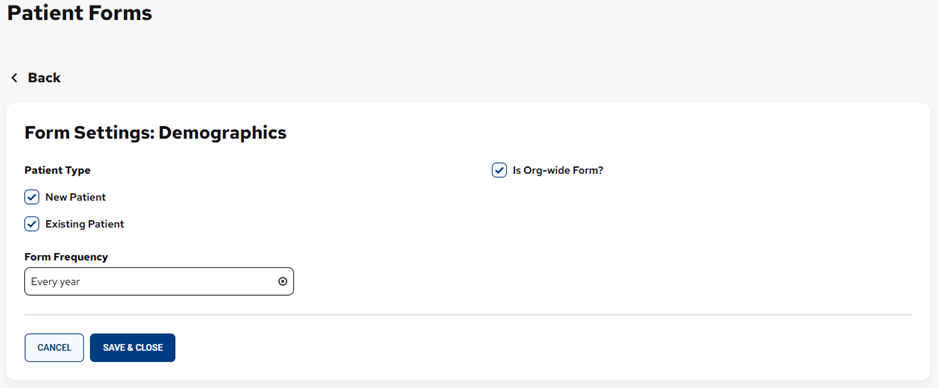
3. Under Patient Type, specify which patients the form will be due for:
- New Patient – Select this checkbox if the form is for any patient whose status is “New” in Dentrix Ascend.
- Existing Patient – Select this checkbox if the form is for any patient whose status is anything other than “New” in Dentrix Ascend.
Note: You can now quickly specify that the form is for all locations in your organization by selecting the Is Org-wide Form? checkbox. However, if the form is only for specific locations, clear the check box; on the Select one of more locations below list, select the checkbox of each applicable location; and then click Select.

4. Click Save & Close to return to the Patient Forms page.