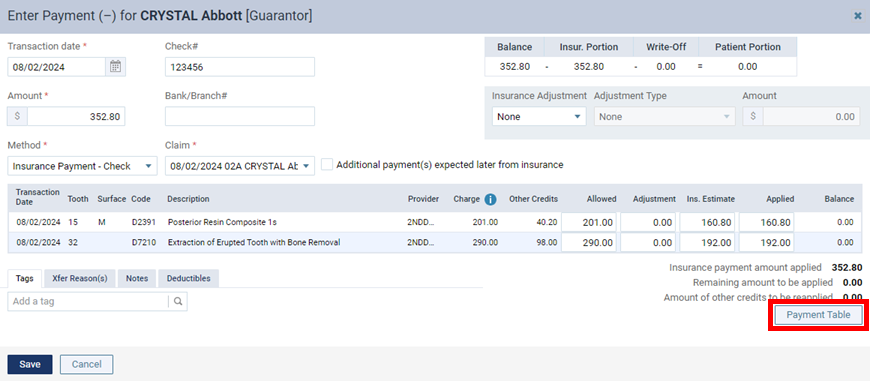
With this release, you can now quickly update an insurance plan’s payment table while you are entering an insurance payment. You can now easily save payment information from an explanation of benefits (EOB) without having to leave the patient’s ledger and edit the insurance plan’s payment table.
New Security Right
- Updating payment tables while entering insurance payments requires the new security right “Claim Payment Table Updating.”
- This right is located in the “Ledger” category and is dependent upon the “Create payment” right.
- With the “Claim Payment Table Updating” right granted, a user does not need to be granted the right to manage entire payment tables.
- By default, existing users who have been granted the “Manage Payment Tables” right, will be granted the new “Claim Payment Table Updating” right.
- For new organizations, the Administrator, Billing Coordinator, and Receptionist role are granted the “Claim Payment Table Updating” right by default.
To update a payment table
1. In a patient’s ledger, click Payment (-).
2. In the Enter Payment (-) dialog box, set up the payment options as you normally do:
- Enter the Amount of the payment.
- Select the Method of payment.
- Enter the payment details (such as the check number).
- Select the correct Claim.
- Change any of the following amounts for each procedure as needed: Allowed, Ins Estimate, and/or Applied.
- If applicable, specify the adjustment details.
3. Click Payment Table.

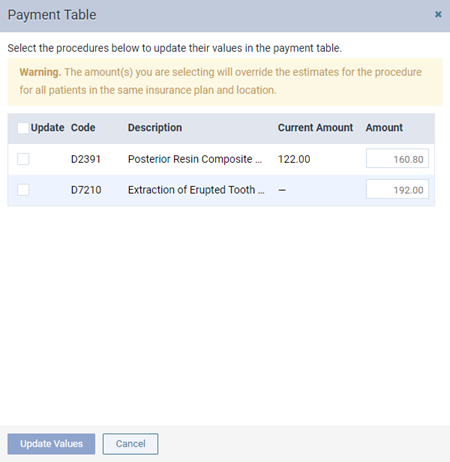
In the Payment Table dialog box that appears, the procedures for the selected claim appear.

Notes:
- If a procedure already exists in the payment table, an amount appears in the Current Amount column.
- A procedure’s Amount corresponds to the Applied amount in the Enter Payment (-) dialog box. If necessary, you can change the amount to match the EOB by clicking in the Amount box and then entering the correct amount.
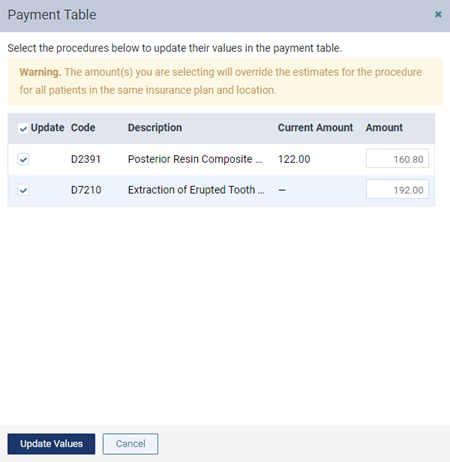
4. Select the Update checkbox of each procedure whose amount you want to add to or update in the payment table. To quickly select all checkboxes, you can select the checkbox in the column header.

Important: It is important that you only update the payment table when the payment amount applies to all patients covered by that plan. For example, if the estimated insurance portion is different from the payment amount because money is being withheld toward a deductible, do not update the payment table. Similarly, if a patient has exceeded their maximum benefit, do not update the payment table.
5. Click Update Values to update the payment table and close the dialog box.
A green “Saved Payment Table” message appears briefly, indicating that the payment table has been updated.

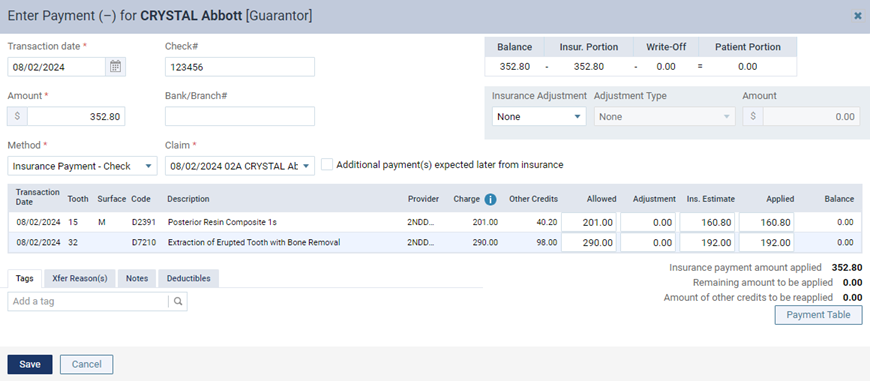
6. In the Enter Payment (-) dialog box, set up any other options as needed (such as tags and notes), and then click Save.

