The product update releasing from October 20, 2020 through October 22, 2020 introduces two-way texting to Dentrix Ascend. The Insights dashboard has a new Outstanding Claims widget. A new bulk exceptions editor makes it easier to enter a long list of procedures not covered by insurance. NOTE: The features described below will appear in your system after your update date. Look for pop-up messages in Ascend announcing the new features.
Patient Information
Two-Way Texting
You are now able to exchange text messages with your patients. You can respond to a received text, or you can initiate a new conversation. This capability is included with your subscription at no extra charge. Your user role must have the Manage inbox messages right (Other category) to send text messages. Note that all messages go to the patient’s primary contact, as configured in the Related Patients tab of the Patient Information page.
In the Inbox, the patient’s appointment, and the routing panel, the Show messages link was renamed to Text messages.

Click the Text messages link to open the Messages from [Patient Name] window. The window now includes a standard text message entry box and a send button.
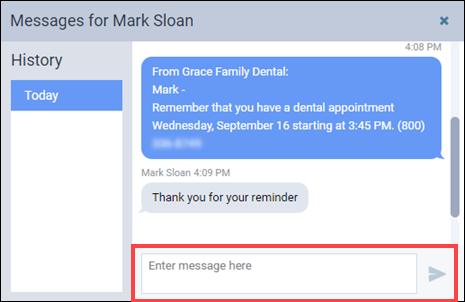
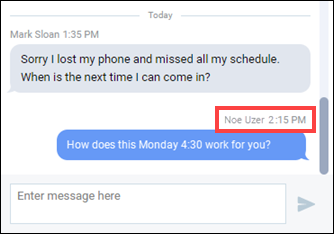
The Messages window has two additional enhancements. First, if another team member posted to a thread, his or her name appears above the text block. If there is no name, either it is your message, or it was generated automatically by the Patient Communications module.
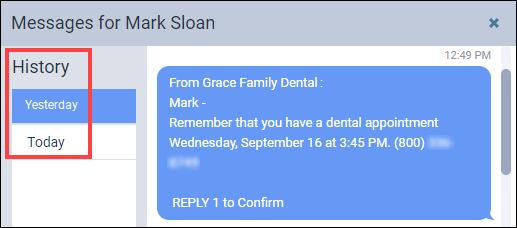
Second, the History panel has a new Yesterday tab, in addition to the Today tab, to make it easier to locate conversations. This appears in both the Messages window and the Patient Connection Text Messages tab.
A new way to initiate a conversation is a text message icon next to the patient’s date of birth in the patient information ribbon. The icon only appears if the patient’s primary contact has a phone type marked as Mobile and if Dentrix Ascend recognizes it as a valid mobile phone number.
If the patient unsubscribes from receiving text messages, the icon disappears, and you will see a warning instead of the text field in the Messages window. You will also receive a warning if you attempt to initiate a conversation with a patient who does not have a valid mobile number.
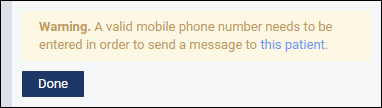
Click the this patient link on the warning message to open the patient’s Basic Info tab, where you can correct or update the contact information.
Dentrix Ascend displays a “Not delivered” error message if it encounters a problem communicating with the patient’s mobile carrier.

The Audit Log tracks texting activity. The Type column has a new Messaging filter to help you locate this kind of activity.
Tip: You can message new patients who booked online, through the appointment panel. Dentrix Ascend captures the new patient’s mobile number as part of the booking process.
Insurance
Procedures Not Covered Exception Management
Dental plans may elect not to cover some procedures. When this happens, you need to add the list of exceptions to the coverage table. Before this update, procedures not covered had to be entered one at a time; now you can build the entire list in one step. In the Add New Exception window, there is a new button called Add Bulk Procedures.
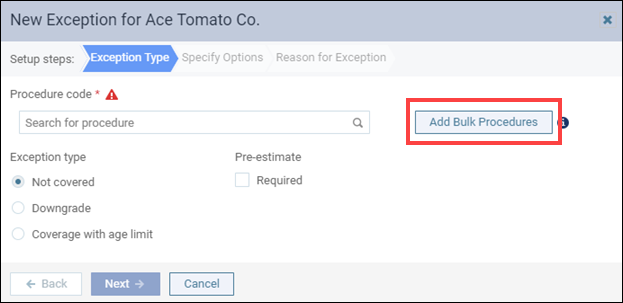
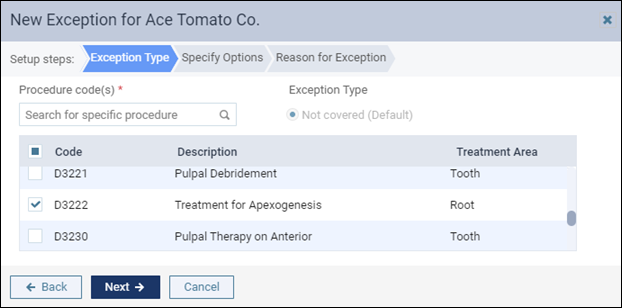
Note: This utility is only for procedures where the Exception type is Not covered. For the Exception Type step, the window lists all the procedure codes; search or scroll through the list, and select the check box of the procedures that are not covered. Click Next to continue as in previous versions.
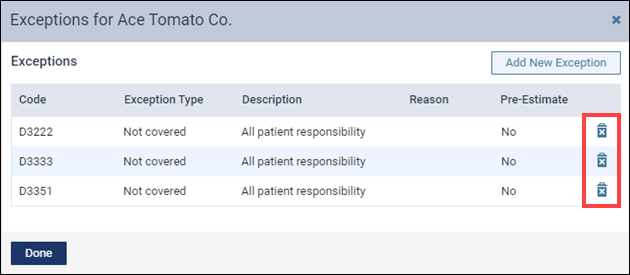
Another enhancement to the Exceptions window is the addition of a new delete icon, which makes it easy to remove a defined exception.
Power Reports
Ledger Report Builder Enhancement
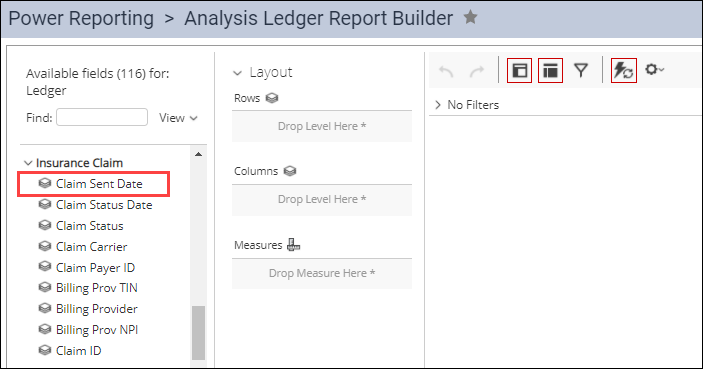
You can now add the Claim Sent Date to your financial reports for more accurate insurance reports. Categorizing and filtering by claims’ sent dates could, for example, allow you to see how long it takes insurance companies to process your claims. This filter is available for both analysis and interactive reports. The sent date represents either the date the claim was sent electronically, or the date on which it was printed.
Insights Dashboard
Outstanding Claims Insight
The Insights dashboard now includes a summary of your location’s outstanding claims. To access this information, go to Home > Insights. In the Insurance section, you can see a summary of the following:
- Outstanding Claims – The number of aged claims
- Total Billed – The total production amount associated with the outstanding claims
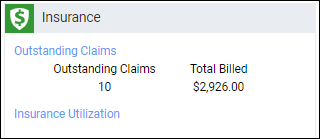
Note: Dentrix Ascend uses the service date of the procedures on a claim to determine if that claim is outstanding and to determine the aged totals. The Total Billed amount reflects the amount you would get if you ran the Outstanding Claims Report today with the default filters of “All” in every category. Clicking any part of this widget area opens the Outstanding Claims Report.
User Rights
No new user rights are included in this release, but there was one update: the Manage inbox messages right (Other category) controls the ability to initiate two-way text messaging.
Imaging
No updates or enhancements are included in this release.
New Learning Content
Did you know the Dentrix Ascend Resource Center has a collection of webinars? You can find it by following down the Product News and Updates category to Webinars. Here are some of our most recent additions. Click a webinar title to open the page here in the Resource Center.
How to Improve Your Insurance Estimates
Learn to set up Dentrix Ascend so you can confidently and correctly give insurance estimates. This webinar will show you how to:
- Set up accurate PPO coverage tables
- Manage setup for insurance exceptions
3 Powerful Ways to Increase Your Cash Flow in Dentrix Ascend
In this webinar, you’ll learn to use the routing panel as a tool to:
- Reduce Your A/R
- Fill Your Schedule
- Increase Patient Retention
Setting Up a Virtual Waiting Room with Dentrix Ascend
In this webinar, you’ll learn about features inside Dentrix Ascend for creating a virtual waiting room:
- Activating the COVID-19 Screening Questionnaire
- Customizing Appointment Reminders to let Patients know to check-in via text
- Virtually checking in patients
- Ensuring that patients fill out their forms virtually, and notifying back office that patient is ready