The product update released November 12, 2021 introduces a new print statement fulfillment service. The Treatment Planner was enhanced by allowing you to edit procedures directly, the ability to save images that include the tooth numbers and exam dates, and a new data field has been added to Power Reporting.
Revenue Cycle Management
Print Statement Fulfillment
Special Note: This feature is under a controlled release and you may not see it in your tier right away. Print statement fulfillment simply means hiring a third party to do all the printing, folding, stuffing, sealing, stamping, and mailing of your billing statements so you can focus on other responsibilities. Dentrix Ascend is pleased to announce that it is now ready to provide that service.
We call this feature Print and Mail for Me. While there is no additional cost to access the feature, there is of course a per-page cost for printing, processing, and postage.
The feature is part of the new Action menu found in the Billing Statements, Patient Walkout, and Patient Billing Statement pages.
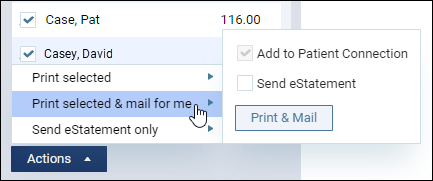
As you can see in the image above, you can select whether to make print statement fulfillment a fallback to sending electronic statements.
Agreeing to Terms and Conditions
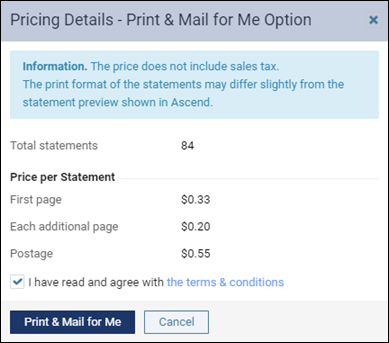
The first time you select the Print & Mail option, you must click through the pricing details and acknowledge that you have read the terms and conditions associated with this service. This will be true for any of your team members who launch print statement fulfillment for their first time—they will see the pricing information and be required to acknowledge the terms and conditions.
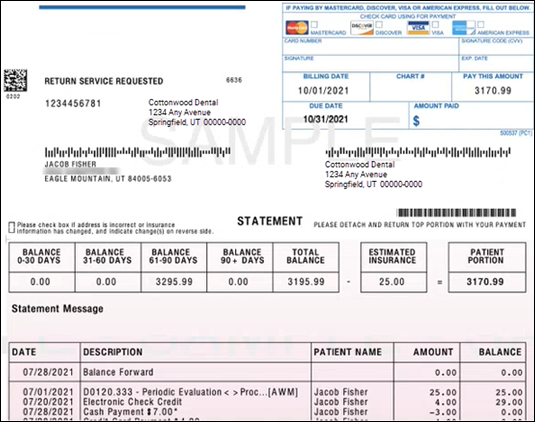
Note: The information prompt states that “The print format of the statements may differ slightly from the statement preview shown in Ascend.” The printed statements your patients receive through the Print and Mail for Me service are high-quality, full-color statements. The statement groups procedures into visits to make it easy to read. The format is not customizable.
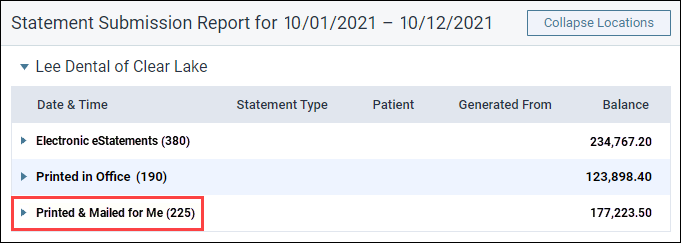
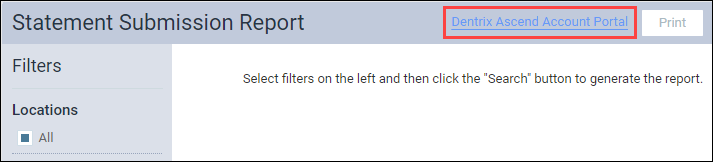
Using the Statement Submission Report
Dentrix Ascend earlier added the Statement Submission Report to provide insight into your billing activity. The report summarizes or details the patient statements you sent electronically, printed yourself, or had printed and mailed for you, during a given time frame.
For more information on this report, read the original August 24 release notes.
How to Pay for Printed Statements
Your organization will pay for Print and Mail for Me services through the Henry Schein ePay account set up for your Dentrix Ascend subscription. No further action is required if you have a credit card on file. To see a detailed invoice, click the link from the Statement Submission Report to open the Dentrix Ascend Account Portal.

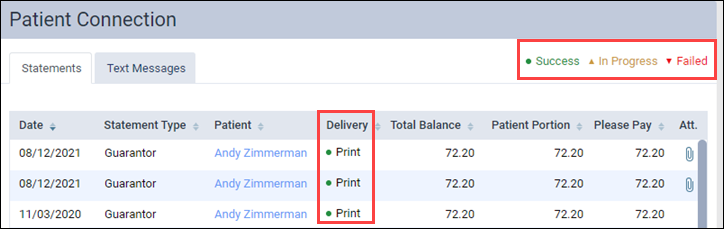
Tracking Delivery Status of Printed Statements
The Delivery status icons related to delivery of Print & Mail for Me statements are now fully active in the Patient Connection page. Print fulfillment statements are “In Progress” while Ascend prepares and sends the batch or individual statement to the fulfillment center.
Note: Dentrix Ascend does not participate in the National Change of Address Verification (NCOA) program to verify or maintain your patient addresses.
User Rights for Print and Mail for Me
There are two new rights associated with this feature. To launch Print and Mail for Me from the bulk Billing Statements page, your role must have the Send batch of Print & mail for me… right (located in the Reports section of the rights list). To launch print statement fulfillment from the Patient Walkout or the Patient Billing Statement pages, your role must have the Send single Print & mail for me st… right (located in the Ledger section of the rights list). Users without these rights will not see the Print and Mail for Me option in the Actions menu.
Clinical
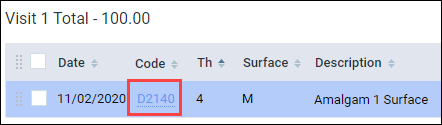
Editing Procedures from the Treatment Planner and Unattached Procedures
With this release, you can edit procedures in the Treatment Planner and in the Unattached Procedures page. Before this release, if you needed to edit a procedure in the Treatment Planner, you had to navigate to the Progress Notes tab to make the edit. If you needed to edit a procedure in the Unattached Procedures page, you had to navigate to the Ledger to make the edit.
Now, when you need to edit a procedure, you no longer need to switch pages. You can open the Edit Procedure dialog box directly from the Treatment Planner and the Unattached Procedures pages by clicking the procedure code hyperlink.
Treatment Planner view
Unattached Procedures page

Note: The functionality of the Edit Procedure dialog box has not changed. When you select a procedure, the dialog box opens where you can edit information for the procedure such as the date, provider, status, procedure, bill to insurance, the amount, the tooth, surfaces, and the procedure notes. Then, when you are finished with the procedure edits, click Save.
User Rights
The following changes to user rights are included in this release:
- A new Send batch of Print & mail for me… right (located in the Reports section) allows you to use the Print and Mail for Me feature from the Billing Statements page.
- A new Send single Print & mail for me st… right (located in the Ledger section) allows you to use the Print and Mail for Me feature from the Patient Walkout and Patient Billing Statement pages.
Imaging
Save Images with Tooth Number and Date
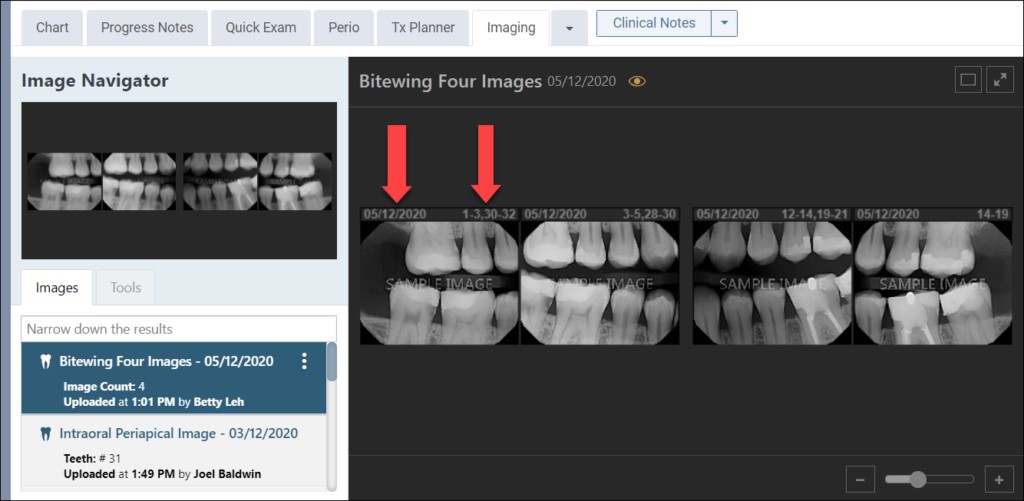
Many insurance companies want to know the tooth number and date for images submitted with claims. This release introduces a way to save images that include the tooth numbers and exam dates for images that include a template mount, such as bitewings and full-mouth series.
In the Image Navigator, select an exam. Then, click the Display All Images icon.
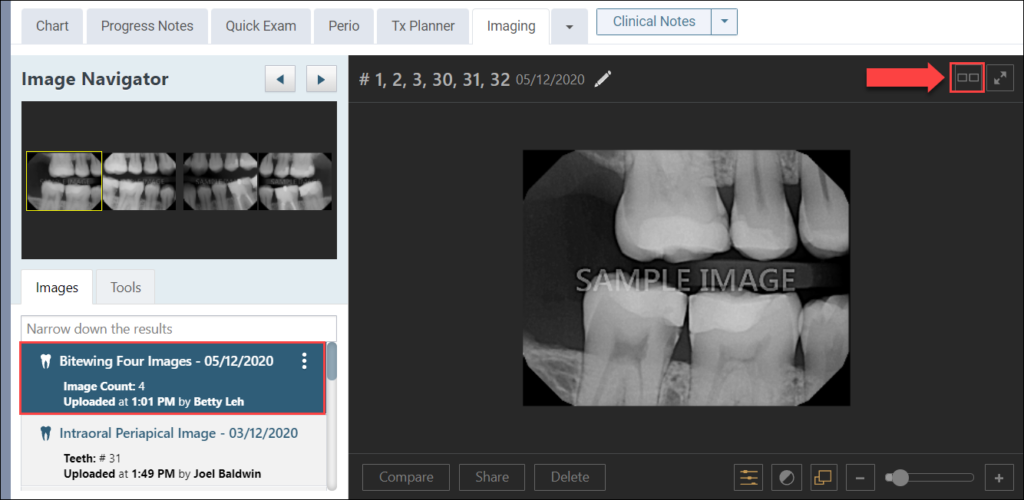
In the display area, each image will now automatically have the tooth number(s) and the exam date as a banner on the top of the image.
Note: You can click the eye icon to hide/show this banner.
To save the image, right-click on the image and select Save image as.
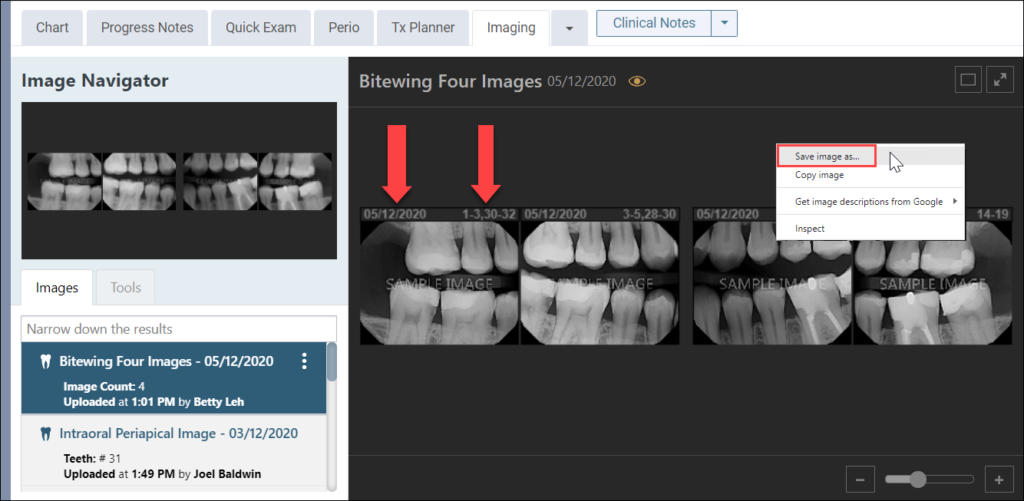
Note: If you click the eye icon and then click Save Image as, the image will be saved without the tooth numbers and exam dates.
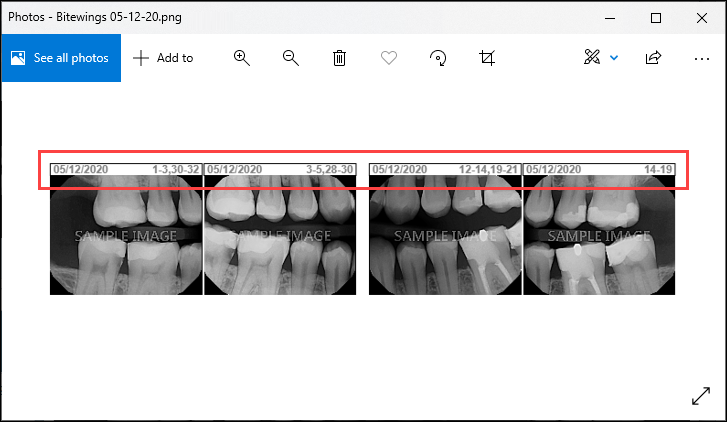
When you save the images to your computer, the image will save as a PNG file and will include the tooth numbers and exam dates.
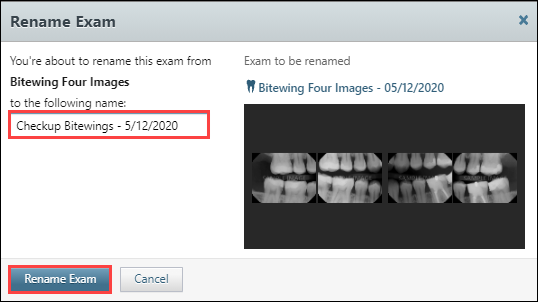
Rename Exams in the Image Navigator
Another enhancement to the imaging module is the ability to rename exams. To do this, click the ellipsis next to any exam in the exam list. Then, select Rename exam.
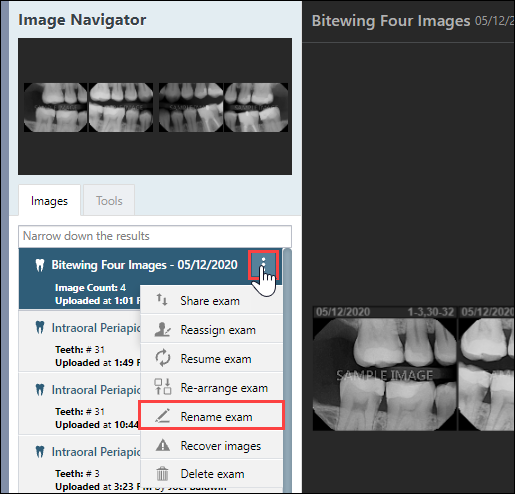
Type a unique name in the field provided. Then, click Rename Exam.
Power Reporting
New Contracted Fee Measure for Scheduled Procedures
With this update, a new Contracted Fee field has been added to the Analysis Schedule Report Builder in the Measures section and to the Interactive Schedule Report Builder in the Procedure section.
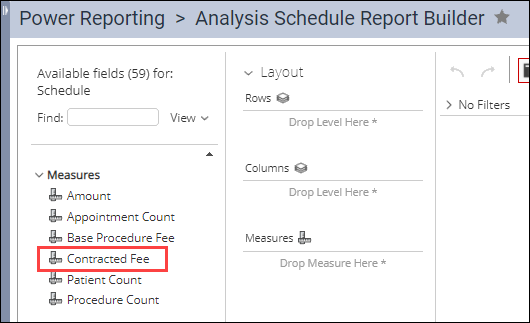
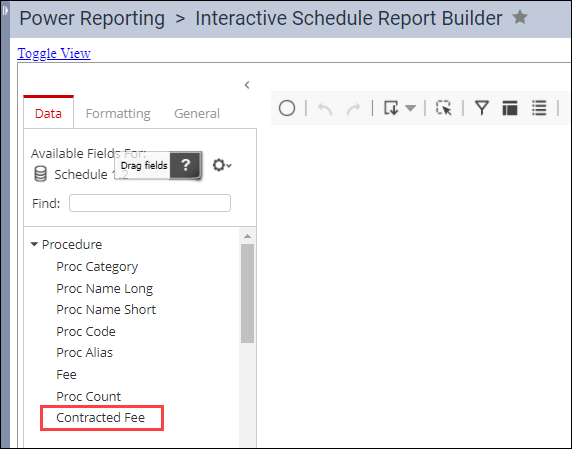
With this update, the Contracted Fee field extracts the contracted fees from the primary insurance plan into the Analysis Schedule Report Builder and the Interactive Schedule Report Builder.
The Contracted Fee field is important because it allows you to see the amount that the billing provider should be getting for a scheduled procedure as a provider contracted with a primary insurance plan.
Modified Contracted Fee Measure for Posted Procedures
Prior to this update, a Contracted Fee field was included in the Analysis Ledger Report Builder and in the Interactive Ledger Report Builder; however, it was dependent on whether an insurance claim had been created.
With this update, the Contracted Fee field has been modified so that, when a procedure is posted, these reports calculate the contracted fee that the billing provider should be getting for a posted procedure and does not depend on whether a claim is created.
Note: The service location is used to determine the plan fee schedule for the contracted fee.
Note: The contracted fee also includes logic to ensure that the patient is insured and that the billing provider is contracted with primary insurance plan.
New Learning Content
The Practice Education department has been busy! We hope you enjoy the webinars in the Fall 2021 Dentrix Ascend Insights Digital Series, which include the following popular topics:
Implement A More Profitable Patient Visit Workflow with the Dentrix Ascend Routing Panel
To remain profitable, your team needs to follow efficient and productive workflows.
Provide Better Patient Care with New Clinical Tools in Dentrix Ascend
New tools and apps from Henry Schein One help you improve clinical efficiency by streamlining routine tasks.
Make It Easy for Patients to Schedule: Offer Online Booking
Today’s patients want to see available dates and times and choose one that works for them.
Improve Cash Flow with Dentrix Ascend RCM Solutions
Make the most of the RCM solutions available to you in Dentrix Ascend.
Be sure also to check out our new feature video Using a Proxy to Enter Electronic Prescriptions. It will walk you through the steps that your administrator, the proxy, and the provider must follow to take advantage of this exciting capability.