Released 11/5/25
You can now send patient forms on an “as-needed” basis to patients.
Setting Up a Form to Allow On-demand Requests
1. On the Settings menu, select Form Builder to open the form builder on a new browser tab.
2. For a form in the list, select the Settings option on the corresponding Actions menu to view the Form Settings page.
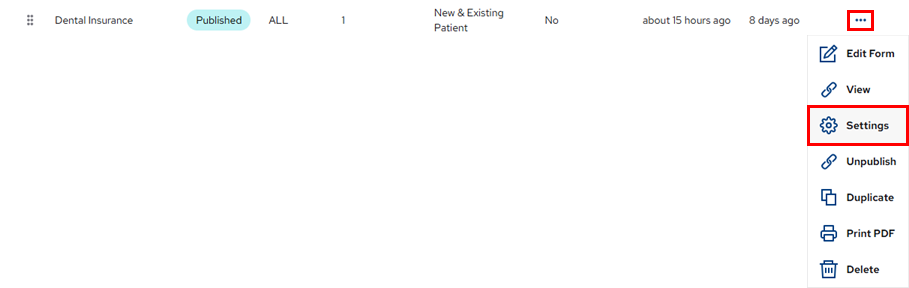
3. Under On Demand, turn on the Allow this form to be sent manually to any patient switch, and then click Done.

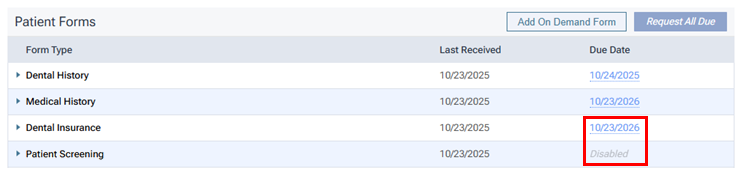
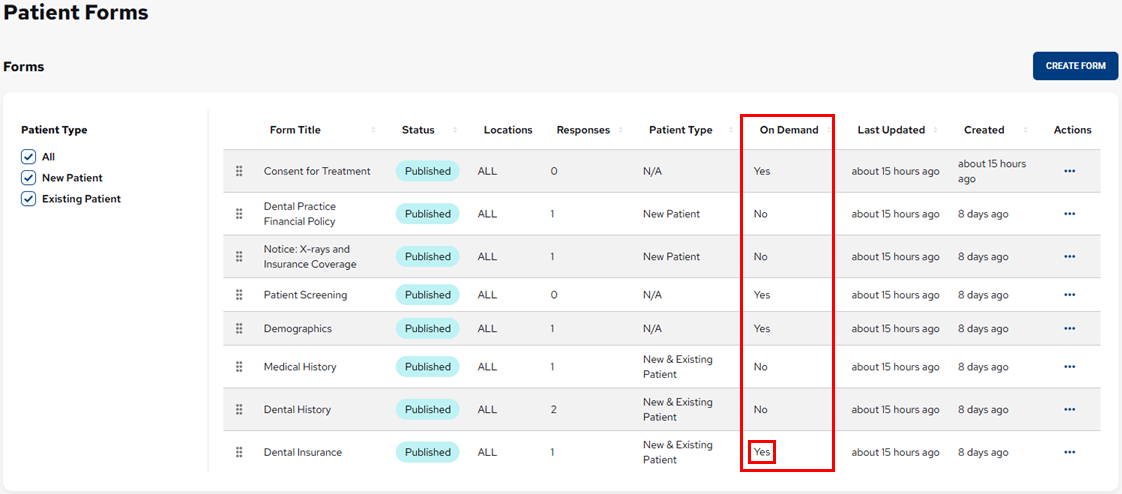
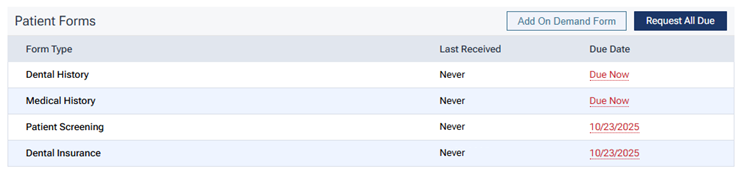
You are returned to the Patient Forms page. For the form whose on-demand setting you just changed, “Yes” now appears in the On Demand column (a new feature introduced with this release).
Requesting Forms on Demand
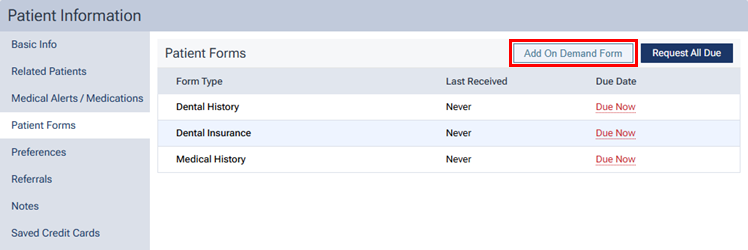
1. Select a patient, navigate to that patient’s Patient Information page (Patient > Patient Information), and then select the Patient Forms tab.
2. Click Add On Demand Form.
Note: Adding an on-demand form requires the “Edit forms due for a patient” security right (in the “Patient Information” category).
The On Demand Forms dialog box appears.

Note: If the list is long, you can use the Search box at the top to locate a form. As you type, the matching forms (any with those characters together anywhere in their names) appear in the list.
3. Select the checkbox of each form you want to add to the patient’s record.
4. Do one of the following:
– To add the selected forms to the patient’s queue of due forms without sending a request to complete them, click Add as Due. You are returned to the patient’s list of forms.
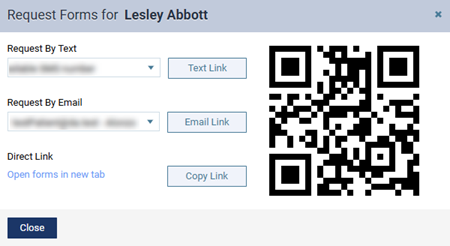
– To send a request to complete only the selected forms, click Send Now. The Send Forms for [Patient Name] dialog box appears. Then, do one of the following:
- To send the portal link to a mobile phone number, select the desired number from the list, and then click (or tap) Text Link.
- To send the portal link to an email address, select the desired address from the list, and then click (or tap) Email Link.
- To copy the portal link to the Window Clipboard, click (or tap) Copy Link. You can then paste the link in a document or email message for the patient.
- To open the patient’s portal on another tab of your Web browser (for instance, if you are opening it on a practice-owned mobile device that the patient can use to complete forms in the office; be sure to close any other Dentrix Ascend tabs before giving the device to the patient), you can click (or tap) the Open forms in new tab link.
- To access the patient’s portal link on a mobile device, use the camera on that device to scan the QR code, and then tap the link that appears on the mobile device.
Then, click Close.
With either option (adding as due or sending now), the on-demand forms are added to the patient’s list of forms with today’s date as the Due Date until those forms are received.
Note: If an on-demand form that you are adding already exists in the patient’s record (due or received in the past), the due date of that same-named form is set to today’s date.
After the patient completes an on-demand form, the Due Date is updated:
- According to the form’s specified frequency, either the date when it is next due appears, or “Does Not Expire” appears.
- If the form has not been assigned a patient type (New Patient or Existing Patient), “Disabled” appears.