This release introduces a new Power Report for tracking your success with collections and a new option to require the placement date and months remaining for orthodontic procedures. There is also a new user right to allow you to edit a patient’s chart number after the number has been saved.
Power Reporting
Named Date Fields
Earlier versions of power reports were sometimes confusing when date fields were included, because in the report column headers the name was just “Date” with no hint of which date type was represented. With this update, descriptions have been added to the field names of Ledger-related reports. For example, the Applied Date fields are now named Day (Applied), Month (Applied), and Year (Applied).

These date field names were also automatically updated in your custom reports.
New Collection Success Report
A new report has been added to the Financial section of Power Reporting. The purpose of the new Collection Success Report is to survey the various locations in a multisite practice over the past 12 months to see how successful they were at collecting production revenue. The report includes prepayments and unallocated monies. When you view the report, you will see only the locations that you have the rights to view.

The values on the Collection Success Report appear as a percentage and reflect the Collection amount divided by the Production amount. Conditional formatting makes it easier to see relative success: green is better; red is worse.
You can customize the baseline report to limit the scope to a specific location, change the date range, break out collection by provider, and so on.
Deposit Report Updated
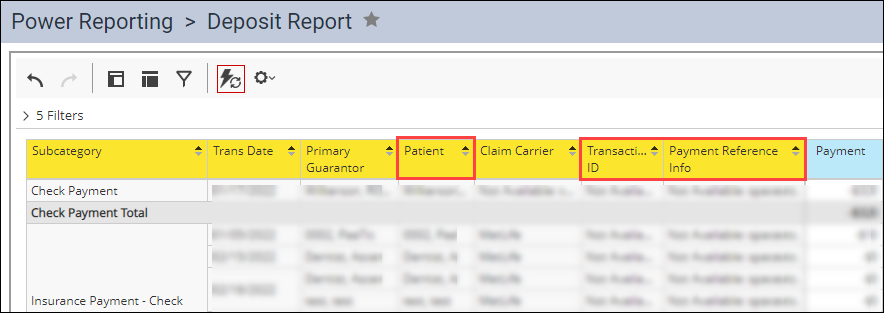
The Power Reporting version of the Deposit Report has been updated to include fields recently added to the standard Deposit Slip Report located on the Home menu. Now both reports include the patient’s name, electronic transaction ID, and payment reference information (for example, check number). The updated power report will be easier to compare with the Deposit Slip Report.
Credit Card Processed Payments Report Updated
The columns of the Credit Card Processed Payments Report have been rearranged to resemble the Integrated Payments Report located on the Home menu.
Insurance
Require Orthodontic Treatment Information
Insurance claims are more successful when you include as much information about procedures as possible. For orthodontic procedures, Dentrix Ascend includes treatment fields that populate the ancillary claim fields.
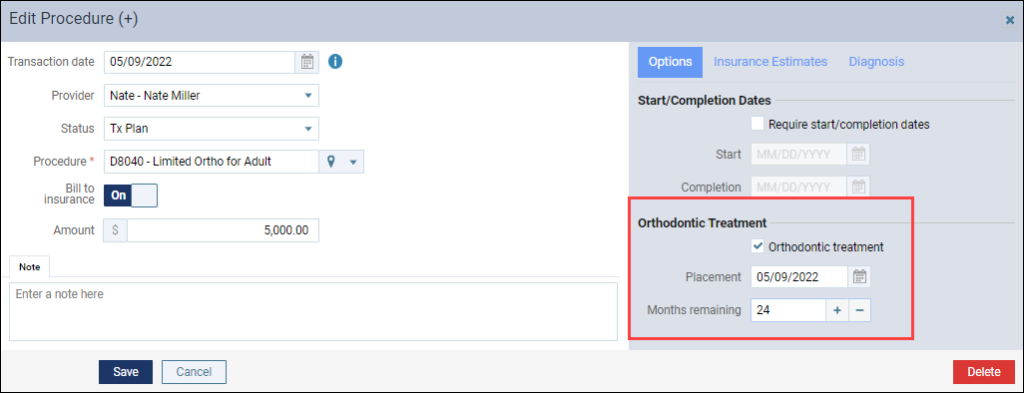
This update introduces the option to require a placement date and months remaining for an orthodontic procedure. This new feature also includes warnings and new windows that are intended to remind you to enter orthodontic treatment information.
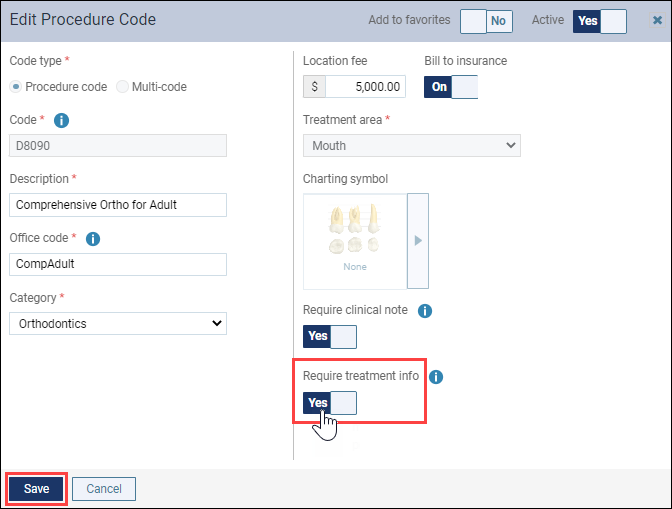
You can make the orthodontic fields required for selected procedures by turning on a new switcher in the procedure code editor. To enable the Required treatment info feature, open the Settings menu and select Procedure Codes & Conditions. Enter the procedure code or description in the search bar to search for orthodontic procedure codes.

Select an orthodontic procedure to open its Edit Procedure Code window. By default, the Require treatment info switcher is set to No for all orthodontic procedures. Toggle the Require treatment info switcher to Yes and click Save to require users to input the Placement date and Remaining months when the procedure is posted.
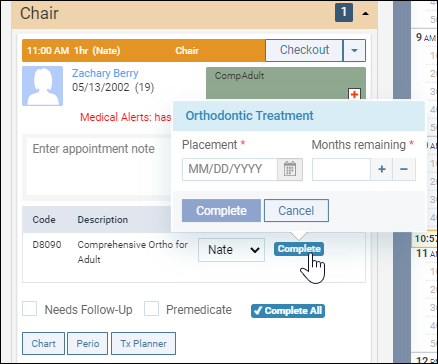
Automated warnings and windows will now appear on the following pages if you try to post or complete a procedure but do not have the required orthodontic treatment information entered:
- Chart
- Treatment Planner (from the Edit Procedure window)
- Routing Panel (from the Chair and Checkout Statuses)
- Progress Notes
- Ledger (from the Patient Walkout)
Chart

Treatment Planner and Routing Panel

Progress Notes and Routing Panel

Ledger

Patient Information
Editing the Chart Number
In the past, once you entered a chart number and clicked Save, you could not edit the chart number. As of this release, users with the applicable right can now edit the chart number assigned to a patient.
To get to the chart number, from the Patient menu, select Patient Information, or click the pencil icon next to the patient’s name on the patient information ribbon.

To edit the chart number, click the pencil icon next to the chart number field, edit the field, and click Save.
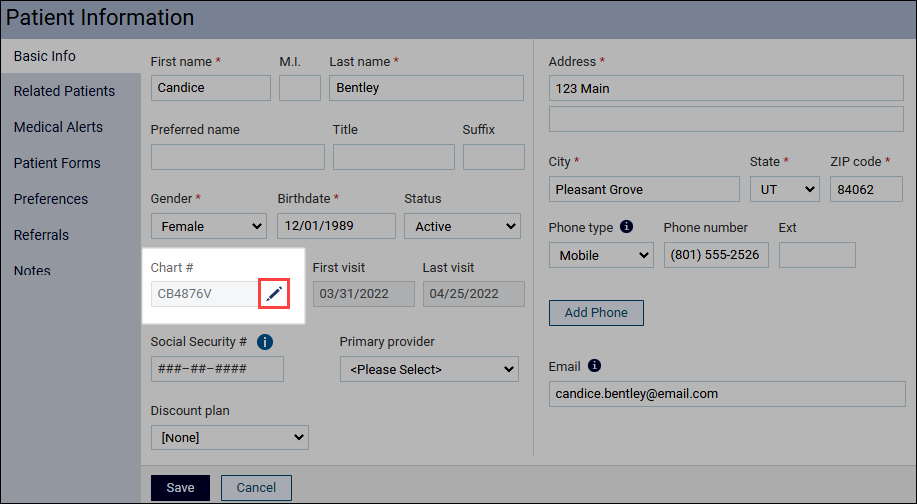
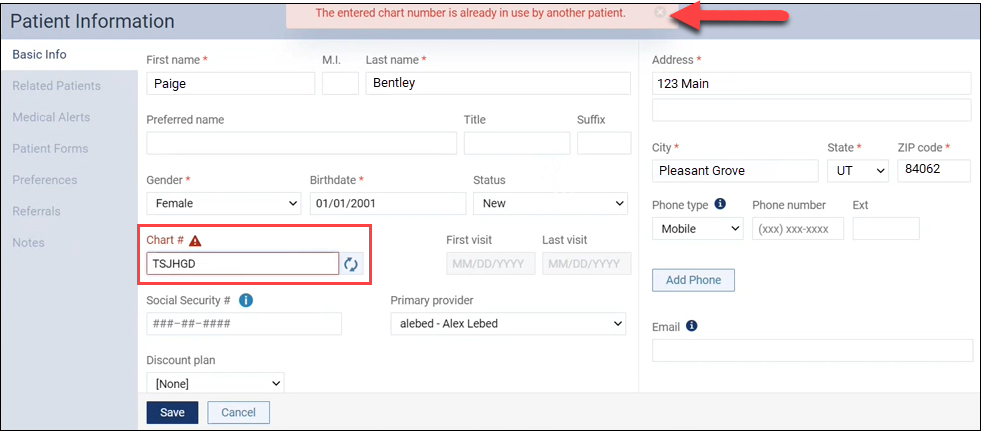
A chart number can contain any combination of letters and numbers. A warning message appears if a chart number is in use by another patient.
Changes to chart numbers are recorded in the Audit Log.
Notes on Rights
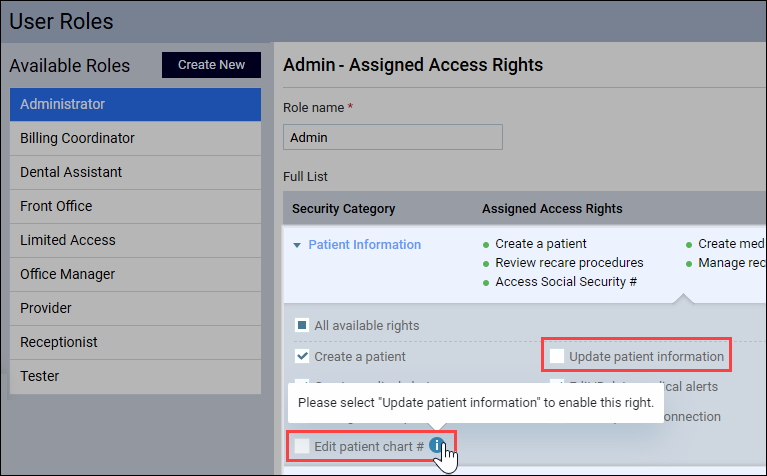
- For existing users, if you have the Update patient information right and the Access Social Security # right, the Edit patient chart # right will automatically be turned on for you with this update.
- Going forward, users must have the Update patient information right selected and the Edit patient chart # right selected to edit the chart number.
User Rights
This release introduces the new right Edit patient chart #. Users with this right will be able to edit a patient’s chart number after the number has been saved.
New Learning Content
The Practice Education team is constantly building new content to support you. The following resources were recently added to the Dentrix Ascend Resource Center:
