Custom Imaging Procedures
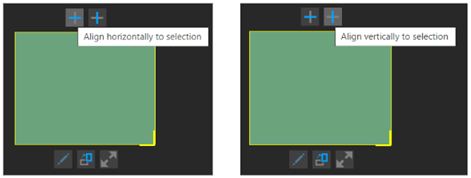
There are new options that allow you to align and size placeholders in your custom imaging procedures.
The buttons above a selected placeholder allow you to align the box horizontally or vertically.
The buttons below the selected placeholder allow you to assign tooth numbers (existing functionality), rotate the box, and resize the box.
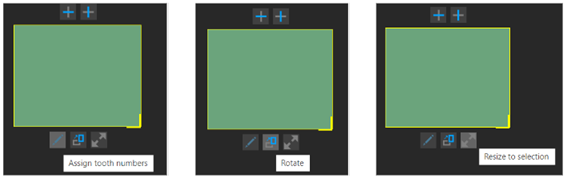
Image Recovery – Filter by Category and Patient
There are new options that allow you to filter recoverable images by category and patient.
While viewing image history, select an image or a series. Then, on the corresponding options menu, select Recover images.
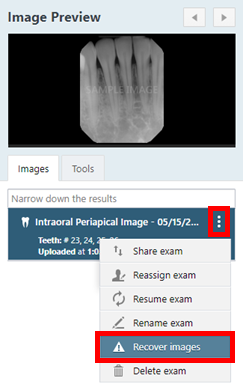
The recovery options appear.
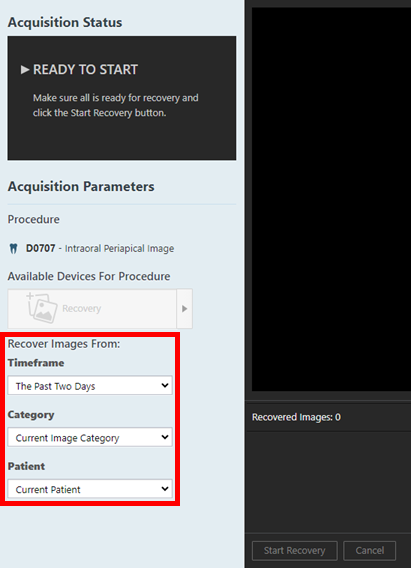
The following filtering options are available:
- Timeframe (existing functionality):
- The past two days (default)
- All time
- Category:
- Current category (default)
- All category
- Patient:
- Current patient (default)
- All patients
Image File Details
When clicking the pencil icon to view image details, users can now see the imaging device name or sensor the image originated from. If the specific model of the sensor is known (e.g., Schick 33 versus Schick CDR 2000), it will be displayed. If the image was imported, the source will be listed as “Imported Image.” This information, already stored in the database for every image, is now displayed in the user interface for better clarity.
Click the pencil icon to display a dialog box that displays the Assign Tooth Number options, and then click the Image Details link.
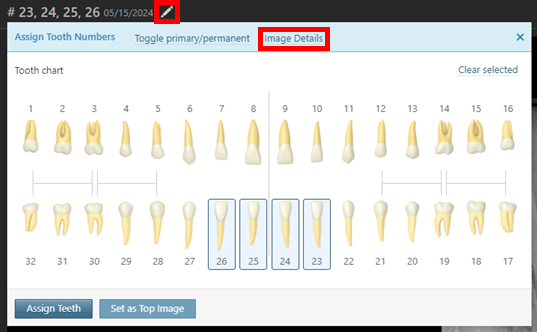
The dialog box displays the Image Details.
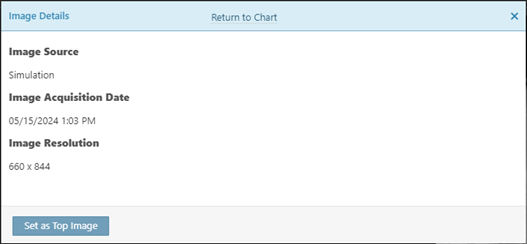
Either click the Return to Chart link to return to the tooth chart view of the dialog box, or click the X to close the dialog box.
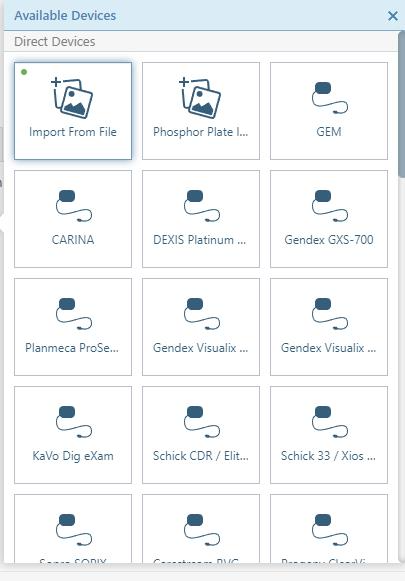
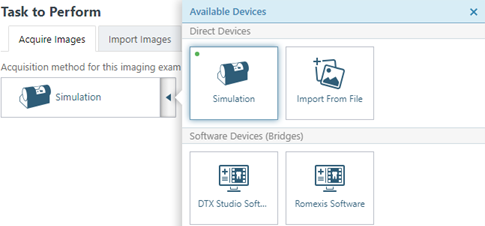
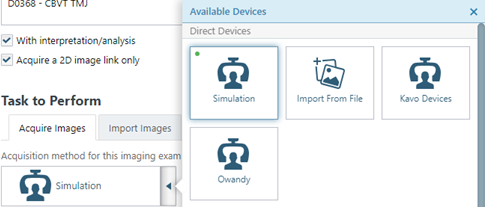
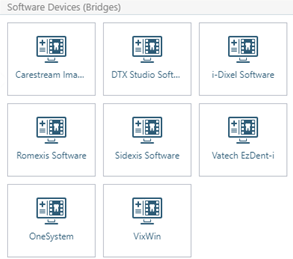
Alphabetized Device List
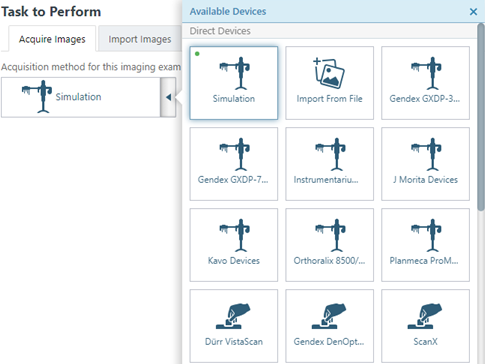
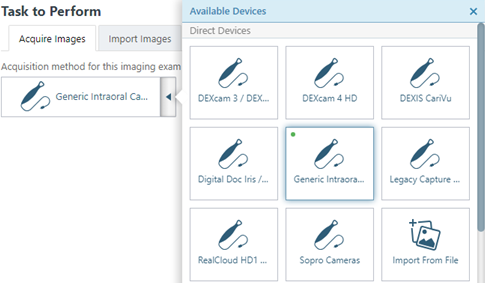
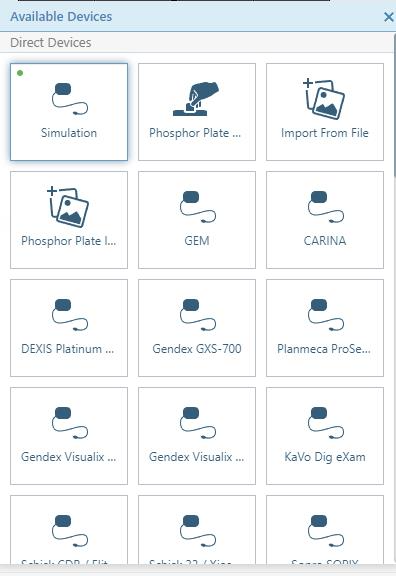
The list of acquisition devices is now alphabetized.
Intraoral X-rays:
- Direct Devices: If enabled, the simulation options appear first and are alphabetized. The import options appear second and are alphabetized. The sensors appear third and are alphabetized. The phosphor plate scanners appear last and are alphabetized.
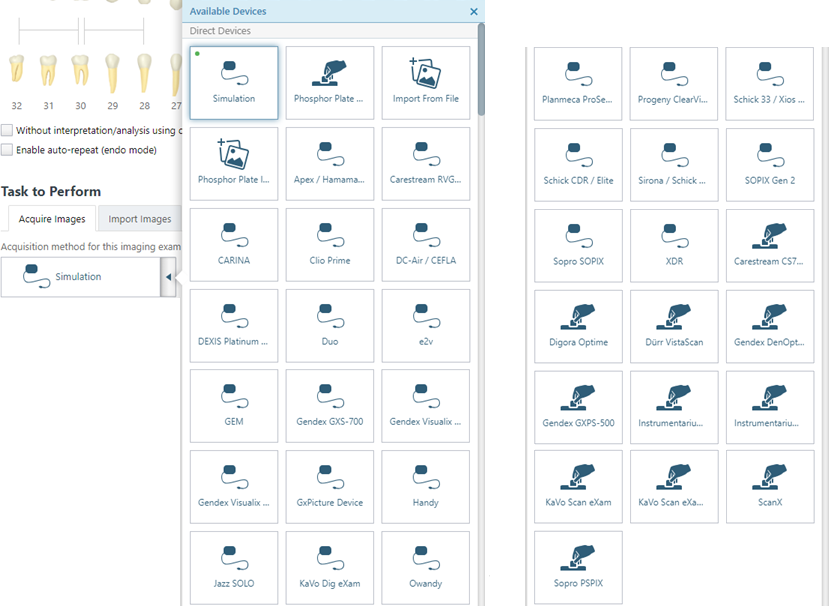
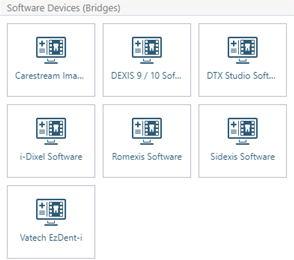
- Software Devices (Bridges): The devices are alphabetized.
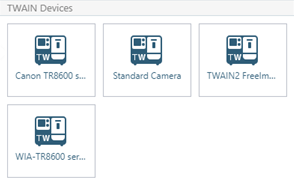
- TWAIN Devices: The devices are alphabetized.
Extraoral X-rays:
- Direct Devices: If enabled, the simulation option appears first. The import option appears second. The machines appear third and are alphabetized. The phosphor plate scanners appear last and are alphabetized.
- Software Devices (Bridges): The devices are alphabetized.

- TWAIN Devices: The devices are alphabetized.

2D oral/facial photos:
- Direct Devices: The devices are alphabetized. The import option appears at the end.
- Software Devices (Bridges): The devices are alphabetized.

- TWAIN Devices: The devices are alphabetized.

CAD/CAM scans:
- Direct Devices: If enabled, the simulation option appears first. The import option appears next.
- Software Devices (Bridges): The devices are alphabetized.
3D volumes:
- Direct Devices: If enabled, the simulation option appears first. The import option appears second. Then, the machines appear and are alphabetized.
- Software Devices (Bridges): The devices are alphabetized.
Acquisition Agent – Multiple Users (Windows Only)
To allow a Windows user to use the acquisition agent even if another Windows user on the same computer has not signed out, each time a Windows user signs in, the acquisition agent is now restarted.
Note: This functionality currently applies to the Windows OS only. The macOS version does not yet support this yet.
Acquisition Agent – Patient ID for VistaScan
There is a new option in the acquisition agent preferences that allows you to specify whether to send the patient ID in a job file or not when VistaScan is used it acquire images.
To include/exclude patient IDs, do the following:
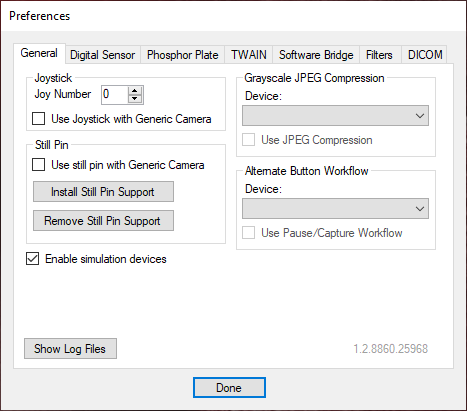
1. Right-click the Acquisition Agent icon, and then select Preferences.
2. In the Preferences dialog box, select the Phosphor Plate tab. Under VistaScan, leave the Send Patient ID checkbox selected, or clear the checkbox.
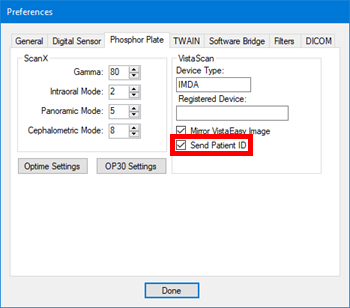
3. Click Done.
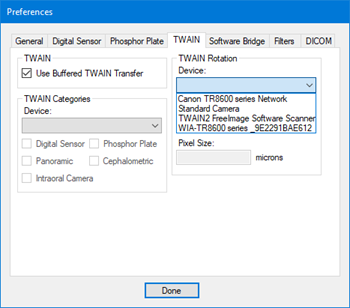
Acquisition Agent – Device Names Sorted Alphabetically
In the acquisition agent’s Preferences dialog box, devices in the various lists are now sorted alphabetically.
General tab:
- Grayscale JPEG Compression > Device: The list is grouped by acquisition type (import options, direct devices and software bridges, and then TWAIN devices), and each group is alphabetized.
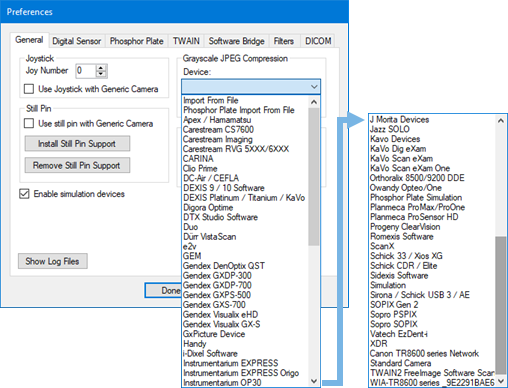
- Alternate Button Workflow > Device: The list of direct devices is alphabetized.
TWAIN tab:
- TWAIN Categories > Device: The list of TWAIN devices is alphabetized.
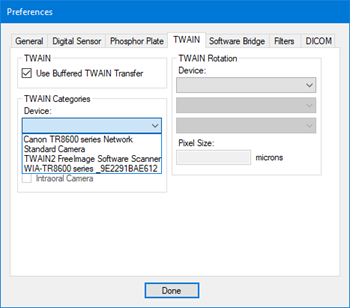
- TWAIN Rotation > Device: The list of TWAIN devices is alphabetized.
Filters tab:
- Acquisition Filters > Device: The list is grouped by acquisition type (import options, direct devices and software bridges, and then TWAIN devices), and each group is alphabetized.

Acquisition Agent – Sirona IOSS
Sharpness settings were added to the acquisition agent for the Supreme and Velocity family of sensors, which use the new Sirona IOSS SDK.
To customize the Sirona sharpness settings, do the following:
1. In the acquisition agent’s Preferences dialog box, select the Filters tab. Notice that there is now a Sirona Filter section.

2. Do any of the following as needed:
For the Supreme family of sensors, do the following:
a. From the Set Device Family list, select Supreme. 
b. From the Select Filter list, select one of the following options: General, Endodontic, Periodontic, Restorative, or Hygiene. 
c. In the Set Sharpness Value box, either leave the entered value, or enter a different value. The box accepts numbers from 0 to 100. 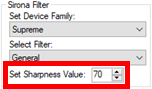
Repeat steps b-c for other filter types as needed.
For the AE (Velocity) family of sensors, do the following:
a. From the Set Device Family list, select AE. 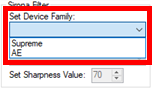
b. From the Select Filter list, select one of the following options: General, Endodontic, Periodontic, or Restorative. 
c. In the Set Sharpness Value box, either leave the entered value, or enter a different value. The box accepts numbers from 0 to 100. 
Repeat steps b-c for other filter types as needed.
3. Click Done.
Supported Devices
- A2Z Imaging Duo sensors – Direct integration was added (Windows only).
- Carestream CS 7600 phosphor plate scanners – Direct integration was added (Windows only).
- Acteon Sopix Gen 2 intraoral sensors – Direct integration was added (Windows and Mac).
- Gendex CBCT machines – You can now acquire 3D volumes from Gendex CBCT machines through the VixWin software bridge (Windows only).
- Handy intraoral sensors – Direct integration was added (Windows only).
- Kavo extraoral devices – Support for extraoral X-ray acquisition was added. Previously, Kavo devices were supported only for 3D volume acquisition.
- Sirona / Schick USB 3 – New filtering options for “Sirona / Schick USB 3” are now available during image acquisition.
- SIRONA intraoral sensors – Integration for Schick/Sirona Xios and 33/Elite Sensors using the new Sirona IOSS SDK was added.
- Sirona / Schick – The device names are now as follows:
- Schick 33 / Xios XG
- Schick CDR / Elite
- Sirona / Schick USB 3 / AE.
Exam List Image Count
The exam list now displays a complete count of images, including those within image stacks, while excluding any deleted images. This provides a more accurate overview of available images for review.

Number of Images in Header
Improved the exam view header to indicate the current position within an image stack, displaying “Image: x of y”, where ‘x’ is the current image and ‘y’ is the total in the stack.

Set as Top Image in Stack Button Moved
The Set Top button (up arrow icon) has been moved from the exam view header to the Assign Tooth Number dialog box (accessed by clicking the pencil icon). The new button is labeled Set as Top Image.

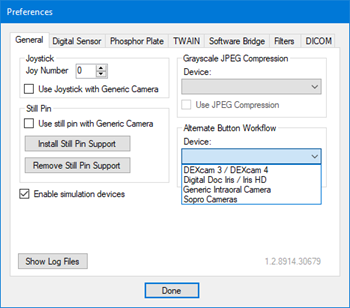
Enable/Disable Simulation Devices
There is a new setting in the acquisition agent preferences that allows the enabling or disabling of simulation devices. With this update, simulation devices are disabled by default.
Note: This functionality currently applies to the Windows OS only. The macOS version does not yet support this yet.
On the General tab, there is a new Enable simulation devices checkbox.
If simulation devices are enabled:
If simulation devices are disabled: