Due to the transition from DoseSpot to Veradigm for ePrescribe, this release introduces expiration dates for state IDs and DEA numbers for providers in all organizations even they do not use ePrescribe.
User Accounts
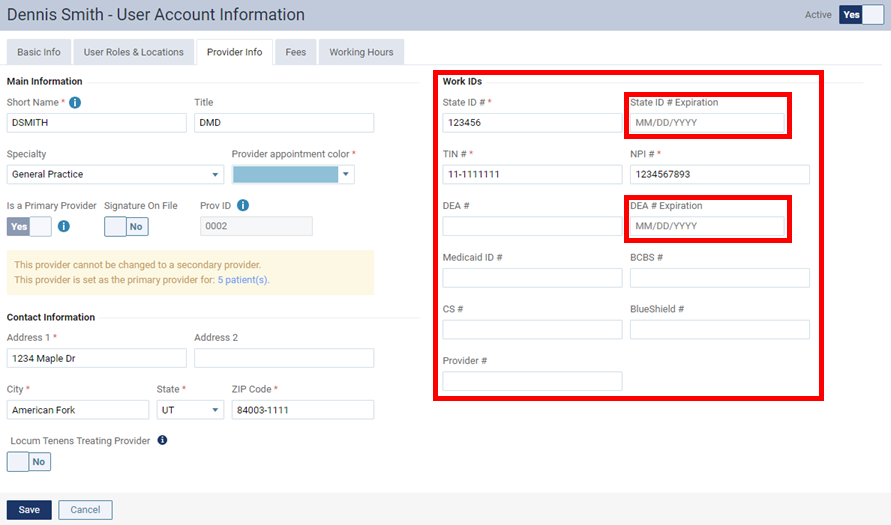
You can now enter the expiration date of a provider’s State ID and the expiration date of a provider’s DEA number in Dentrix Ascend.
Note: The State ID expiration date is required if the provider uses ePrescribe, and the DEA number expiration date is required if the provider prescribes controlled substances.
To view the new options, go to Settings > User Accounts, click a provider’s user account, and then select the Provider Info tab. The options under Work IDs have been rearranged, and the two new boxes are State ID # Expiration and DEA # Expiration.
Bulk User Import
The bulk user account import utility now allows for those expiration dates to be included in the .csv file being imported. In a spreadsheet program, open the .csv file, and add columns for DEA Exp. Date and State ID Exp. Date. These expiration dates are only required when a YES appears in the Provider (YES/NO) column just as with all the work IDs.

Note: You can download a .csv file template when you initially open the import utility. Click the Click to download the Excel import template link.
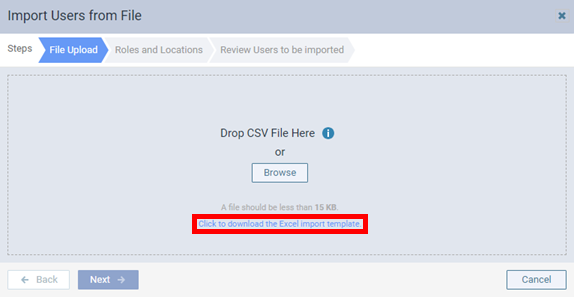
To import users from a file, do the following:
1. Go to Settings > User Accounts, and then select Import Users from File on the New User menu.
2. The File Upload tab and Roles and Locations tab function the same as in previous versions.
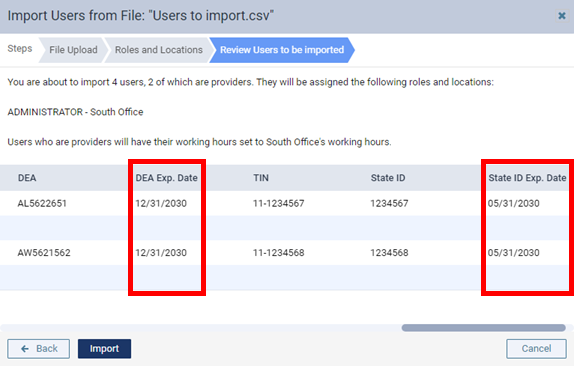
3. The Review Users to be Imported tab lists the users and their corresponding details from the .csv file; however, this list now includes a DEA Exp. Date column and a State ID Exp. Date column (you must scroll to the right to see them).
Note: If there are missing or invalid data, a message appears in red, and the fields with errors are red and have red error icons. If there are errors, you must cancel the import and correct the errors in the .csv file.
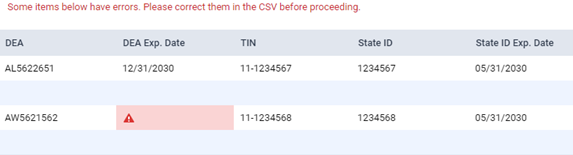
4. Click Import.