EARLY ACCESS ONLY
You can now include images on the Patient Clinical Report so the report is more comprehensive and includes all the essential supporting information that needs to be sent to a specialist when you refer a patient to another practice.
To print the report
1. With a patient selected, go to Patient > Print Clinical Report.
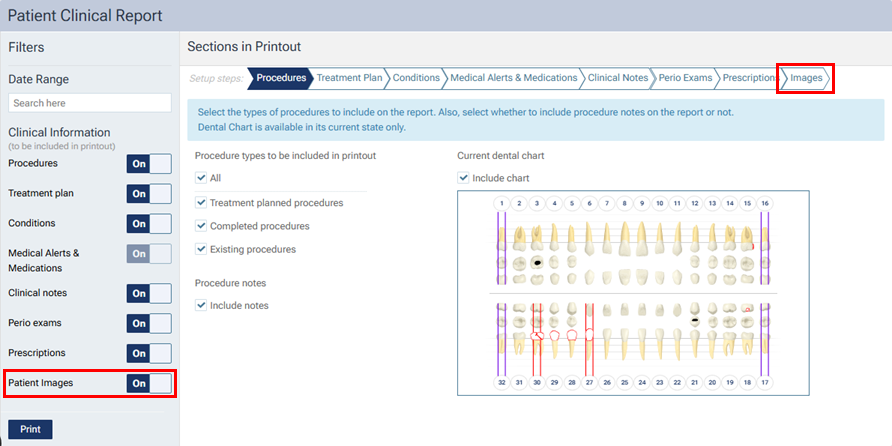
The Patient Clinical Report page opens. On the left there is now a Patient Images switch. With this switch on, next to Setup steps, the Images option is available.
2. Set up the options for each step, from Procedures to Prescriptions, as you normally would.
3. For the Images step, if the patient has images attached to his/her record, do one of the following:
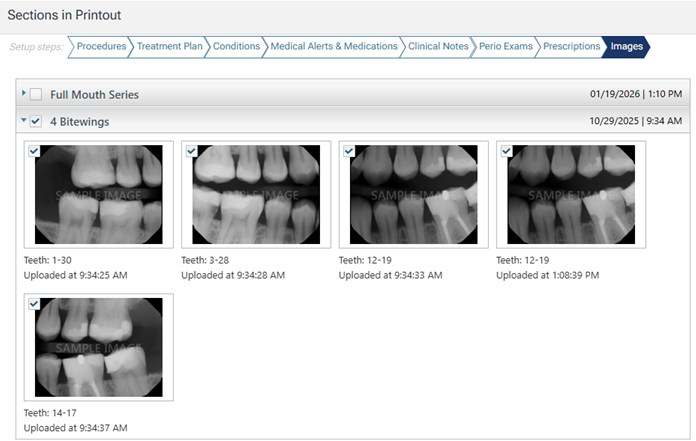
- Select the checkbox of an imaging procedure. The procedure expands automatically to display the corresponding images. All images are selected for inclusion on the report. If necessary, clear the checkbox of any images that you want to exclude from the report.
- Expand an imaging procedure to display the corresponding images. Select the checkbox of any images that you want to include on the report.
Notes:
- If all images in a procedure are selected, the images will appear together on the report (the entire series/set will be presented as one image). However, for any slot of the set/series with multiple images (images with the same assigned tooth numbers), only the top image of the stack will appear on the report.
- If only some images in a procedure are selected, each image will appear separately on the report.
4. Repeat step 3 as needed to include other images on the report.
5. Click Print.