Released 5/15/25
With this Dentrix Ascend release, an all-new, enhanced form builder is available. With the new patient forms features in Dentrix Ascend, you can send requests to patients to have them complete the forms that are due, similar to how you requested forms previously.
Some highlights of the new forms include the following:
- Completely customizable forms.
- Targeted questions with conditional logic.
- Patients can upload their drivers ID and insurance cards.
- Multi-site organizations can set up a form and publish it to many locations at once.
- Forms can include a list of medical conditions and allergies that you specify from your Dentrix Ascend database.
- Demographic information, medical conditions, and allergies that a patient enters on an online form can synchronize with that patient’s record in Dentrix Ascend automatically, so the amount of manual adjudication of completed forms that is done by office staff to update patient records might be greatly reduced or even eliminated.
New Menu Option
On the Settings menu, the Patient Forms option is no longer available.

Now, to manage forms, you select the Form Builder option on the Settings menu.

Creating New Patient Forms
To create new patient forms, do the following:
1. On the Settings menu, select Form Builder.
The Patient Forms page opens on a new browser tab.

Note: You can create forms for new patients and patients of record.
4. Complete the following steps for each form that you want to create:
a. Click Create Form.
The All Templates options appear. You can create a form, starting from scratch or using a template.

b. Click Blank or one of the templates.
The Form Builder page opens.
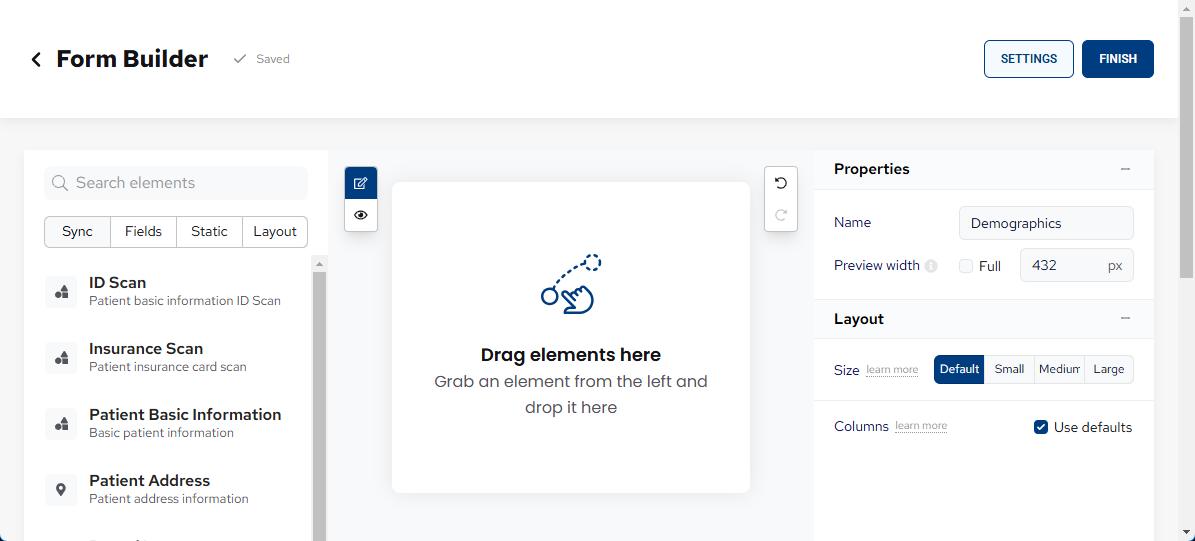
The panel on the left contains all available elements that you can add to the form.
Sync
These standard elements correspond to patient information that can update data in your Dentrix Ascend database.
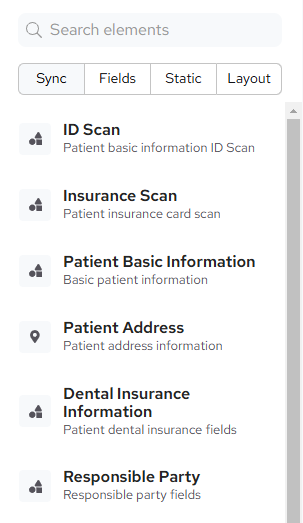
Currently, the following demographics on a form can update a patient’s record:
- Preferred name.
- Address.
- Email address.
- Mobile phone:
– If a mobile phone number does not exist for the patient, the one entered on the form is added to the beginning of the patient’s list of phone numbers.
– If a mobile phone number does exist for the patient, and it matches the mobile phone number on the form, it is moved to the beginning of the patient’s list of phone numbers (if it is not already the first).
Note: Duplicate phone numbers are allowed in Dentrix Ascend only if they are assigned different types (such as Home and Mobile).
Notes:
- The ID Scan element allows a patient to use the camera on his/her mobile device to take a picture of a driver’s license to populate some patient information on the form automatically.
- The Insurance Scan element allows a patient to use the camera on his/her mobile device to take a picture of an insurance card to populate some insurance information on the form automatically.
The medical conditions and allergies on a form (see “Including Medical Alerts on Forms”) can update a patient’s record. Currently, only the “positive” responses (such as when it is indicated that the patient has asthma) can update the patient’s record. The “negative” responses (such as when it is indicated that the patient no longer has a particular condition) do not update the patient’s record.
- If a medical alert does not exist for the patient, and that medical alert on the form has a positive response (the condition or allergy is active), it is added to the patient’s list of medical alerts. An expired medical alert is considered not to be an existing medical alert in the patient’s record.
- If a medical alert does exist for the patient, it is not expired, and that medical alert on the form has a positive response (the condition or allergy is active), it remains in the patient’s list of medical alerts.
Notes:
- For a medical alert that has been added to the patient’s record, a note is included and contains the text “Indicated by patient via forms” and the date. Also, the default status of the “Show alert” and “Is permanent” switches for the medical alert assigned to the patient are based on the status of those switches for that medical alert in the medical alerts library, and the default value of the “Severity” grade for the medical alert assigned to the patient is “Select a grade,” which indicates that the severity has not yet been specified by office staff.
- For a medical alert that already exists in the patient’s record and has been verified, the text “Indicated by patient via forms” and the date are appended to any existing note text.
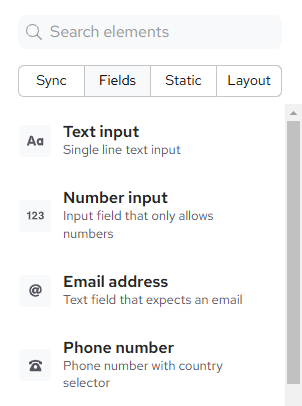
Fields
These custom elements correspond to information that cannot update data in your Dentrix Ascend database.
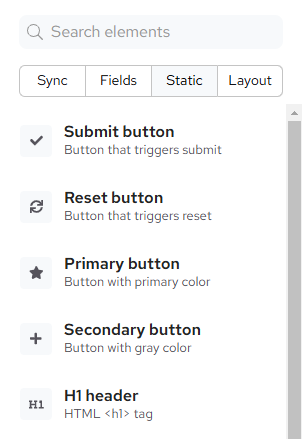
Static
These static elements are for the presentation and functionality of the form. You can add text, such as headings and paragraphs. You can add images. You can add buttons, such as a reset button and a submit button.
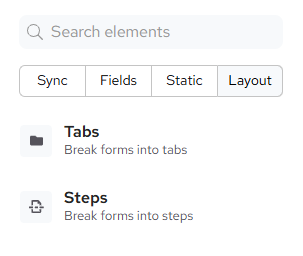
Layout
These layout elements are for laying out the form. You can add tabs and steps to break up the form into smaller chunks instead of having one long form page to scroll through. You can add a container to group elements visually. You can add columns and lists.
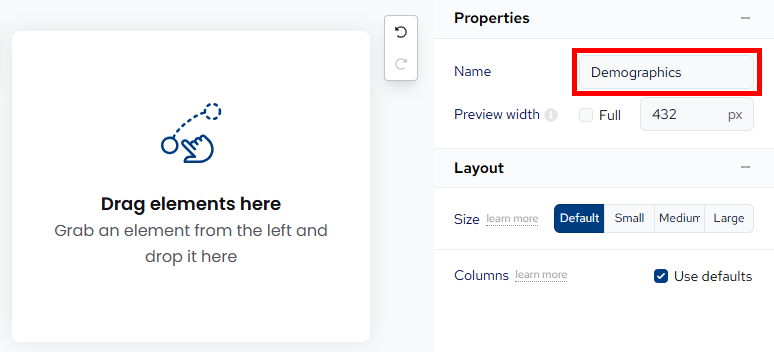
The center area is the form preview area. You drag elements from the left to the preview area and arrange those elements as desired.

The panel on the right provides options for the form (if no element is selected) or a selected element on the form.
c. With the form container selected (not an element on the form), under Properties, enter a Name for the form.
d. Perform any of the following tasks to build/modify the form.
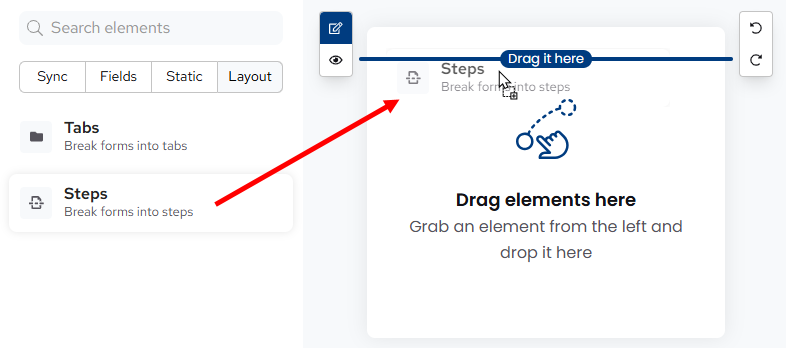
You can drag a Layout element, such as Steps, to the form.
You can drag a Sync element, such as Patient Basic Information, to the form.
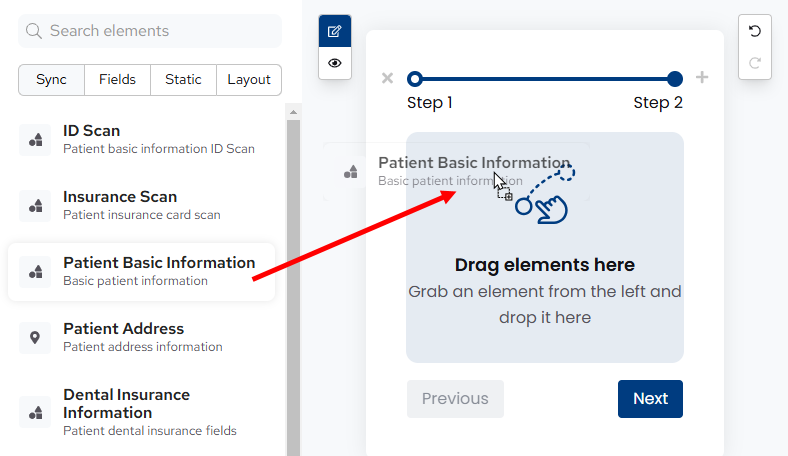
To view a different step, select it.

Then, you can drag another element, such as Responsible Party, to that step of the form.
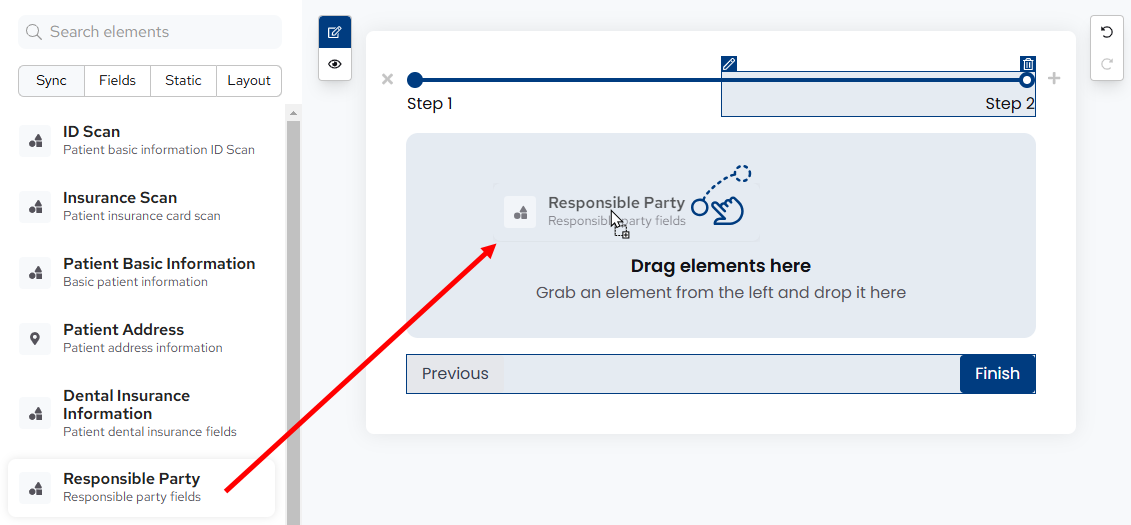
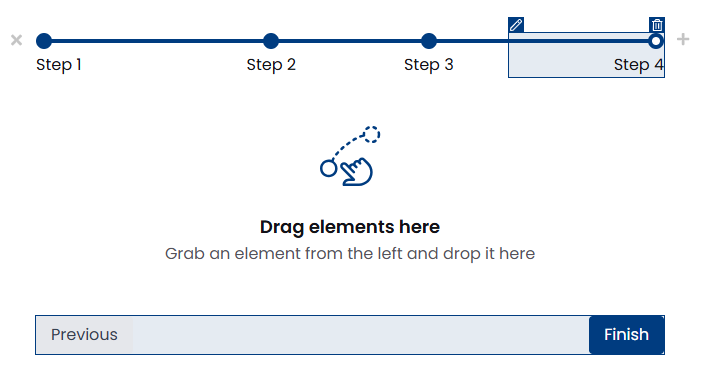
To add a step, click the Add icon (plus sign).
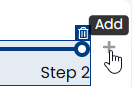

Add other steps and elements as needed.
Notice that, with tabs and steps, a Finish button is included automatically for the last item.
If you do not use steps or tabs, you must add a Submit button manually. Drag it from the Static elements list to the form.

Important: If the form includes steps or tabs, a Submit button is added automatically to the form. However, if the form does not include steps or tabs, and you do not add a Submit button manually, patients will not be able to submit the form after completing it, so remember to include this element.
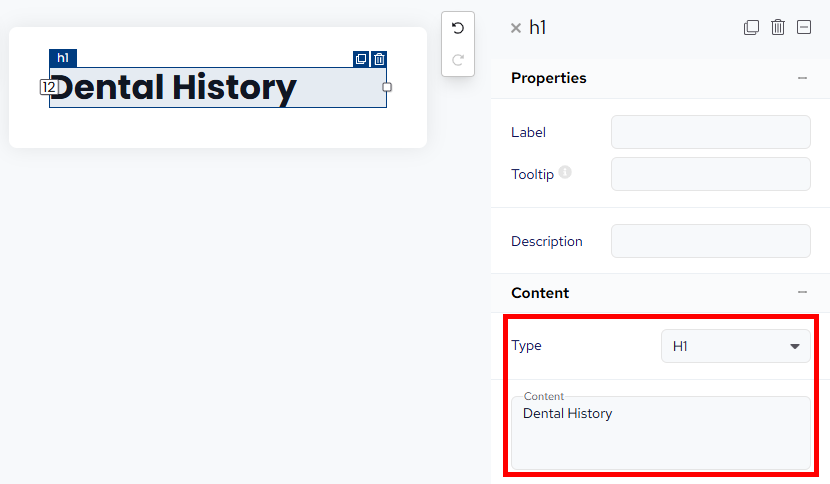
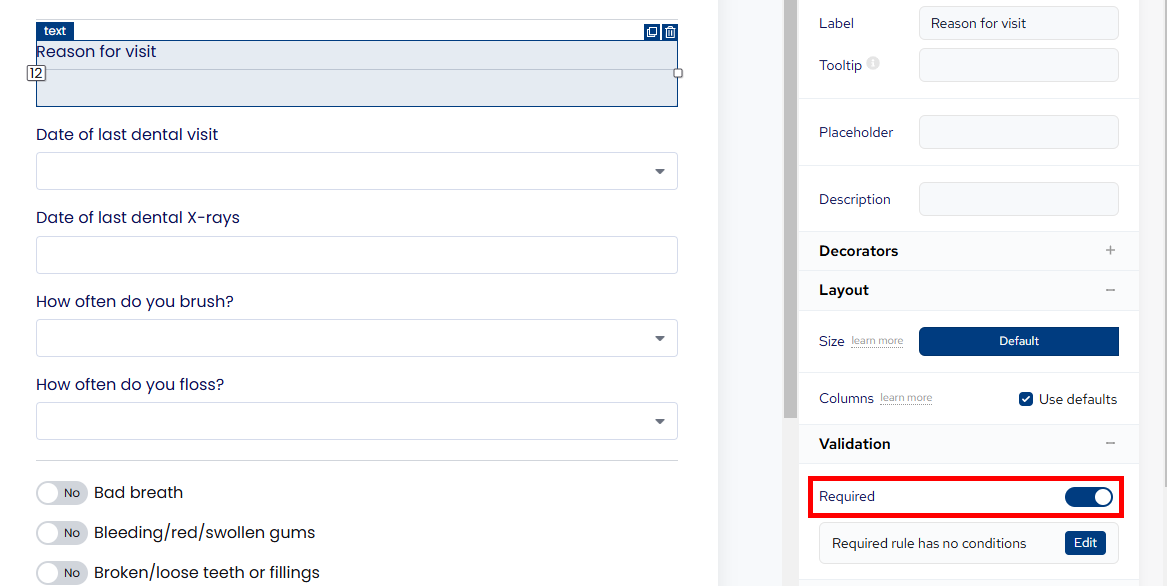
To change the label of an element, such as a step, select it, and then change the Label.

Here are some examples of changes you can make to elements:
Type and Content (for a heading).
Align (centered on form).

Required (a response is required).
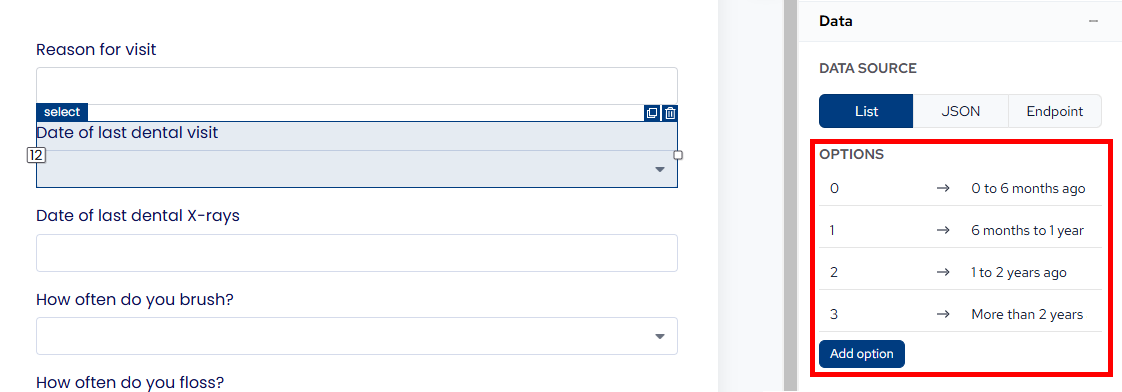
List of selections (in this example, only one option can be selected). For the first option, enter a value and a label; for each subsequent option, click Add option, and then enter a value and a label.
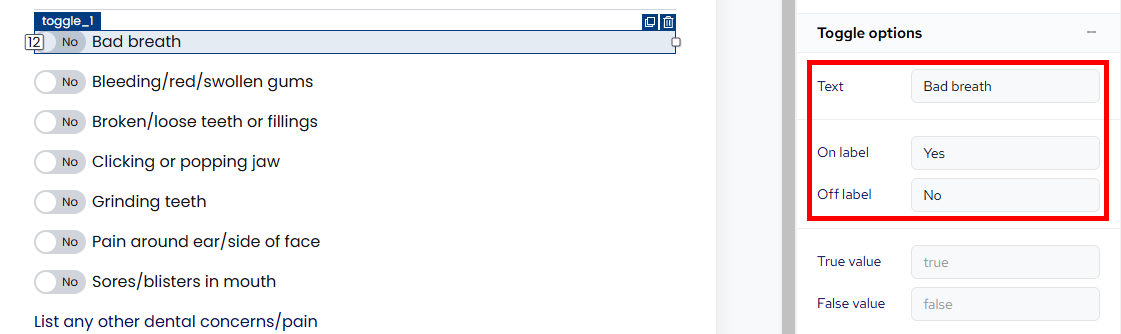
Text, On label, and Off label (for toggle/switch)
To resize an element, drag its edge to the left or right.

To remove an element, select it, and then click the Remove button (trash can icon).

The vertical toolbar to the left of the preview area allows you to switch from editing the form to previewing the final look and functionality of the form.

e. Click Settings.
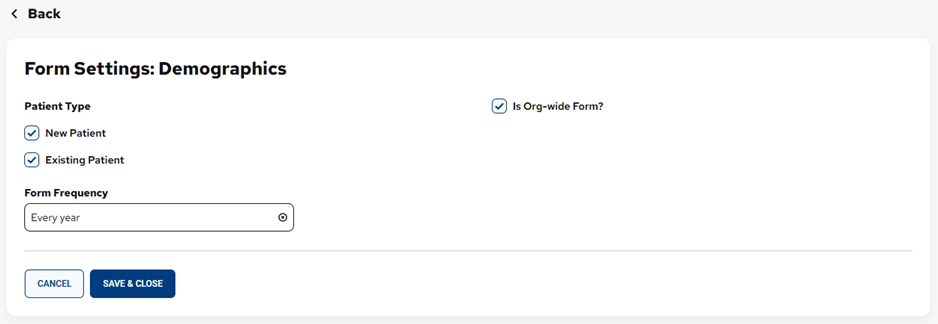
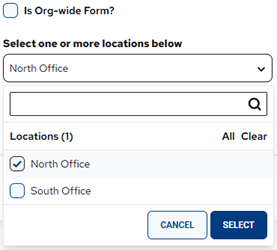
f. Specify a patient type, a frequency, and the locations of your organization that this form is available in:
- The specified Patient Type determines which patients the form will be due for:
- New Patients – The form is for any patient whose status is “New” in Dentrix Ascend.
- Existing Patients – The form is for any patient whose status is anything other than “New” in Dentrix Ascend.
- The specified Form Frequency determines how often patients must complete the form.
- If the form is for all locations, leave the Is Org-wide Form? checkbox selected. However, if the form is only for specific locations (it applies only to patients whose preferred location is one of the selected locations), clear the check box; on the Select one of more locations below list, select the checkbox of each applicable location; and then click Select.
g. Click Save & Close to return to the Form Builder page.
h. Click Finish.

You are returned to the Patient Forms page, and the form you created appears in the Forms list.

Note: By default, the Status of the form is “Unpublished.”
i. To publish the form, in the Actions column, click the corresponding ellipsis (…) to view a menu, and then select Publish.
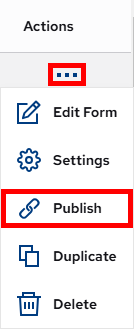
The Actions menu also provides options to edit, unpublish, delete a form; duplicate a form if you want to create another form based on the existing form, and change a form’s settings.

To edit a form, in the Actions column, click the corresponding ellipsis (…) to view a menu, and then select Edit Form.
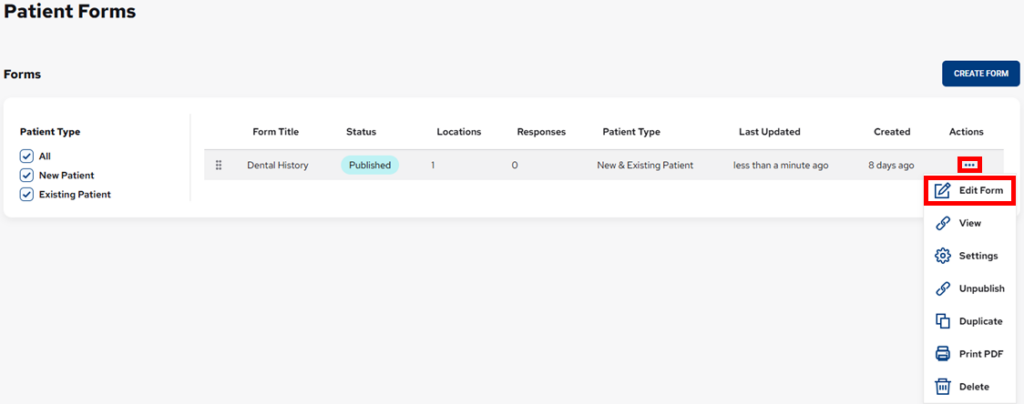
Note: After you edit a published form, its status becomes “Unpublished,” so you must re-publish it to make the form available to patients.

Including Medical Alerts on Forms
You can now flag the problems and allergies that you want to have appear on any form that includes the “Medical Conditions” and “Allergies” elements. Only the medical alerts you have flagged in Dentrix Ascend will be available for a patient to select on forms.
To edit a medical alert
1. On the Settings menu, under Patient Care, click (or tap) Medical Alerts Library.
2. Select a medical alert.
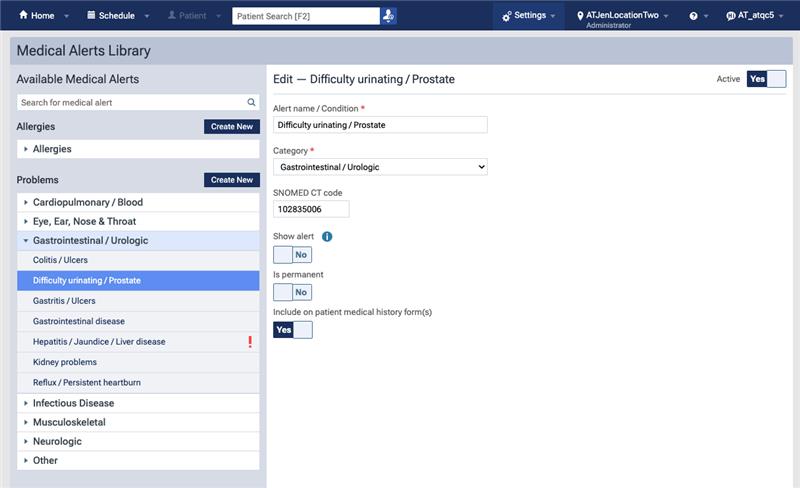
3. Set the Include on patient medial history form(s) switch to Yes.
4. Click Save.
Manual Requests to Complete Forms
As with previous versions of Dentrix Ascend, you can send requests for patient forms to be completed using the following methods:
- Bulk automated appointment reminders – Each appointment reminder that Dentrix Ascend sends out automatically by email and text message can include a button (with email messages) or a link (with text messages) that a patient can use to open the portal where he or she can complete online forms.
- Individual manual request – You can manually send an email or text message with a link to a patient, such as when a patient accidentally deletes the text message for his or her appointment reminder.
Notes:
- The Web address for a patient’s online portal is unique to a given patient. Each patient must open the online portal using the link (or button) that is specific to his or her record.
- The link to the online portal is valid for seven days or until the associated forms have been completed, whichever comes first. After that, you must generate a new link if the patient still has not used the original link provided.
To manually request patient forms, do the following (this is patient specific):
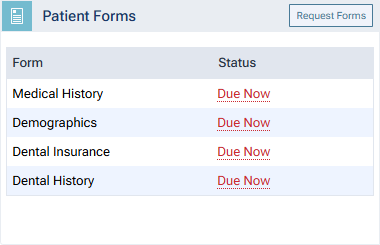
In Dentrix Ascend, open a patient’s Overview page, and then click Request Form in the upper-right corner of the Patient Forms box.
Notes:
- The published forms that have been created using the new Form Builder appear, and you can send requests for patients to complete any of those forms. You cannot send requests for patients to complete any forms that were created using the old Patient Forms tool; however, any of those forms that were completed by patients remain associated with the respective patient records.
- Outstanding form requests from the old system will still work for the two weeks that those links are valid.
The Request Forms dialog box appears.
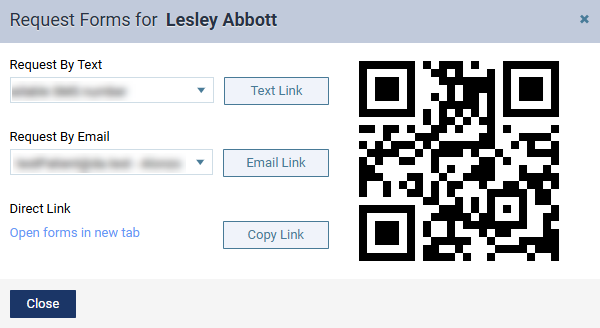
The dialog box looks different from before, but functions similarly.
Note: You can no longer register kiosk devices or push requests to those devices. However, patients can still complete forms on a practice-owned mobile device.
Do one of the following:
- Request By Text – To send the portal link to a mobile phone number, select the desired number from the list, and then click (or tap) Text Link. This button is available only if the patient has a mobile phone number entered in his or her record. The mobile phone numbers of the patient and his or her primary contact are available for selection.
- Request By Email – To send the portal link to an email address, select the desired address from the list, and then click (or tap) Email Link. This button is available only if the patient has an email address entered in his or her record. The email addresses of the patient and his or her primary contact are available for selection.
- Direct Link – Do one of the following:
- To copy the portal link to the clipboard, click (or tap) Copy Link. You can then paste the link in a document or email message for the patient.
- To open the patient’s portal on another tab of your Web browser (for instance, if you are opening it on a practice-owned mobile device that the patient can use to complete forms in the office; be sure to close any other Dentrix Ascend tabs before giving the device to the patient), click the Open forms in a new tab link.
- To copy the portal link to the clipboard, click (or tap) Copy Link. You can then paste the link in a document or email message for the patient.
- QR Code – To access the portal link on a mobile device, use the camera on that device to scan the QR code, and then tap the link that appears on the mobile device.
Completing patient forms
Patients can complete forms online prior to or during their visits. The patient can open the online portal from his or her appointment reminder by using the button (with email messages) or link (with text messages) provided. You can also open the patient’s portal on a practice-owned mobile device.
Notes:
- The Web address for a patient’s online portal is unique to a given patient. Each patient must open the online portal using the link (or button) that is specific to his or her record.
- The link to the online portal is valid for seven days or until the associated forms have been completed, whichever comes first. After that, you must generate a new link if the patient still has not used the original link provided.
The patient does the following to complete patient forms:
1. The patient clicks the link in the text message (or button in the email message) he or she receives.
The patient forms portal displays the option to enter a birth date.
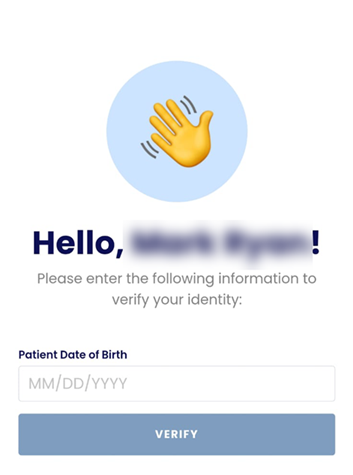
2. The patient enters his or her birth date and then clicks Verify.
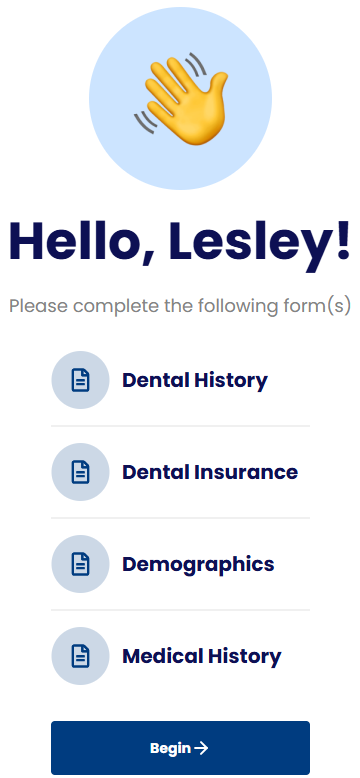
3. The patient portal lists the forms that are due for that patient, the patient clicks (or taps) Begin to complete the forms.
Note: After successful submission of the forms, the link to the portal becomes expired to prevent future authentication attempts.
Audit Log
If a form submission triggers an update of a patient’s demographics, applicable entries appear in the Audit Log. The Details column contains “Form Write-back” and what information was written to the database.
If a form submission triggers a medical alert to be added to a patient’s record, an applicable entry appears in the Audit Log. The Details column contains information regarding the added medical alert (current functionality) and “indicated by patient via forms.”
If a form submission triggers a medical alert in a patient’s record to be updated (text is appended to the note of an existing medical alert), an applicable entry appears in the Audit Log. The Details column contains information regarding the updated medical alert (current functionality) and “indicated by patient via forms.”
Additional Information
To watch an introductory video and read about quickly getting started with patient forms, visit the Dentrix Ascend Forms page.