Released 12/19/25, Updated 3/27/26
We’re making it even easier to protect your patient data. Dentrix Ascend is introducing an enhanced security experience that includes multi-factor authentication (MFA).
Why This Matters
- Better protects patient health information (PHI) and reduces the risk of unauthorized access.
- Meets enterprise-level security standards and HIPAA best practices.
What to Expect
Even if MFA is active, you might not be required to complete the MFA steps to log in. For most users, MFA will only be required when something unusual occurs—like logging in from a new device or location. If MFA is required, complete the following steps:
- When you log in to Dentrix Ascend, you’re prompted to enter a one-time code that is sent to your email address.
- Enter the code you received to proceed.
- Enter your mobile number to register your device and receive an SMS with a code.
- Enter the code you received to complete the MFA.
MFA and Better Security
The following is not intended to be an exhaustive list of security practices for Dentrix Ascend. Rather, these notes should minimize the impact of MFA, reducing the instances of when you may be asked to complete MFA. However, this does provide a guarantee, and you may be asked to complete MFA more or less frequently depending on your individual circumstances.
As noted above, for most users, MFA will only be required when something unusual occurs—like logging in from a new device or location.
- Using a VPN – Using a VPN may trigger a request to complete MFA, especially when turning off/on could cause your location to appear as having changed from your previous login. In this scenario you should be prepared to receive an SMS code on a mobile device at your current location.
- Consistent VPN Usage – If possible, use a single, dedicated VPN location rather than switching, or disable the VPN when not necessary.
- Avoid Shared Accounts – Using shared accounts (such as members of a team logging in using the same account) causes multiple, disparate locations to log in simultaneously, potentially triggering MFA requests.
- Use Known Devices/Networks – Log in from trusted devices, home Wi-Fi, or corporate, known IPs.
- Proper Logout/Login Procedure – If traveling, ensure a session is fully terminated in one location before starting a new one in another, allowing for realistic travel time.
- Securely Configure Locations – If you are responsible for managing security, exclude trusted locations like corporate office IP addresses from detection policies.
Coming Soon: Authenticator Apps
Right now, MFA uses SMS. In the future, you’ll be able to choose an authenticator app (like Google Authenticator) if preferred.
Accounts ineligible for MFA have been disabled
If your account is ineligible for MFA, it has been disabled, and you cannot access Dentrix Ascend.
See below for information on how to correct MFA ineligibility.
Email communications have been sent to individual users who are ineligible for MFA.
Additionally, the nature of what requires addressing is displayed in a pop-up alert message post login to Dentrix Ascend (whether a duplicate email or invalid username is in use).
What to do if your account is disabled
If your account is disabled, an error message appears when you attempt to log in.

You must contact your organization’s Dentrix Ascend administrator to correct the reason for your ineligibility (details on what to do below).
Once your account has been updated to fix your ineligibility, you will be able to log in again by going through the Enhanced Security process noted below.
Making Sure User Accounts Are Eligible for MFA
MFA requires verification using a unique email address for each individual user. Therefore, MFA cannot be enabled for user accounts that share the same email address. To ensure that the user accounts in your organization are not prevented from having the higher level of security provided by MFA, make the following changes as needed to user accounts that are currently ineligible for MFA:
- Email addresses – To resolve duplicate emails:
- Each user must have a unique email address.
- Email aliases (or what is sometimes referred to as “plus addressing”) may be used. For example, [email protected] can be edited to add a “+1”: [email protected]. This can be done within the Dentrix Ascend account settings for the user who needs to have a duplicate email address replaced with a unique one.
- Confirm with your email provider or internal helpdesk that alias messages route correctly back into the primary account. In the example above, an Dentrix Ascend email alert sent to [email protected] should end up in the original account: [email protected].
- Usernames – Change usernames that do not follow the naming convention that is required for MFA. Any user accounts with unapproved usernames will not be enrolled in MFA.
New restrictions now in place
- New accounts cannot be created using duplicate email addresses.
- Editing an existing account with a duplicate email address will require updating it to a unique email address first.
Example of a duplicate email address
- User A – Username is Sam; email address is [email protected]
- User B – Username is Sally; email address is [email protected]
In this example, the same email address ([email protected]) is being shared between two user accounts (Sam’s and Sally’s); therefore, the email address for one or both of those accounts must be changed.
Approved naming convention for usernames
- Letters (a-z, A-Z) are allowed
- Numbers (0-9) are allowed
- The following special characters are allowed: underscore (_), dot (.), plus sign (+), and dash (-)
- Spaces are NOT allowed
- Email addresses are NOT allowed
- The @ symbol is NOT allowed
Students notified of change to usernames
All users must have a username and email address which allows for enrollment into MFA. Email addresses are invalid for use as a username.
If you received a notification email regarding your username being invalid for enrolment into MFA, a change will be made to your username to make it eligible for enrollment into MFA. If you have not received an email from us regarding this change your username remains as is.
Change being made to usernames:
- We will replace the @ symbol within your usernames with a dash
- Therefore, a username of [email protected] becomes sally-gmail.com
This will happen on Monday, March 30th. We have also communicated this with your college Ascend administrator. Please contact them directly if you have any questions in respect of this.
Logging In With Enhanced Security and MFA
The enhanced security login process is the first step to enabling a more secure login process for users.
Notes:
- For now, this adds an additional login screen, which is detailed below.
- Some users will be required to complete an additional verification using a mobile phone to receive a code, which is then entered onscreen. Once a user has completed this step, he/she might not be asked to do this again for some time.
To log in with enhanced security
The initial login page opens.

1. Enter the organization ID and your username.
2. Click Continue.
An additional login page opens.
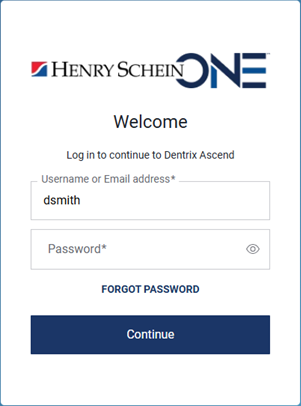
Notes:
- Your username is pre-filled.
- The password is not pre-filled even if it is saved in the Chrome browser’s password manager.
- If you can’t remember your password, click the Forgot Password link to reset your password.
3. Enter your Password.
4. Click Continue.
You will be required to complete the MFA steps below only if there is something out of the ordinary with your login; otherwise, you are logged in to Dentrix Ascend and can ignore the MFA steps.
Notes:
- Once you have completed verification using your mobile to receive an SMS, you will most likely not be asked again for some time to complete the MFA steps to login.
- The MFA steps will not be required for every login.
To continue logging in with MFA
The Verify Your Identity page opens. Your email address is pre-filled. A numeric code is sent to that email address.
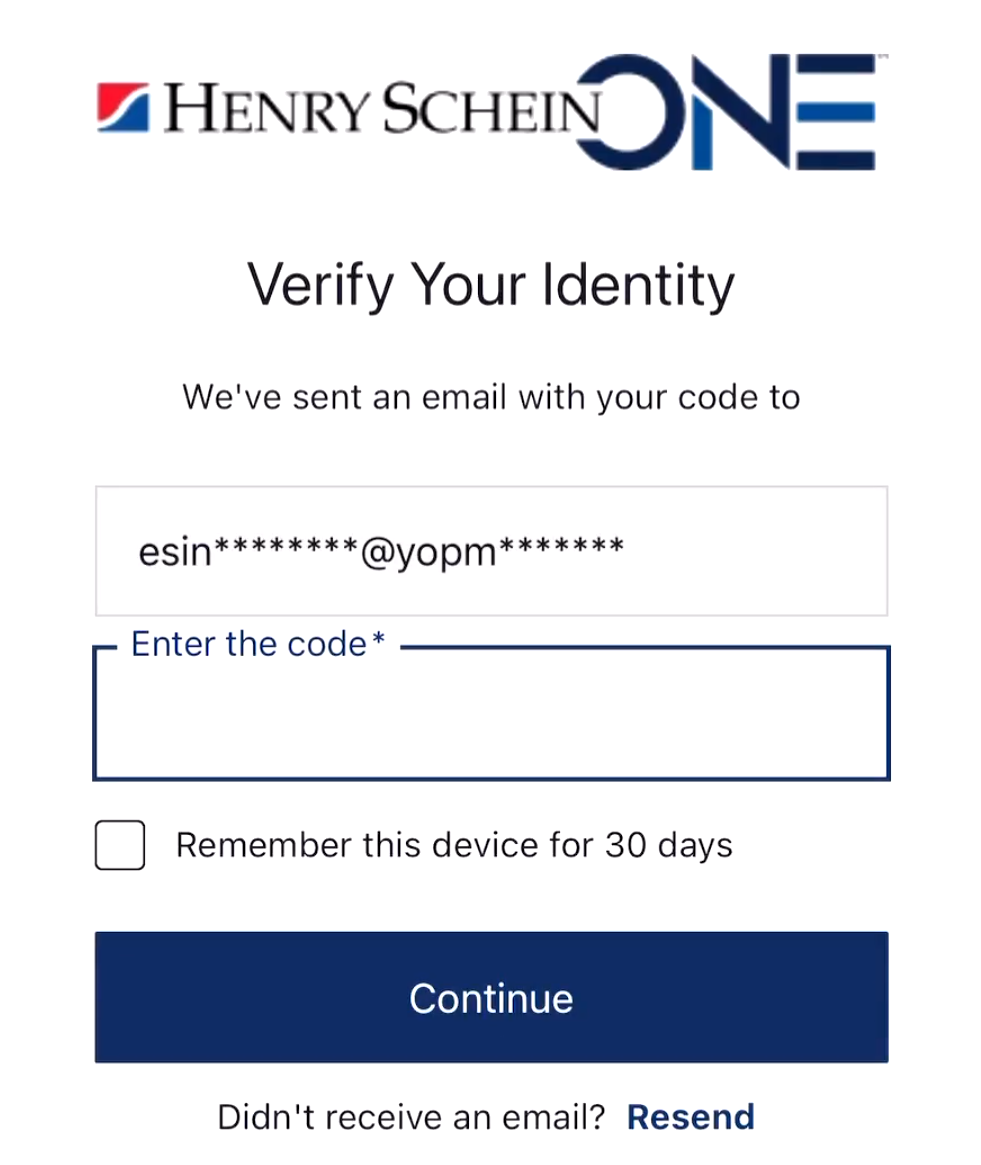
5. Enter the code from the email message you received.
6. Click Continue.
7. When you are asked to register your mobile device, enter your mobile phone number.
The next Verify Your Identity page opens. A numeric code is sent to your mobile phone.

Note: If you did not receive the code, click the Resend link. If you still do not receive a code, contact Dentrix Ascend Support.
8. Click Continue.
You are logged in to Dentrix Ascend.
Resetting MFA Devices
As needed, you can reset a user’s mobile phone number that was registered previously for MFA (multi-factor authentication) so that user can register a new number.
To reset a user’s MFA device
1. On the Settings menu, select User Accounts to open the User Accounts page.
2. Click a user to view that user’s account information.
3. Click the Clear MFA Devices link to clear the previously registered mobile phone number. The next time that user logs in, he or she will be asked to register a new mobile phone number for MFA, and an SMS code will be sent to that number.

Using a PIN With Enhanced Security
With enhanced security enabled, a user can specify a PIN for his/her account, which he/she can use (instead of password) to authorize the following actions:
- Unlocking a transaction (procedure, charge adjustment, credit adjustment, or payment)
- Unlocking a transaction’s date
- Unlocking a procedure’s amount
- Unlocking a procedure’s insurance estimate overrides
- Signing a clinical note
- Signing a treatment consent form
To create a PIN for your user account
1. While you are logged in to Dentrix Ascend, on the User menu, select My Account to open the My Account page.
2. Select the PIN tab (formerly the Change Password tab).
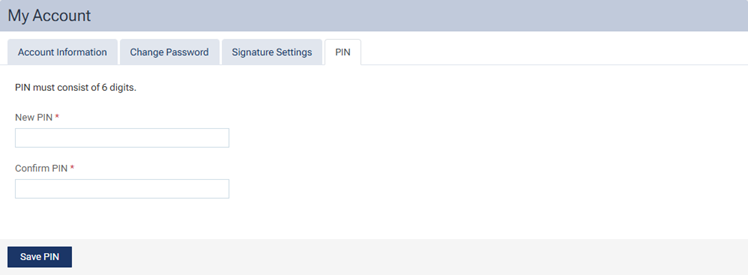
3. In the New PIN and Confirm PIN boxes, enter a 6-digit PIN.
4. Click Save PIN.
Note: When the PIN is saved, an email message to notify you that your PIN has been updated is sent to the email address that is associated with your user account.
To change your PIN
1. While you are logged in to Dentrix Ascend, on the User menu, select My Account to open the My Account page.
2. Select the PIN tab.

3. In the Current PIN box, enter your current 6-digit PIN.
4. In the New PIN and Confirm PIN boxes, enter your new 6-digit PIN.
5. Click Save PIN.
To reset your PIN
1. While you are logged in to Dentrix Ascend, on the User menu, select My Account to open the My Account page.
2. Select the PIN tab.
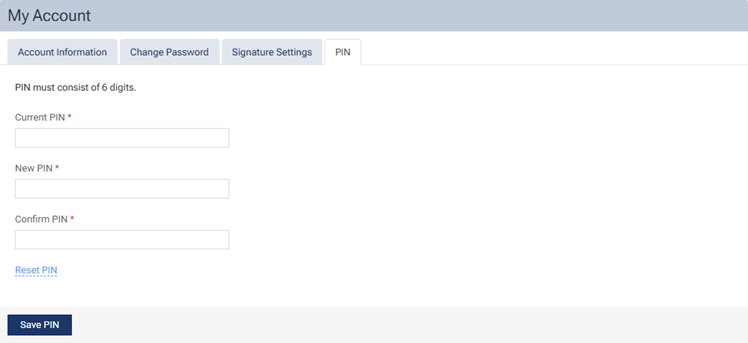
3. Click Reset PIN to send an email message to the email address that is associated with your user account.
4. Click the Set your PIN link in the email message, log in to Dentrix Ascend.
5. Complete the steps for “To create a PIN for your user account.”