Released 4/16/25
You can now quickly assign a user’s role for multiple locations at one time when you are adding or editing a user account. Previously, you had to assign a role one location at a time.
To quickly assign a user account’s access to multiple locations at once
1. On the Settings menu, select User Accounts. The User Accounts page opens.
2. Either select an existing account to edit it, or select Create New User on the New User menu to create an account.
3. Select the User Roles and Locations tab.
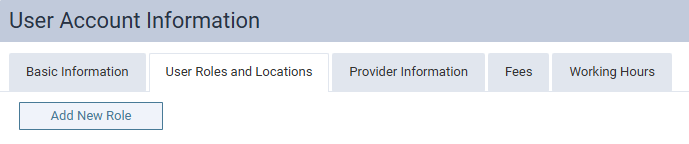
4. Click Add New Role. The Add Role dialog box appears.
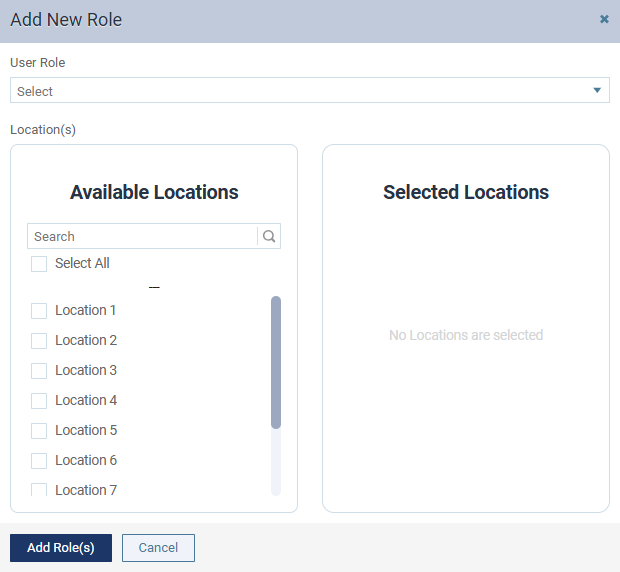
5. From the User Role list, select the user role that you want to assign to the user. The role will be associated with all selected locations, but you can change the role for a given location later.
6. In the Available Locations list, select the locations that you want to assign to the user. You can begin typing a location name in the Search box to filter the list. To quickly select all locations, select the Select All check box.
7. To unassign a location, clear its checkbox in either the Available Locations or Selected Locations list.
8. Click Add Role(s).
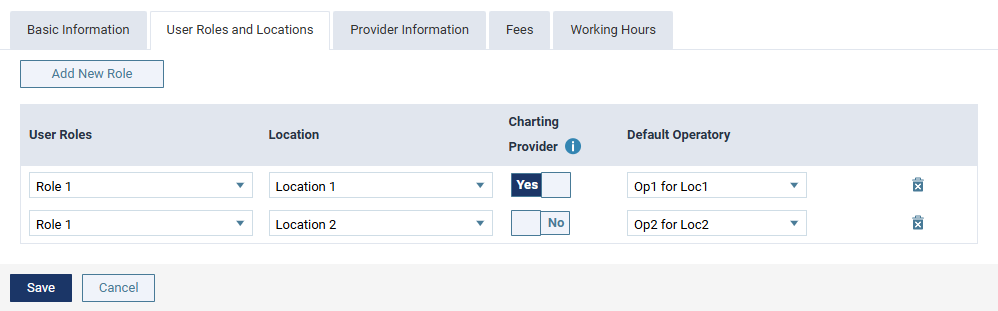
For any of the user’s role-location combinations, you can do any of the following (like before this release):
- Change the User Role.
- Change the Location.
- Indicate whether the user is a Charting Provider or not (for a provider only).
- Select the Default Operatory.
- You can also delete an unneeded role-location combination by clicking its Delete button (trash can icon).
9. Set up or change any other user account information as needed, and then click Save.