The product update released on March 10, 2020, introduces the first phase of clinical note template central management, with the ability to distribute from one location to many. You can now receive an automatic warning when the patient’s primary insurance plan has no contract with your billing provider. Online booking time slots now show all available appointment times at once. And this update brings phase 3 of lab case management, which includes a new dashboard widget and a new power report.
Clinical Note Template Distribution
If your dental group practice wants to share standardized clinical note templates among all offices, this update introduces that capability. For example, if you’ve done the work of customizing a popular template, you can now share it with any location without having to build from scratch in each location or requiring each provider to log in and make it a favorite. This new distribution feature is located in the Settings > Clinical Note Templates page.
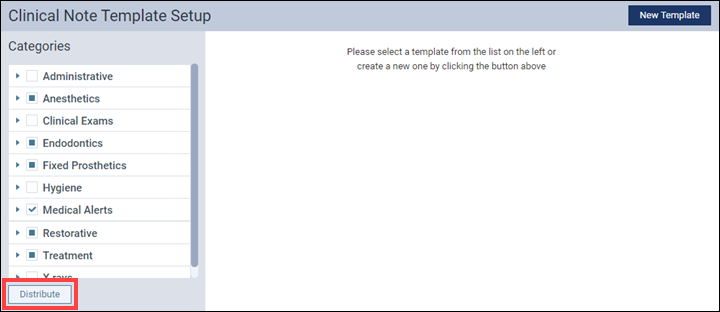
To distribute clinical note templates, begin by selecting the template names from the Categories lists. You can include entire categories or just a few templates within a category. When you are ready, click Distribute. This opens a Distribute Selected Templates dialog box.
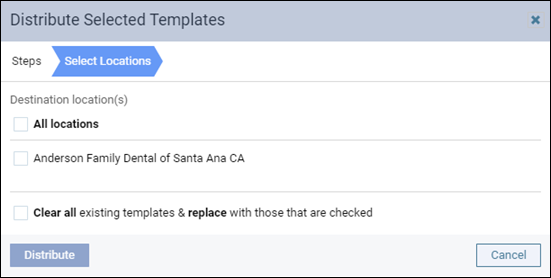
Select All locations to send these templates to all the locations in your organization, or you can select specific locations. IMPORTANT: your user account must have rights to each of these locations; in other words, the destination location list is limited to the locations to which you have access.
The Clear all existing templates & replace with those that are checked option means the templates in the destination location(s) will be completely removed, and those locations will have only the templates selected here for distribution. A common use for this feature is when you are adding a brand new location and there is nothing there but the standard—and for you, outdated—set of templates.
If you do not select this option, the dialog box will warn you when a duplicate template name exists, and give you the option to replace, skip copying, or to keep both versions.
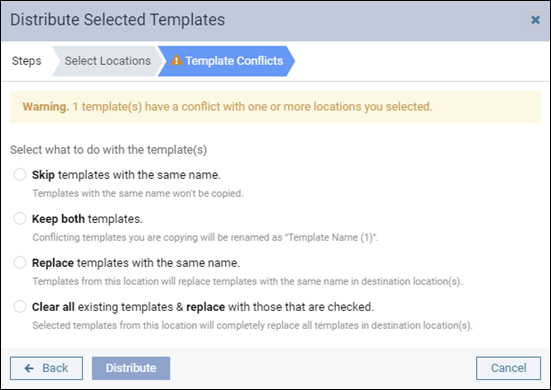
The same choices show up for any conflicting quick-picks associated with the templates. Conflicts may be common especially with bulk distribution because every location starts with the same default list of templates. If all you are distributing are new custom templates, conflicts are less likely.
To perform clinical note template distribution, your user role must include both the existing Manage clinical note templates right and the new Distribute Clinical Note Templates right (Settings category). Users in the Administrator role have these enabled automatically; any other role requires manual enablement by an administrator.
Note that if a provider is working on a clinical note from a destination template when you attempt to replace that template, you will receive a warning message, and distribution will skip that template.
The Audit Log tracks distribution activity.
Lab Tracking Phase 3
Lab Cases Widget
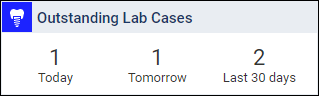
The home page/dashboard has a new widget called Outstanding Lab Cases. It provides an immediate link to the Lab Cases page and gives you a heads up for how many lab cases you are waiting to receive.
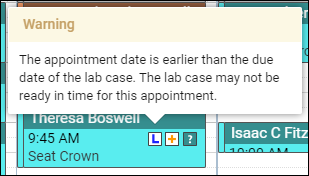
Due Date Warning
In support of lab case due dates—the date when the lab work is expected to return—you will now see a warning pop-up in the Calendar if you attempt to reschedule an appointment to a date before the lab work is due.
Lab Cases Power Report
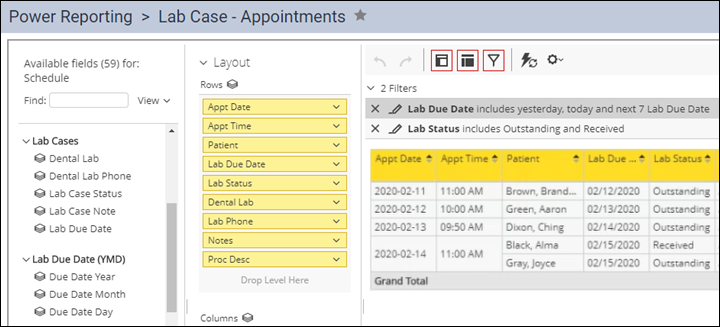
To support the lab cases feature, a new Power Report called Lab Case – Appointments is now available. It is located in the Schedule/Recare category.

Insurance
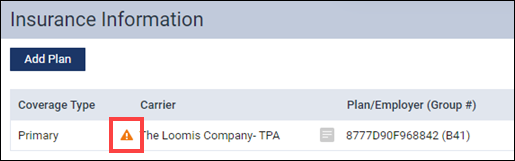
Warning when Billing Provider is Not Contracted
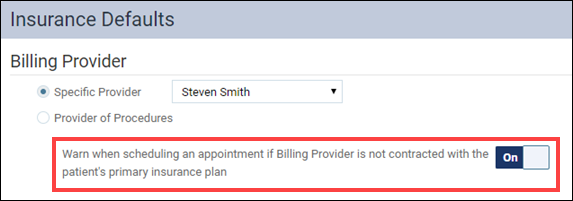
Dentrix Ascend can now warn you automatically when the billing provider is not contracted with the patient’s primary insurance plan.
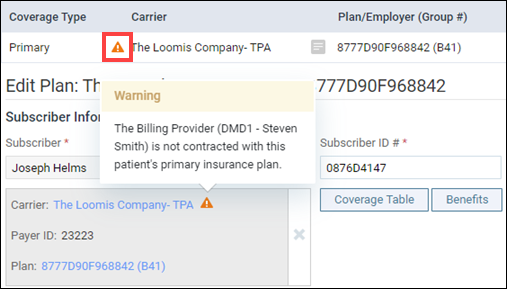
The warning triangle pops up an explanation when you click it.
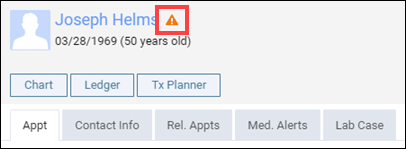
The warning also appears in the patient’s appointment panel.
Your settings in the Insurance Defaults page determine who the billing provider is. This warning feature is optional and you can turn it off or on with a new switcher in the Billing Provider section of the page. The feature is turned Off by default.
Outstanding Claims Subscriber Link
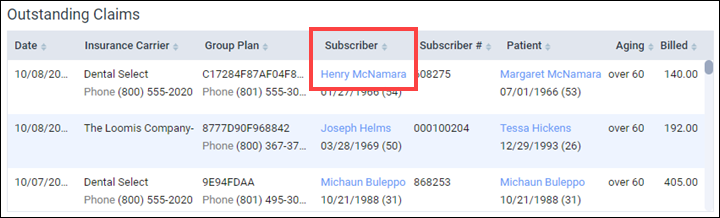
In addition to the patient name hyperlink, the Outstanding Claims report (Home > Outstanding Claims) now includes name hyperlinks to the insurance subscriber. Clicking the name opens the subscriber’s Ledger page in a new tab. The advantage of this is that when you’re done looking at the subscriber’s ledger, you can close the tab and go back to the Outstanding Claims report without needing to regenerate the report.
Insurance Adjustment Description Update
To make insurance payment adjustment descriptions easier to understand, the names of the dropdown options have been renamed from “Write-Off” to “Write-Off (-)” and from “Refund” to “Offsetting (+)”.

Submitting Automated Eligibility Checks
The Location Information page (under Settings) has a new option that allows you to turn off automated eligibility checking. For each location, you can choose whether the automated inquiry runs each morning. To keep the checks going as they have been for some time now, keep the Batch Job for Insurance Eligibility switcher set to Yes. This is the default setting. For more information about the automatic insurance eligibility feature, see Verifying eligibility statuses.

Scheduling
Online Booking Multi-Slot Display Enhancement
With this update, when you create a time block for online booking, Dentrix Ascend can present all of the slots available in that block to the patient at the same time. Previously, the patient could only select the first slot available, and when that filled, the next patient would see the next slot, and so on. We hope this increased flexibility improves the patient experience and increases online booking participation.
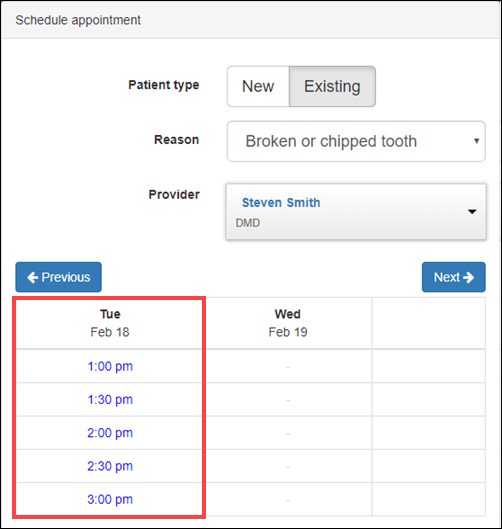
The appointment reason determines the appointment times presented to the patient; you can assign different appointment lengths to different appointment reasons.
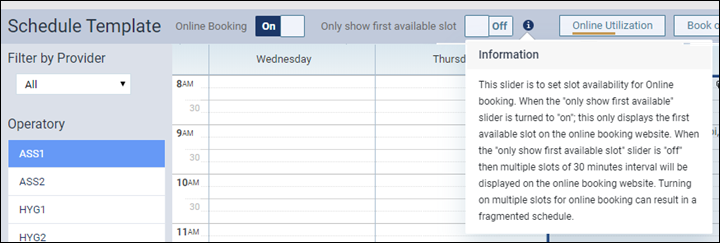
If you prefer to retain the original functionality, you may turn that back on using the new Only show first available slot switcher in the Schedule Template page.
Provider Default Operatory
To make scheduling more efficient, you now can assign a default operatory to a provider.
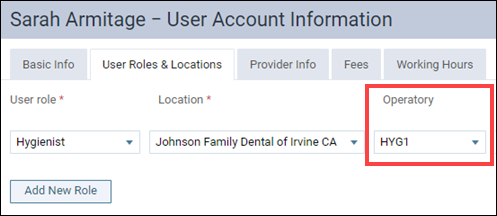
The effect of this is, when you view the Calendar by provider (Provider View) and click to create an appointment, the operatory automatically fills in when you select the provider.
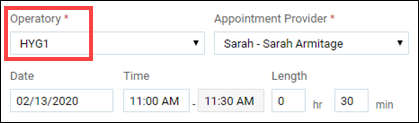
If you change the provider, the operatory changes automatically. You can change the operatory as needed after selecting the provider.
This is an optional feature. Assigning a default operatory is not required to set up a provider user account.
Provider Working Hours Enhancement
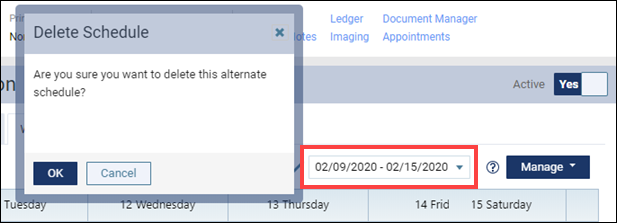
The ability to create alternate work hours for a provider, for a specific date range, was introduced a couple of releases ago. New to this release is the ability to delete the alternate schedule configuration. To do this, open the provider’s Working Hours tab (Settings > User Accounts), select the configured date range from the dropdown, and click the Delete button in the lower right corner of the page. A pop-up window will ask you to confirm the deletion.
Billing
Per-visit Charge for Sliding Fee Program
As an additional enhancement for practices participating in an income-based sliding fee discount program, Dentrix Ascend now can charge a flat per-visit fee, regardless of the procedures performed during the visit.
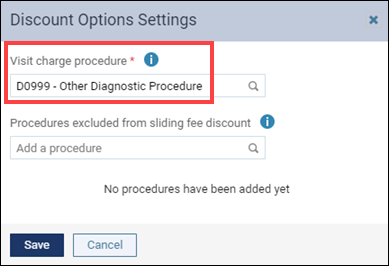
To enable per-visit fees, open the Discount Options page (under the Settings menu). Click the Settings button to open the Discount Options Settings window. In the Visit charge procedure field, designate a procedure code to represent the visit charge. You can choose any whole-mouth procedure. For this example, we are using D0999 “Other Diagnostic Procedure”.
Next, edit the Discount Fee Scale and set the Patient Pays method to “$ per visit”. Type in the charge amount and click Save.

Once you configure a per-visit charge, patients assigned to a sliding fee will have a message in their Patient Information page that reflects this discount arrangement, assuming that they fall within the column guidelines. For more information on configuring the Discount Fee Scale, see Setting up a sliding fee scale.

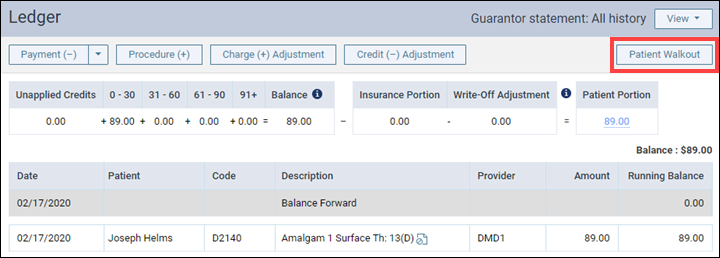
To apply this per-visit feature, after completing today’s procedures you must use a new Discount tab in the Patient Walkout window (and your user role must have the Edit patient procedure amount right). When you first open the patient’s Ledger, you will see the regular charge amounts for the procedures completed today. Click the Patient Walkout button to open the Patient Walkout window.

In the Discount tab, select the procedures to include in the visit, and set the Visit charge provider if different from the rendering provider. When you’re ready, click Post Discount. The visit details disappear. Click Close to close the window and return to the Ledger.
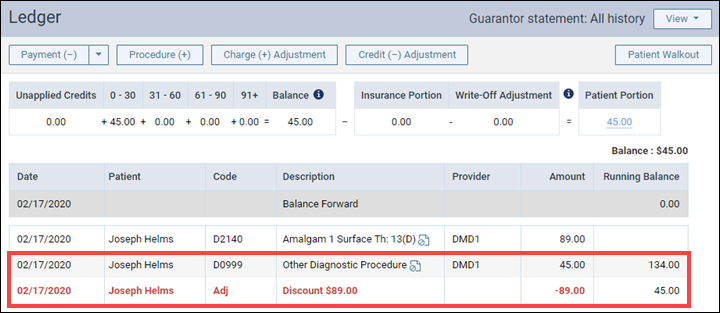
Returning to the Ledger, you will see two things: the addition of the per-visit procedure code, and an adjustment that sets the total amount of the visit to the per-visit charge.
Note that Production Totals in the Calendar uses the per-visit fee to calculate the Net production.
Reporting
Aged Receivables Enhancement
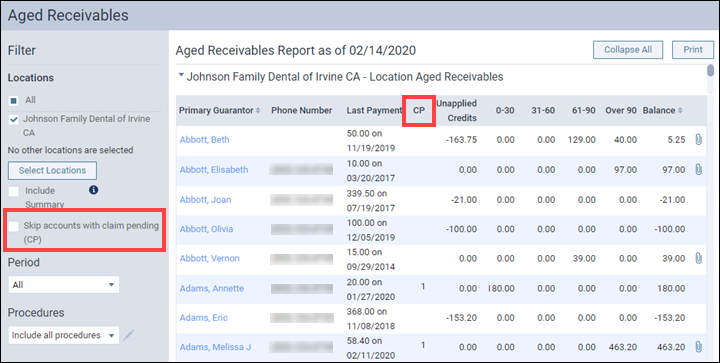
The Aged Receivables report has a new Skip accounts with claim pending filter. When the checkbox is marked, the report will not include accounts with claims pending.
Related to this, a new CP (claims pending) column was added to the report. When you choose to include accounts with claims pending, the CP column displays a count of how many claims are pending for each guarantor. A blank means no claims are pending. The claims pending counts are as of the time you run the report.
Power Reporting
Daily Huddle Dashboards
Two new “daily huddle” dashboards are now included in the Power Reporting suite. As you know, the purpose of a daily huddle is to get a snapshot of how things went yesterday in terms of production, collections, new patients, and scheduling. These two dashboards represent phase one of Dentrix Ascend’s daily huddle implementation.
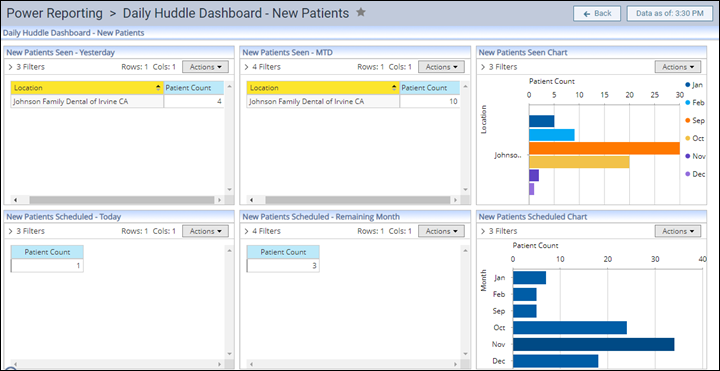
In Power Reporting, a dashboard is a collection of several pre-configured reports. The Daily Huddle Dashboard – New Patients report focuses entirely on your new patients, with the ability to see numbers for yesterday, today, the rest of the month, and so on.
The Daily Huddle Dashboard – Production, Collections report, as the name implies, summarizes production and collection numbers for yesterday and the month to date, looks at today’s scheduled production, and forecasts production for the remainder of the month.

The individual reports within the dashboards are exportable to PDF or Excel. You can remove but not edit the pre-configured filters. You can convert tables to graphic charts and vice versa.
Each of the reports within dashboards also exists as standalone report within the Power Reporting module, and you can edit and save new versions of those reports for yourself or your organization. To find them, type “DH” in the Power Reporting search field.
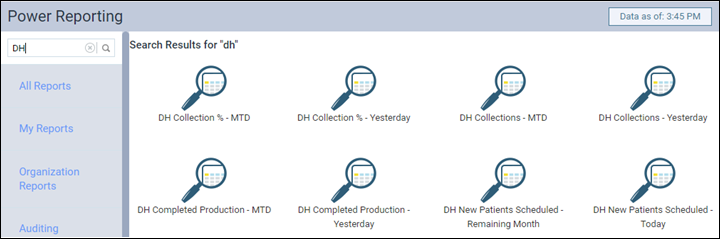
At this time, the daily huddle reports are not under any category and just live in the All Reports section.
New Lab Cases Report Added
To support the lab cases feature, which has rolled out over the last three releases, new to Power Reporting is a default report called Lab Case – Appointments, located in the Schedule/Recare category.
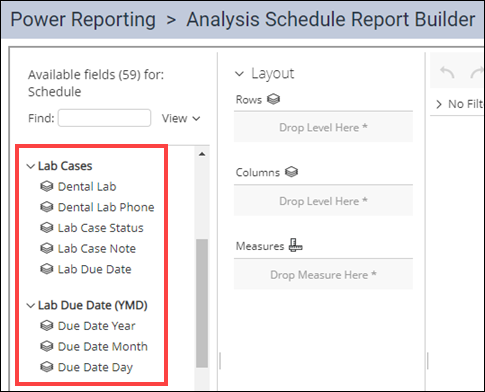
Additionally, the Analysis Schedule Report Builder now includes Lab Cases data fields for your custom-built reports.
Unapplied Credit Report Redesigned
Based on your feedback, the Unapplied Credit Report has a new set of default filters. We added a Location field and now include all unapplied credit amounts.

Usability
Location Abbreviation Code Expanded to Five Characters
The new Abbreviation field in the Location Information page, introduced in the last release, has expanded to allow a prefix of up to five characters to the location name.

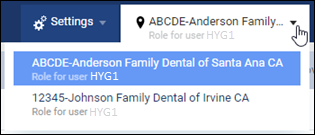
As before, the abbreviation shows up in the location selector, and optionally in your walkout and billing statements.
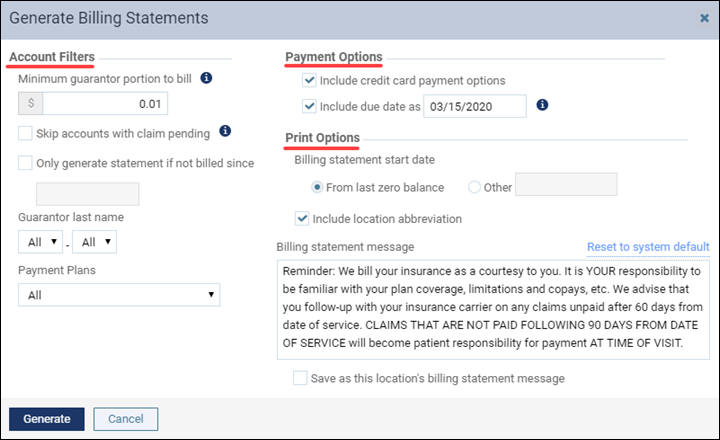
Generate Billing Statements Interface Update
This release introduces some improvements to the organization and field naming in the Generate Billing Statements window in the Billing Statements page.
User Rights
The following changes to user rights are included in this release:
- Distribute clinical note templates (in the Settings category) allows the user to copy selected clinical note templates from the current location to other locations in a multi-site practice.
Imaging
This release includes several new Imaging features and improvements to existing features. New features include:
- Direct integration with the Dexis DEXcam4 HD camera
- Direct integration with the Dexis CariVu camera
New Learning Content
Have you visited the Resource Center lately? We add or update topics all the time. Here is a sampling of what’s new:
Sending Electronic Statements
The simplest and most inexpensive way to transmit your patients’ billing statements is to send them electronically.
Collecting Missing Contact Information
Automated appointment reminders are the most efficient way to reduce patient no-shows and retain patients.
Adding Procedure-Specific Treatment Consent Messages
One of the best ways dentists can protect themselves is by ensuring patients are armed with the facts needed to make informed decisions, and the best place to provide this information is in a treatment consent form.
Scheduling Recare from the Routing Panel
Unless a consistent workflow is established or a reminder system is in place, it can be difficult to remember to schedule a patient’s next recare appointment. Dentrix Ascend has a solution!
Checking Insurance Eligibility
In the ever-changing world of dental insurance, keeping track of patient insurance can be a full-time job. Fortunately, Dentrix Ascend makes it easy to verify insurance eligibility in just a few clicks.
Attaching Lab Cases to Appointments
Did you ever have a patient show up for an appointment, only to discover that the lab case hasn’t arrived from the lab yet? Dentrix Ascend helps you avoid this awkward situation.