The product update released September 21, 2021 represents an improvement in the Dentrix Ascend development process. Beginning with this update, you will see smaller but more frequent releases. This approach helps us achieve our goals to improve quality. You will see new features take shape more gradually. We will clearly announce when a new feature is ready for use.
Clinical Efficiency
Specify Range as the Treatment Area
With this release, you can now specify a range as the treatment area for procedure codes when creating new custom codes, also known as alias or “point” codes. To do this, from the Settings menu, open the Procedure Codes & Conditions page.
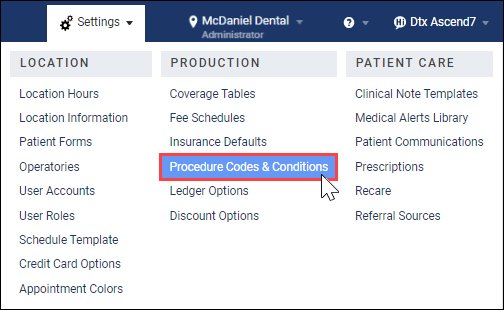
Click Add Procedure Code.

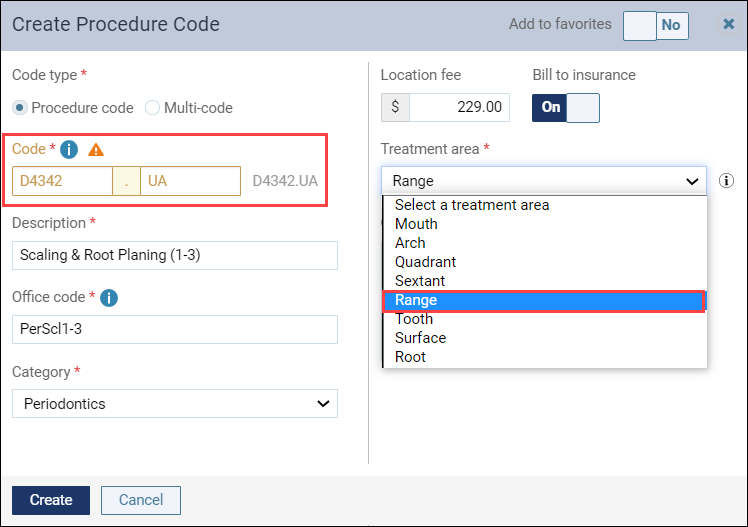
Enter the code and the other required information. If the code you choose already exists in the database, Dentrix Ascend will prompt you to type a suffix for the code to create an alias code. From the Treatment area list, select Range. Note that the sorting order in this list has been updated so that the areas are listed from largest to smallest.
Now, with a range of teeth selected on the Chart, you can chart the custom procedure code.
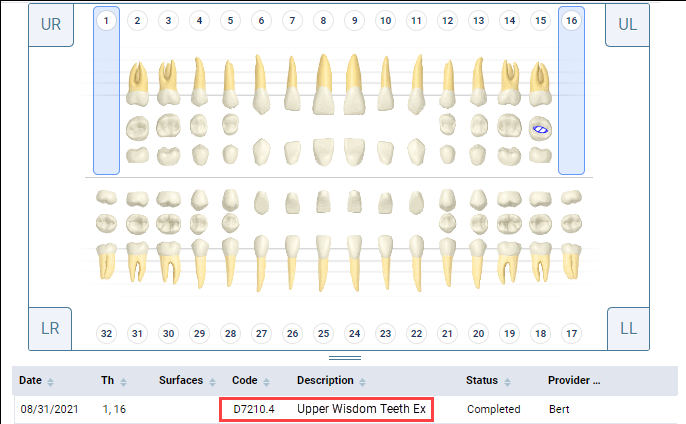
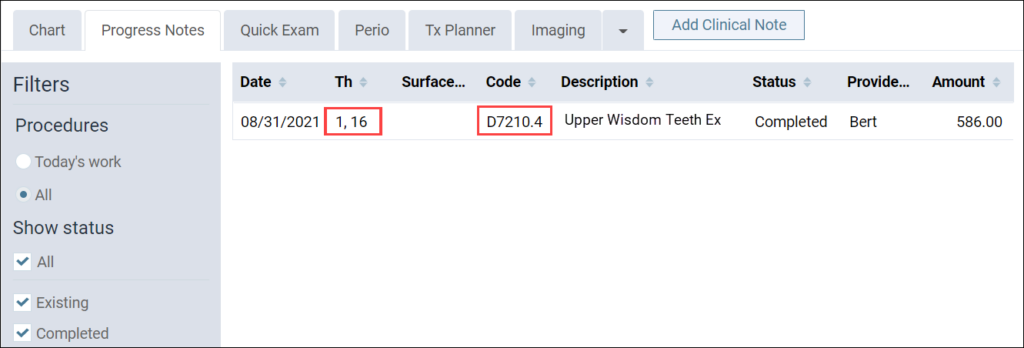
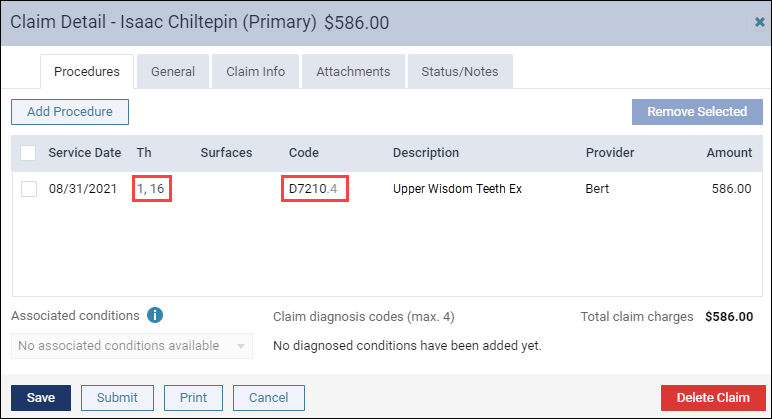
The teeth you select for the range will appear in the progress note and on the insurance claim.

Power Reporting
Predetermination added to Procedure Tracking Report Builder
In addition to the two existing predetermination reports, Predetermination – Tracking and Predetermination – Unsent, this update introduces a new Analysis Procedure Tracking Report Builder. This new tool is ready to assist you in creating custom reports to track your predeterminations from the treatment-planning phase to procedure completion.
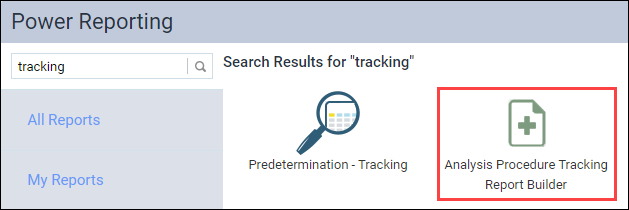
As with any Analysis Report Builder, the report is empty until you select fields to add to the rows, columns, or measures. The important thing to note is that a set of predetermination fields is now available.
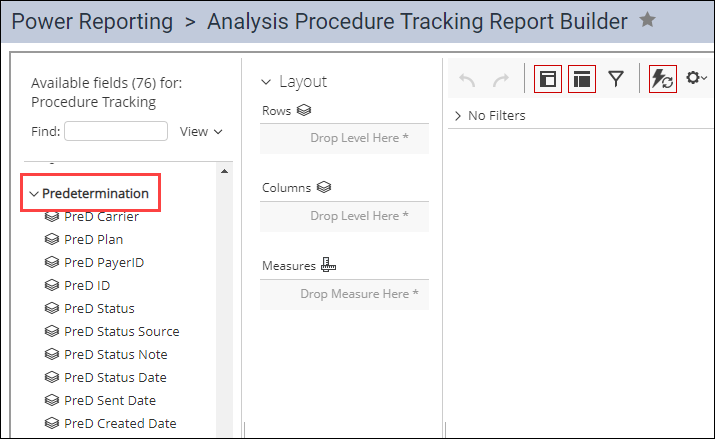
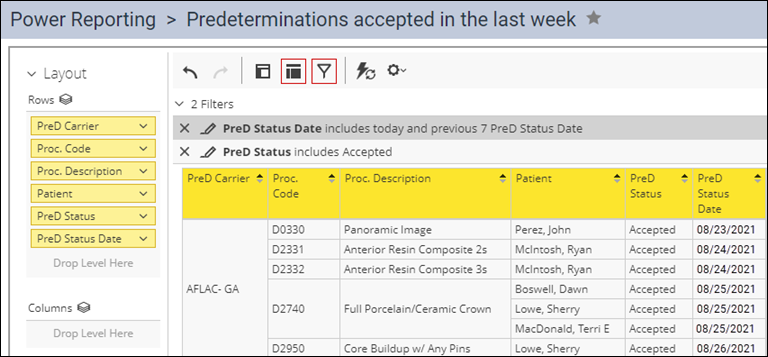
Create a report to meet your needs, and save it as a custom report, either for your use or to be shared with the organization.
ePrescribe Enhancements
ePrescriber Account Sharing
With this update, traveling providers associated with more than one Dentrix Ascend organization can enter electronic prescriptions in locations that they have access to across multiple Dentrix Ascend organizations.
In the past, if a provider, using the same NPI number, attempted to enable electronic prescriptions in a secondary location that corresponds to another organization, a warning message, stating that their NPI number was already in use, would appear. With this update, the provider’s information is available for all Dentrix Ascend organizations they may be associated with, so they can enter electronic prescriptions wherever they may be.
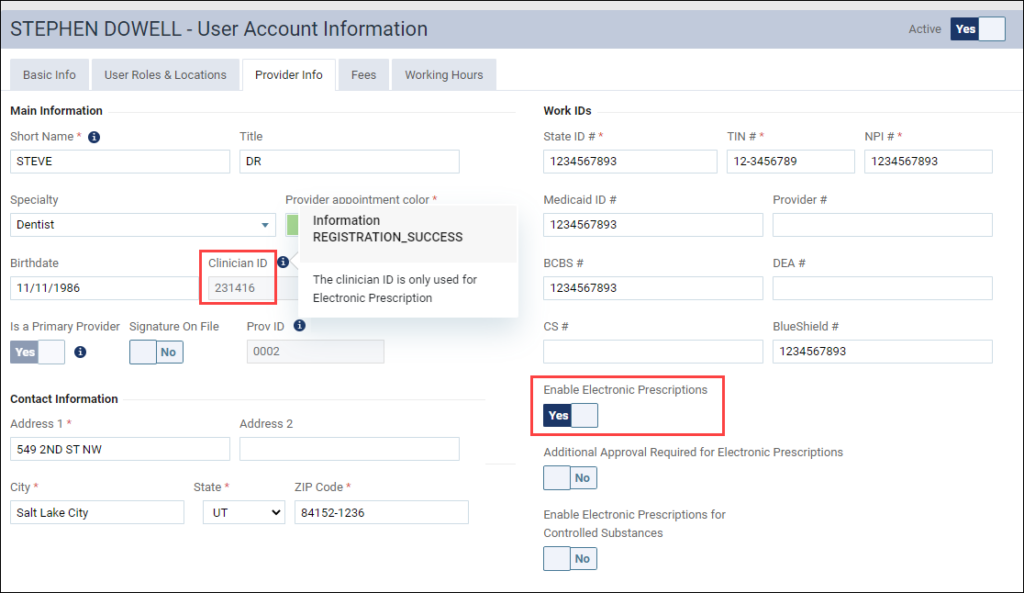
To enable electronic prescriptions for a provider in a location within a different Dentrix Ascend organization, open the provider’s User Account Information page, and select the Provider Info tab. Then, toggle the Enable Electronic Prescriptions switcher to Yes, and click Save. The Clinician ID number automatically appears because the provider’s Clinician ID carries over from the first organization with which they were originally set up.
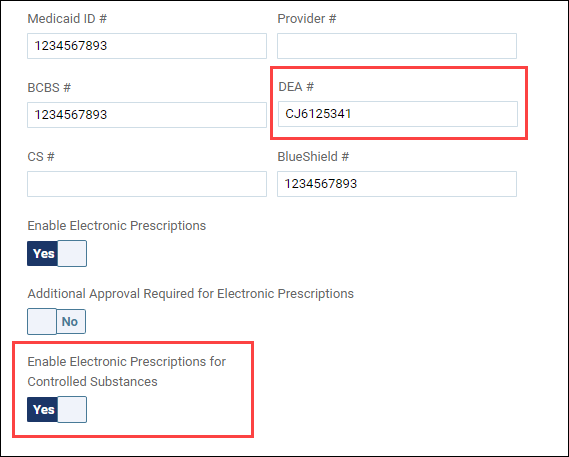
For provider’s that are registered for Electronic Prescriptions for Controlled Substances (EPCS) with one Dentrix Ascend location, to enable EPCS, you only need to enter the provider’s DEA number, and toggle the Enable Electronic Prescription for Controlled Substances switcher to Yes. Two-factor authentication is not required because the provider completed this step the first time they registered.
Note: The ability to share the Clinician ID, NPI #, and DEA # between Dentrix Ascend organizations is only available for prescribing providers. Proxy users are not allowed to share credentials between organizations.
Note: To enable electronic prescriptions for a provider across multiple Dentrix Ascend organizations, that provider’s user account must be active within those organizations. If the account has been inactivated in one organization, that provider’s electronic prescription account information will not be available in other organizations.
Height and Weight Requirements for Pediatric Patients
With this update, ePrescribers must enter the height and weight for their pediatric patients to meet the new electronic prescribing dosing requirements set forth by the National Council for Prescription Drug Programs (NCPDP). Now, when you add a new electronic prescription in Dentrix Ascend, if DoseSpot recognizes that the patient is under 18, an Enter Patient’s Height and Weight dialog box automatically opens.
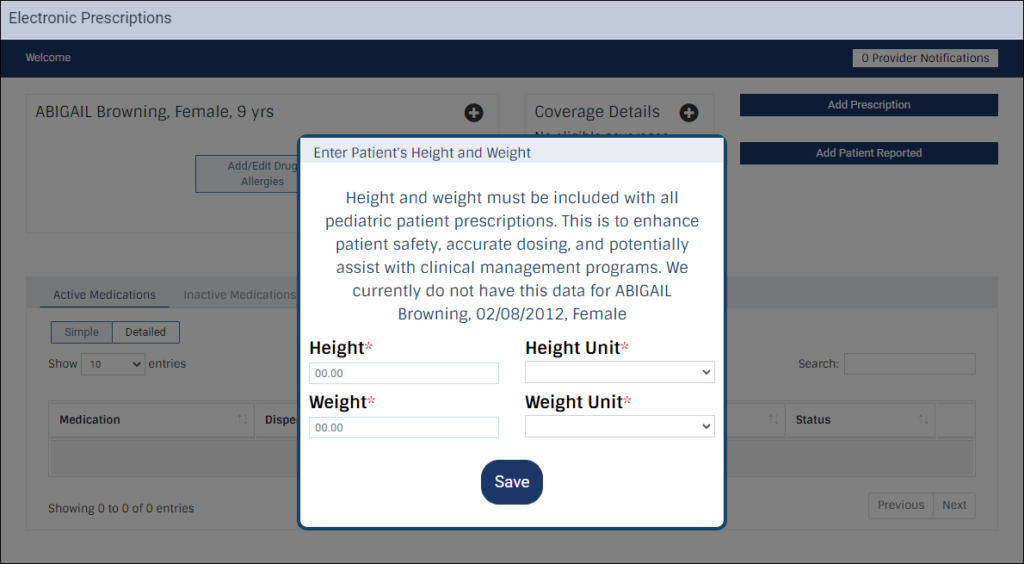
You must enter the patient’s height and weight before you can enter the electronic prescription.
You can enter the height in inches (in) or centimeters (cm) and the weight in pounds (lb) or kilograms (kg).
When you click Save, you can proceed with entering an electronic prescription. You will not be required to enter a patient’s height and weight again the next time you want to enter an electronic prescription for that patient.
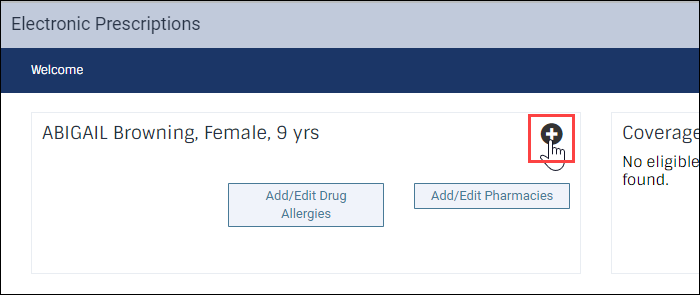
The height and weight can be edited on the patient’s Electronic Prescription page. Click the plus icon, click Edit Height and Weight, update the measurements as needed, and then click Save.
Important: Dentrix Ascend does not store any height or weight information in the patient’s record. This information resides strictly within DoseSpot.

Upcoming Event Announcements
A new section has been added to the Guide Center that you see when you click the cloud icon in the lower-left corner. Click the Upcoming Events section to see details of upcoming webinars or other events, and to register for these events.

User Rights
No changes to user rights are included with this update.
New Learning Content
In addition to the hundreds of articles and videos in the Dentrix Ascend Resource Center, Dentrix Ascend also publishes a regular stream of tips and tricks on its #DentrixAscendBlog web page. Below is a sampling of recent posts. Click a title to open the topic.
Charting Supernumerary Teeth
Dentrix Ascend makes it easy to chart and submit claims for patients with extra teeth.
Protecting Your Insurance Estimates from Unapproved Changes
Prevent unapproved changes by managing which users can edit insurance estimates.
Reactivating Inactive Patients
Reactivate inactive patients to view their old exams, procedures, claims, and more.
Online Payment from the Patient’s Point of View
See online payment from a patient’s point of view so that you can tell them what to expect when they pay a bill online.
