The product update released May 26, 2020, introduces the ability to color appointments in the schedule according to appointment type. An enhancement to patient communications allows you to see incoming text message responses. With this update, you may edit and resubmit insurance claims without deleting the claim and starting over. The Imaging module now has an offline mode that allows you to capture x-rays in Ascend even if your Internet goes down.
Scheduling
Appointment Colors Based on Procedure
Up to this point, appointment colors in the Calendar were solely a reflection of the colors assigned to the appointment provider. With this update, you may choose a different schema: colors assigned by appointment type. You may use provider and appointment type colors in combination, and specify which view is dominant.
Since dental offices often feel pressed for time, we want to make appointment information immediately accessible for you the moment that you need it. Applying colors to procedures can provide you and your office with the information you need “at a glance.” Coloring appointments by procedure type allows assistants, doctors, and office staff to know what kind of procedures are coming up in each operatory.
To customize your appointment colors, open the Appointment Colors page (Settings > Appointment Colors).
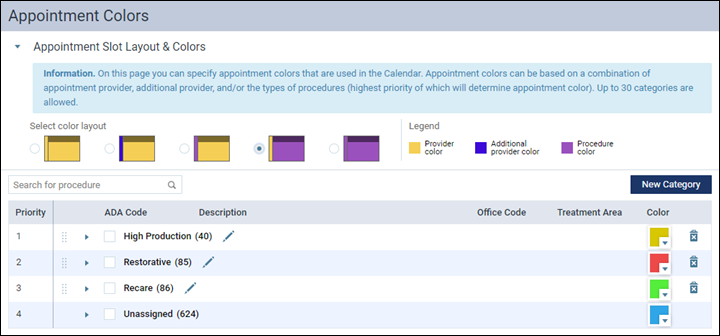
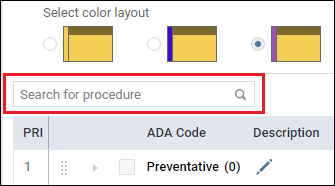
The first thing to do is to select a layout. There are several options available to you. The Select color layout legend demonstrates the possible variations. Select a radio button to choose the option that best fits your office needs.

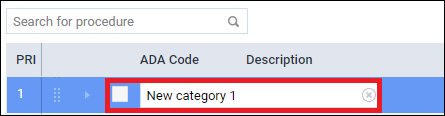
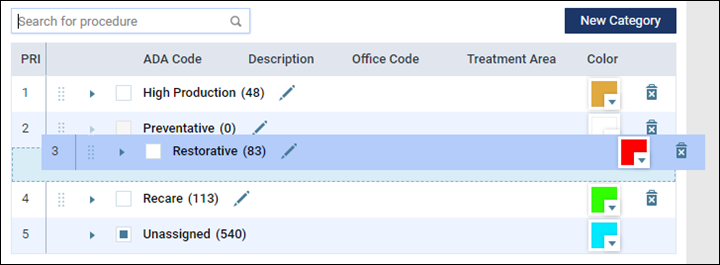
Next, you must define procedure categories. A category is a group of procedures that share an appointment type color. You might choose to label them as Restorative, Preventative, and Recare. Or you might want a different method of categorizing your procedure types. Select New Category to add a category for procedures. You can add up to 30 categories.

In the New Category step, enter the name of your category.
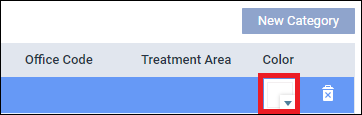
Select the color box to assign a color to this category of procedure.
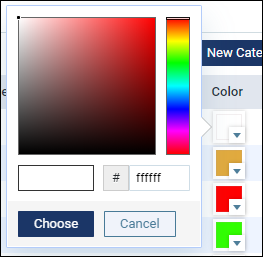
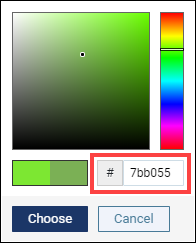
Choose a unique color for this category, either by clicking in the swatch area or by typing a hexadecimal value.
You can rearrange the order of your categories to prioritize the procedure types. Category priority answers the question: if the same appointment has both a restorative procedure and a preventative procedure, which color should the appointment display? To set the priority, click the Drag and Drop icon next to the procedure you want to move.

Move the category to the priority level of your choice. Note that the Unassigned category is always the lowest priority and cannot be renamed or deleted.
The last step is to add procedures to each category. Search for procedures using the Search for procedure bar. Search by code or name. Selections appear as you continue to type.
Or you can search the Unassigned category to choose procedures. To do so, select the down arrow next to the category labeled Unassigned.

Select the procedures you want to move to your new category.
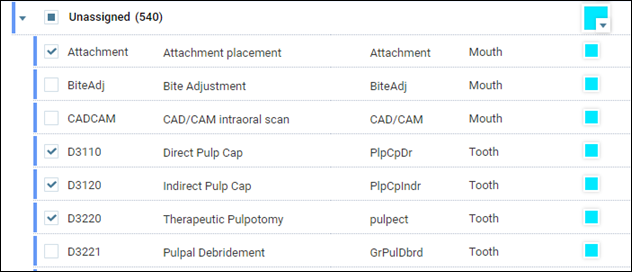
Next, click Move Selected To at the bottom of the page, and select the category where you would like to add the procedures.

Tip: If you choose to group procedures by treatment categories, you can for example search “D0” to list all procedures D0100 – D0999 and do a select all to speed up sending a range of procedures to a category. You can move individual codes later.
Visit the Calendar to see the effect of your changes. Appointment color settings are location-specific. After seeing your color selections on the schedule, you may decide to make some changes. Just go back into the Appointment Colors page and click a color box to make a change. When you edit a category color, a color preview bar above the Choose button shows you both the current color and your new color. Click Choose to confirm the change, or Cancel to keep your current color.
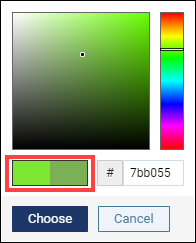
Tip: You see a hexadecimal number next to your color selection. This is an HTML color code. If you know a precise value for your color, you can type that code into the box. For help picking complementary colors, visit a site like HTML Color Codes for ideas.
Use of this feature is optional. Coloring appointments by provider continues to be the default. Appointment color configuration is location-specific.
View Text Message Responses
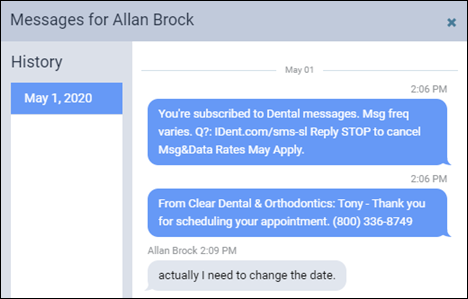
Before this update, if a patient replied to a text appointment reminder with a message like, “Sorry, I can’t make it”, or “No”, or so on, that message was completely lost and Dentrix Ascend had no knowledge or record of it. This new feature allows you to see those replies. You can view all related messages in the context of an appointment and not miss any important responses. Just to be clear, this basic feature does NOT include two-way texting; you can see patient messages but not respond to them from within the platform. Keep in mind also that Dentrix Ascend sends “patient” communications to the primary contact rather than to the patient.
Dentrix Ascend notifies you of messages received by displaying a red dot next to your user name in the blue menu bar. The number in the dot represents the total number of unread messages. Note that this number goes down when any team member marks a message as read.
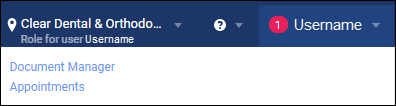
Your user role must have the new Review inbox messages right to see this notification. This ensures that only those team members tasked with monitoring patient text responses will see it. As a shortcut, click the notification dot to open the new Inbox page. Alternatively, you can follow Home > Inbox.

Unread messages are in bold italic text. After you have read the message, click Mark as Read to indicate you read it. If there is nothing else to do, hide the message from the Inbox by clicking the Hide icon. (Clicking Show messages to see all the messages in the thread automatically marks the message as Read.)
If you need to respond to the message, the mobile phone number displays along with the message. For more information, the primary contact name is a hyperlink to the Patient Information page, and the next appointment date and time hyperlink opens the appointment panel in the Calendar. You can filter messages using the View dropdown and can even look up hidden messages. You can also look for a specific message by typing a patient name or phone number in the search box. (The search finds only those messages that are in the current view.)
You can see a patient’s text messages in several areas of the platform. There is a new Show Messages button in the appointment detail panel and a new Show messages hyperlink in the routing panel.
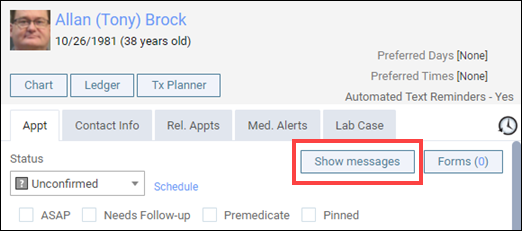
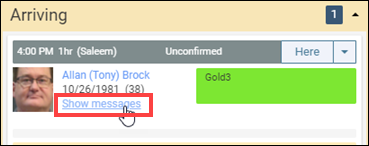
From either link, click to open a pop-up and see the patient’s message history. Note that the button or link appear only when a patient has responded to text messaging.
You can also see patient messages in a new Text Messages tab of the Patient Connection page.

There are two new user rights associated with this feature. The Review inbox messages right allows you see the Inbox page, view the number unread messages in your user menu, see message pop-ups, and mark a message as read or unread. The Manage inbox messages right additionally allows you to hide messages. You must have the Review right in to have the Manage right.

Insurance
Edit and Resubmit Claims
With this update, you can open an unpaid primary or preauthorization claim, make modifications, and resubmit—regardless of its status. There is no need to delete the claim and start over. We hope this makes the claim resubmission process faster and easier. To support this functionality, you will see several changes to the Claims Detail window.
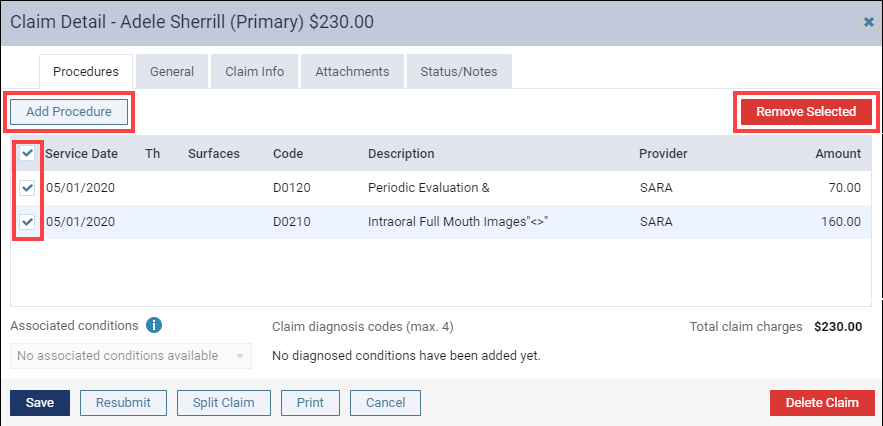
The Procedures tab has the following new features:
- Add Procedures button – click to add unattached procedures to the claim
- Service Date check boxes – select procedures to be removed from this claim
- Remove Selected button – after selecting procedures, click this button to remove those procedures from the claim. These procedures become “unattached” again and you can assign them to a new or different claim with the same service date. Note that you cannot leave the claim empty; if you need to delete the only procedure on the claim, simply delete the claim (click Delete Claim).
Pre-posted write-offs automatically update when you change the procedures included or the provider (contracted vs. non-contracted) in the claim.
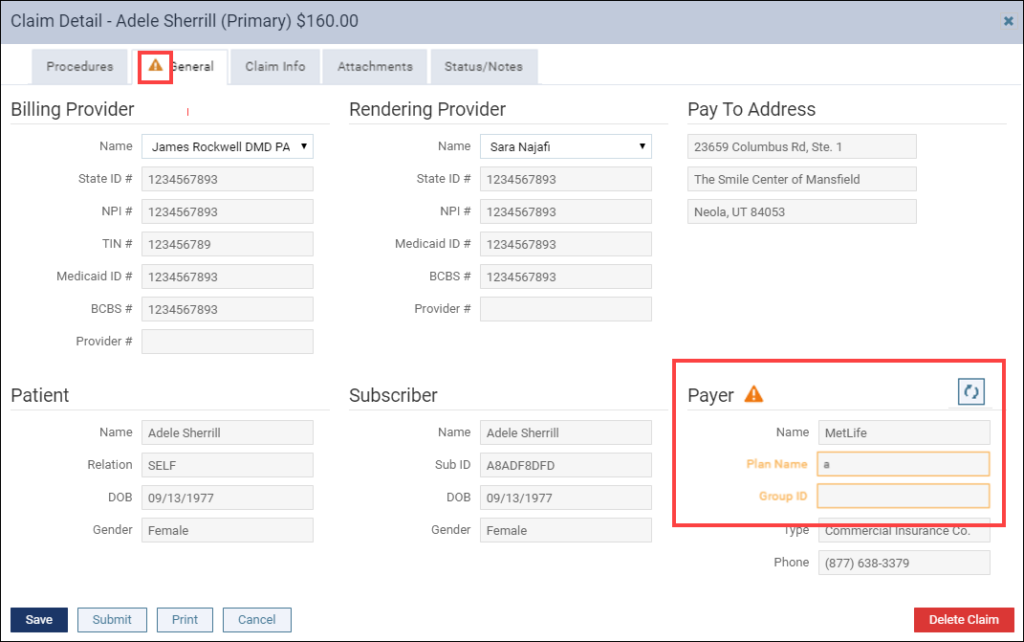
The enhancement to the General tab mainly is notification. If you change either the subscriber or the payer associated with the patient while a claim is outstanding, you have the option to update the claim. To support this, the General tab has the following new features:
- Warning Notification symbol – an orange triangle warns you that insurance information changed
- Modified field warning – an orange triangle appears next to the Subscriber or Payer sections to highlight where the change occurred. An orange outline highlights the specific field. Hover over a triangle to read the explanation.
- Refresh button – changes to the subscriber or payer do not automatically update the claim. You must do this manually by clicking the refresh button (looks like a recycle symbol), which pulls in the information and updates the field. The reason for this is that even though the patient subscriber or payer information changed, because of the service date you may not want to change that information in this claim.
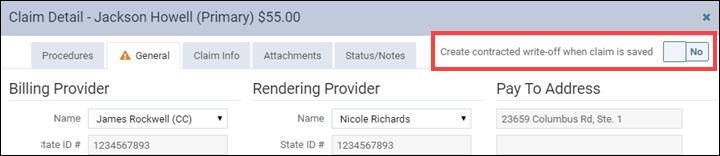
The General tab provides for a special condition. If you change the Billing Provider or the Rendering Provider from a non-contracted to a contracted provider, a new Create contracted write-off when claim is saved switcher appears to help you determine whether to create a contracted write-off.
The Status/Notes tab has the following new feature:
- The Original Ref Number field is renamed to Payer Claim Reference #
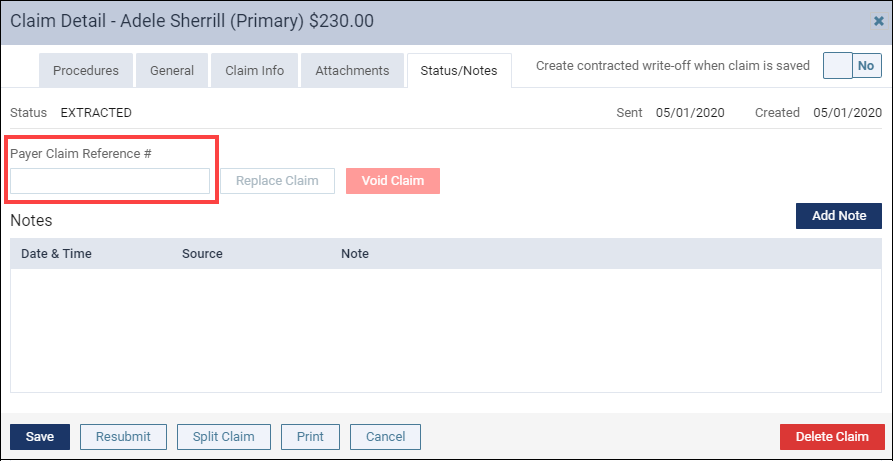
When you finish updating the claim, click Resubmit. Note that claim editing is only available during the “open” period, i.e. not closed due to transaction locking rules.
Clinical
Sextant Treatment Area
You can now create or modify procedure codes and assign a sextant as the treatment area.

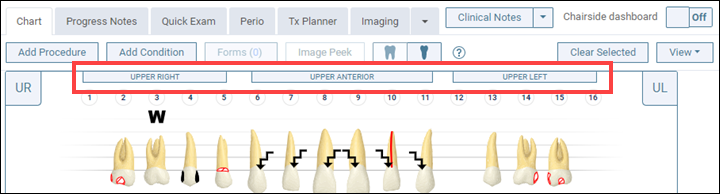
If you choose to work with sextants, you can select sextant treatment areas in the Chart, Perio Exam, and Quick Exam tabs, and in the Clinical Notes pop-up menu. The Chart controls whether sextants display in all these pages. To show sextants, in the Chart View menu select Sextant selectors.

You can add sextants as quick picks in a clinical note template.

The standard sextant area abbreviations are UR, UA, UL, LR, LA, and LL. You will recognize that quadrants also use UR, UL, LR, and LL as abbreviations. Therefore, in Dentrix Ascend these abbreviations now include a superscript “stx” or “q” wherever they appear, for example in progress notes and clinical notes, to help you distinguish between them.

Usability
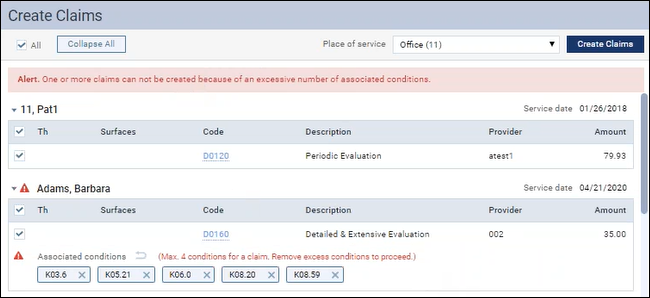
Create Claim Alerts
This update adds condition tag-related alerts to the Create Claim page and the Create Claims tab of the Patient Walkout window. Not only will you get a warning at the top of the page when any claim violates the inclusion of more than four condition codes, but the warning also repeats at the specific claim. This will improve visibility of the error condition when you scroll through a lengthy list of claims.
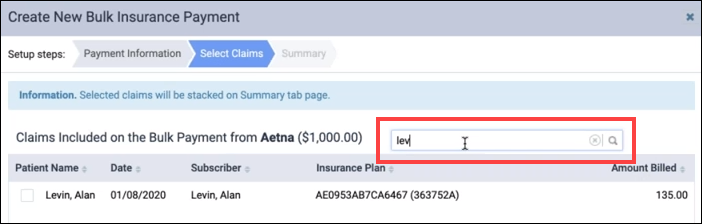
Bulk Insurance Payments
The number of claims you can upload to a bulk insurance payment increased from 500 to 1000 payments. The Select Claims step of the wizard now includes a Search field that allows you to search for a patient name, subscriber name, insurance plan, or amount billed in the list of claims. You now can sort the claims in that step by any of the columns. The Summary step also has sort the capability.
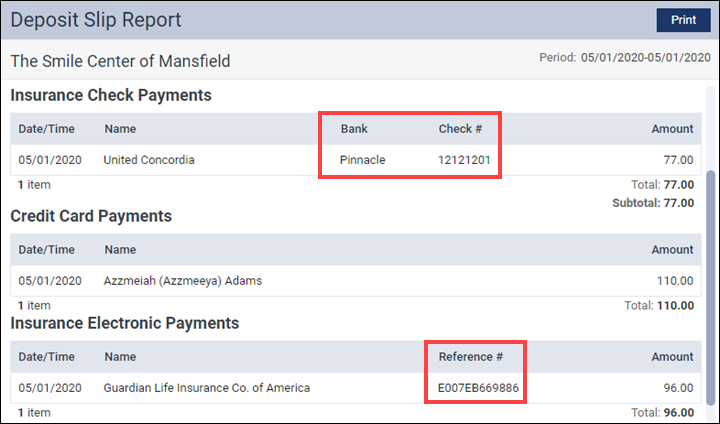
Deposit Slip Report
We reformatted the report column headers slightly to make more sense in context. The Bank and Check # headers only appear for check payments, and a new header Reference # appears for electronic and financing payments.
Quick Exam
When you select a condition, existing work, or treatment plan in the Quick Exam, a quick animation and an emphasis of the column title will help you see that Dentrix Ascend recognized your selection and added it. Previously, you may have felt some uncertainty and clicked multiple times to make sure.
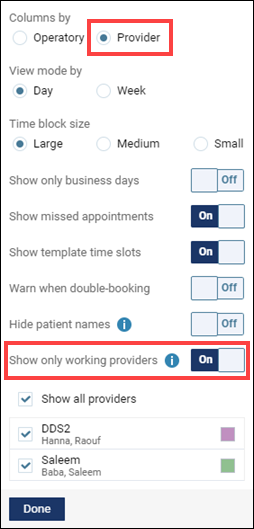
Provider View
This enhancement is for you who prefer to work in the Calendar using the provider view. As a continuation of the feature introduced in the last update that made a provider name a hyperlink to make that provider unavailable for a day, the Calendar View menu now has a new switcher available when the view is by provider. Toggle the Show only working providers switcher to On to hide any providers who have no working hours on the Calendar date(s) in view.
Power Reporting
The Patient Health Report—introduced in the last update—received several enhancements. First, the Insights dashboard glimpse now includes evaluation counts.

The report breaks out healthy and unhealthy patient exam numbers and lists the patients seen. You can view and print either list. We also added an explanation of what constitutes a “healthy” evaluation.

User Rights
The following changes to user rights are included in this release:
- A new Review inbox messages right allows you to see the Inbox page, view the number unread messages in your user menu, view message threads (a group of related messages), and mark the message status as read or unread.
- A new Manage inbox messages right allows you to hide a specific message or entire thread. You must have the Review right to have the Manage right.
Imaging
Offline Acquisition Mode
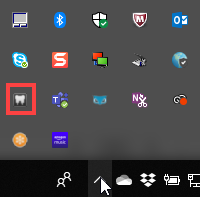
When the Internet is down but you need to acquire images, the Dentrix Ascend Imaging module now includes an offline mode for both PC and MacOS. To use this feature, start by closing your browser. Next, locate the acquisition agent in your device’s taskbar (dock for Mac users).
IMPORTANT: You must update to the latest version of the acquisition agent in order for this feature to work. For help, see Updating the acquisition agent.
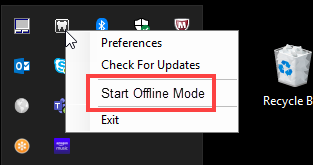
Right-click the icon and select Start Offline Mode from the menu. Offline mode opens a new window of Chrome.
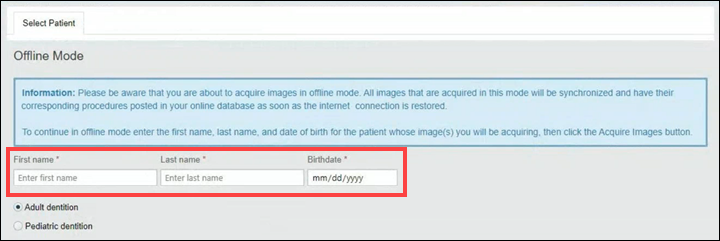
To start acquiring images in offline mode, you must first tell the agent for which patient you are acquiring images. In a temporary Select Patient tab, provide the first and last names, and the birth date.
Once the Imaging module opens, run it as you normally would, with the exception that favorites and custom templates will not be available, because they are stored on the cloud. The images go to a temporary location in your device’s local hard drive. Don’t worry about locating them; they leave when you synchronize and send them up to the cloud.
When you are once again on the Internet and able to access Dentrix Ascend, again close your browser and then turn off Offline Mode (you cannot synchronize patients to the online database when offline mode is open). The next time you open the Imaging module it will start prompting you to synchronize. You can click Remind Me Later to continue working at this time (for example if you have a patient in the chair right now).
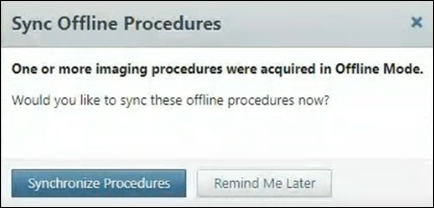
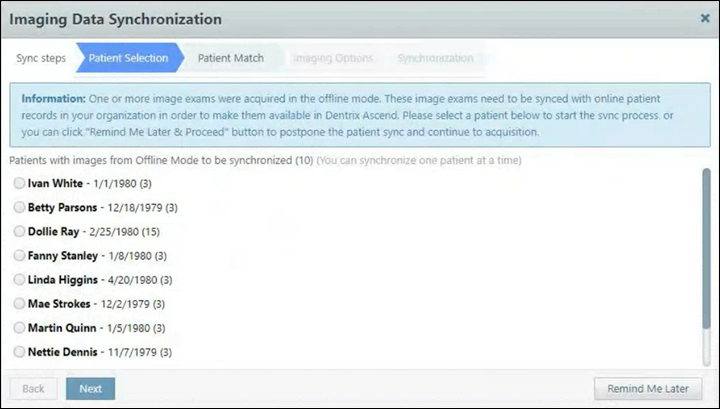
Click Synchronize Procedures to open a sync wizard. The wizard walks you through one patient at a time to double-check that images upload to the correct patient. If the offline patient has a match in the database, Dentrix Ascend automatically selects that patient. If the match is not exact, Dentrix Ascend waits for you to use the Search box to find and select the patient.
New Sensor Support
This update provides integrated support for the KaVo IXS (new Gendex/KaVo intraoral x-ray sensor).
New Learning Content
Hungry for more? The Dentrix Ascend Practice Education team is always cooking up more content to satisfy your appetite for learning and using the platform. Here is a sampler platter for you. Click a topic title to open the article.
Updating Fee Schedules from File
Updating fee schedules doesn’t have to be a chore! Next time you are ready to update your fee schedules, you have the option to perform the update speedily and in bulk by importing a .CSV file.
Using the Chairside Dashboard
Having the tooth chart, progress notes, and images together in one view streamlines your workflow and improves your working efficiency.
Checking Patient Remaining Benefits
Learning how to check a patient’s remaining benefits is important, so that you and your patient have a clear understanding of the amount that remains for the benefit period before any treatment starts.
Deleting Images
You may sometimes want to delete an image from a patient’s record. Perhaps you acquired an image on the wrong patient record, or perhaps the image is blurry. No problem.
Adjusting Online Booking to Align with New Office Hours
Your Online Booking configuration does not recognize when you decide to move to new extended or reduced hours. When that happens, you also need to adjust your Online Booking.
Running an Outstanding Claims Report
Running an outstanding claims report is one way you can improve the cash flow in your dental practice. The Outstanding Claims Report displays aged claims for payers who owe you money.