The product update released June 23, 2020, adds a COVID-19 patient screening form to the Patient Forms suite. You can edit copayment coverage templates in bulk by uploading a .CSV file, and the routing panel has a new button for completing all the procedures in an appointment at once. You can now print the 2019 ADA claim form for carriers with that requirement.
Patient Information
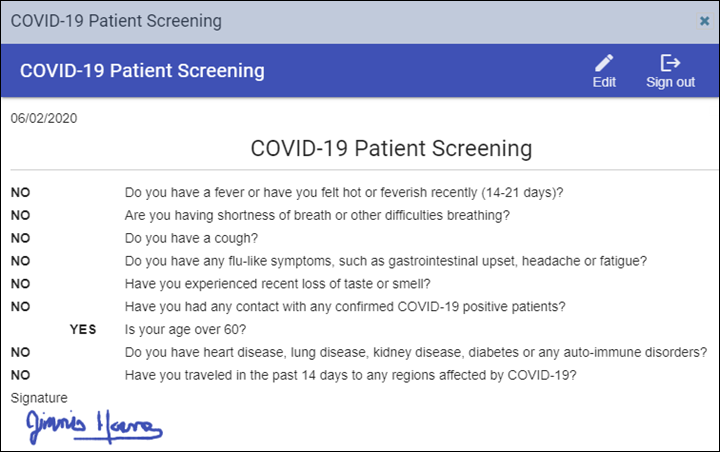
COVID-19 Patient Questionnaire Form
Protect your patients and team members by screening patients in advance of their coming into your practice using ADA-approved questions. Send a link to this new form to support your virtual waiting room plan.
Unspecified Gender Identity
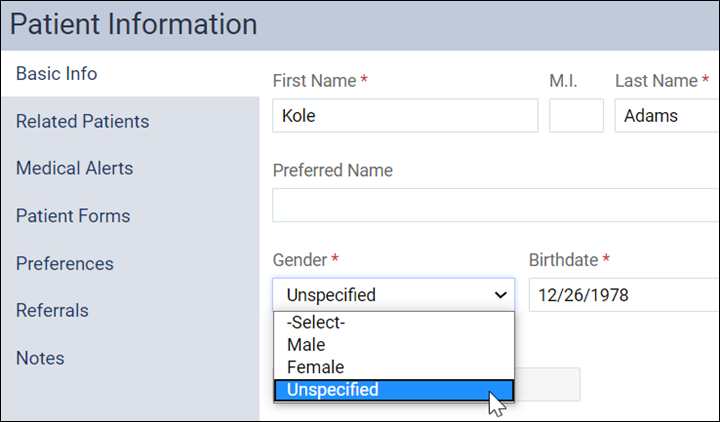
Dentrix Ascend now makes available a printed 2019 ADA insurance claim form. The Gender field in this form includes “U” as an option. To support this feature, you will see several changes in the Dentrix Ascend platform. For example:
The Gender field in the patient Basic Info tab now includes Unspecified as an option.
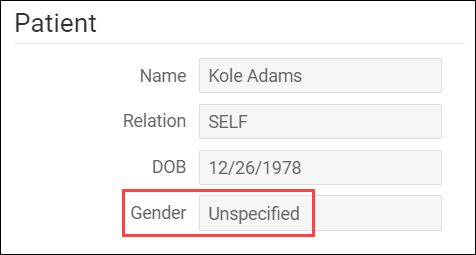
When a patient’s gender is unspecified, and there is no patient picture, the patient avatar becomes a non-gender-specific icon.
The online demographics form includes a Neither option for gender, and in pages or windows where gender is indicated, unspecified gender displays as “U” or “Unspecified” according to the field.
Insurance
Copayment Coverage Table Import from .CSV File
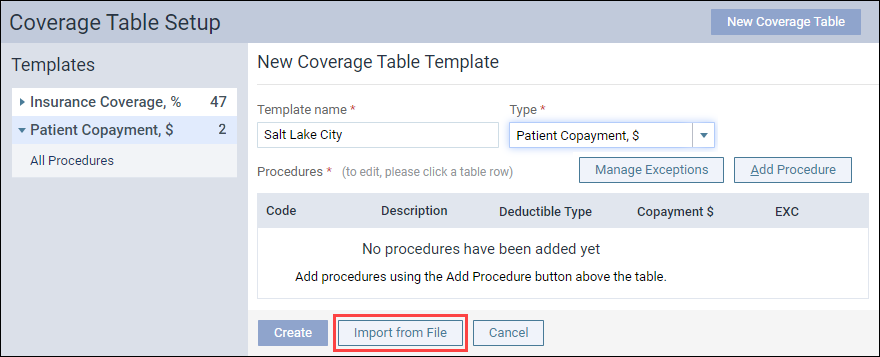
Next time you need to create a copayment coverage table, you can do that quickly and in bulk by importing a .CSV file. You still have the option to add procedures manually.
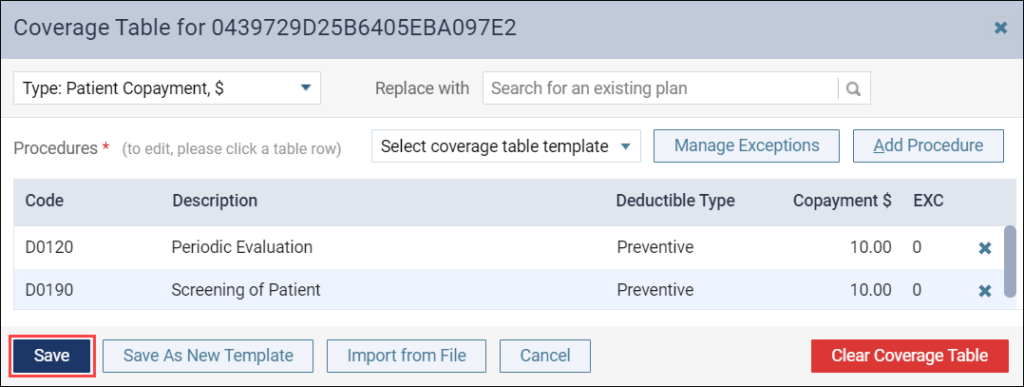
To import copayments from a file, open the Coverage Table Setup page (Settings > Coverage Tables) and select the coverage table you would like to edit (you can also import information into a new coverage table after first creating the table). Click the new Import from File button at the bottom of the page.
There are several steps to importing a coverage table, and a wizard walks you through it.
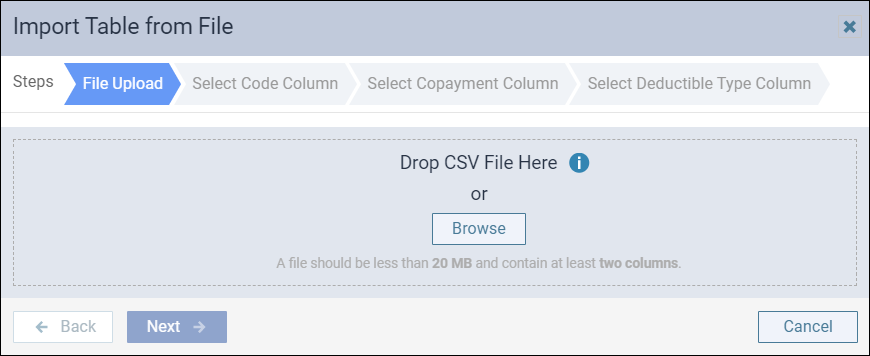
The first thing to do is to acquire the file. You can do this by dragging the file into the work area or by using the Browse button to open an explorer window. Note that your file format and extension must be .CSV, which is an Excel or text file option. Only two columns are required: the procedure code, and the copayment amount (you may optionally include a deductible type column). Dentrix Ascend ignores any additional columns of information. After the file uploads, the wizard automatically advances to the next step.
If your file includes descriptions at the top of each column, toggle the Table has header row switcher to On.
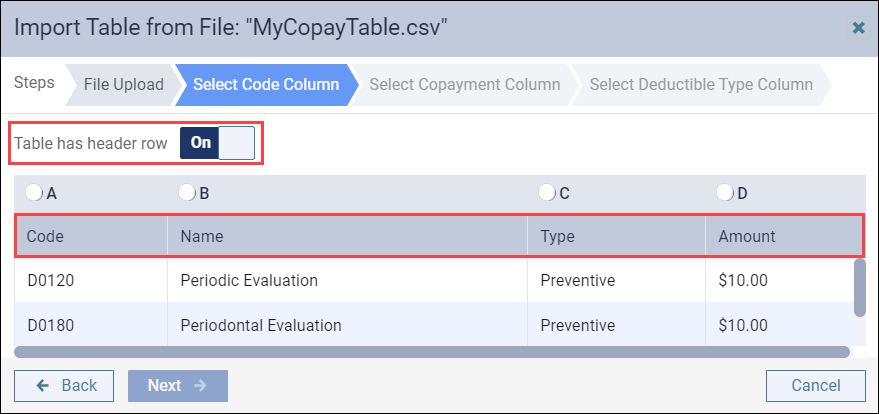
In the Select Code Column step, click the radio button of the column that contains the procedure code. The procedure code format must exactly match the ADA codes in your Procedure Codes & Conditions page (for example, no space allowed between the D and the number) or else the code will not import. Multi-codes do not import. Click Next.

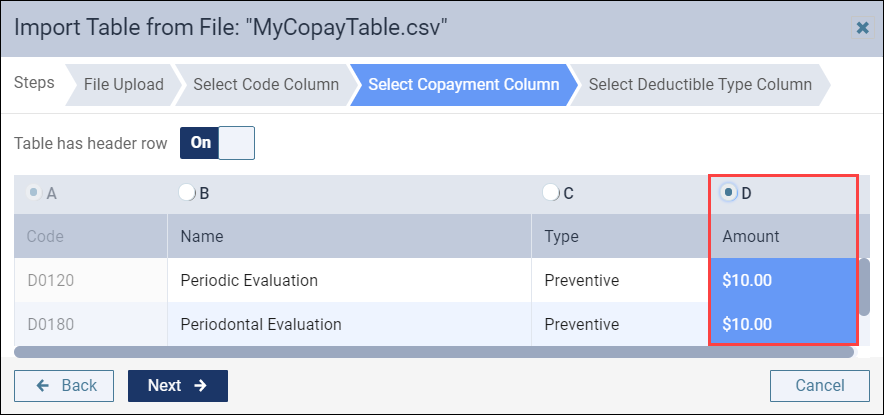
In the Select Copayment Column step, click the radio button of the column that contains the copayment amount. It doesn’t matter if the amount format includes a “$” or not. Click Next.
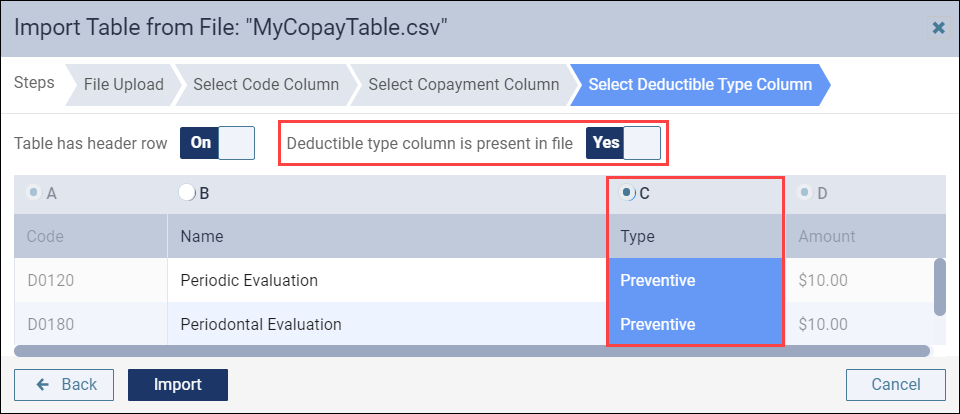
If your .CSV includes a column with the deductible type, toggle the Deductible type column is present in file switcher to Yes. Then, click the radio button of the column that contains the deductible type. The allowed values for this column are Basic, Preventive, Orthodontic, or Major. Any other description will import as None. Click Import. Be patient while the wizard works.
Once the import is complete, Dentrix Ascend reports any errors it encountered.

The last step in the update is to review the import results. You can make manual adjustments if needed at this time.
When you finish the review, click Save.
Note that in an insurance plan copayment table, the button named Delete in the template window was renamed Clear Coverage Table because a plan must always have a table, but it can be empty, which is what the clear function accomplishes. A procedure that does not appear in the copayment coverage table is not covered (patient is responsible for the full amount).
2019 ADA Claim Form
Dentrix Ascend prints claims using the 2012 ADA claim form by default. With this update, you can comply with a carrier request to print the 2019 ADA claim form and avoid delays or denials from that specific carrier. There is no change to electronic claims, which the ASC X12 Standards for Electronic Data Interchange regulates.
To indicate that you want to print a claim using the 2019 version of the form, open the carrier record (Home > Carriers) to see the new Claim Form Options section. Click the Printed claim format dropdown to select American Dental Association, 2019 version, as needed.

The Audit Log tracks changes to this configuration.
Scheduling
Complete All Appointment Procedures with a Single Click
To make the patient checkout process more efficient, a new Complete All button in the patient’s routing panel appointment card allows you to quickly post or complete all the procedures in the appointment.
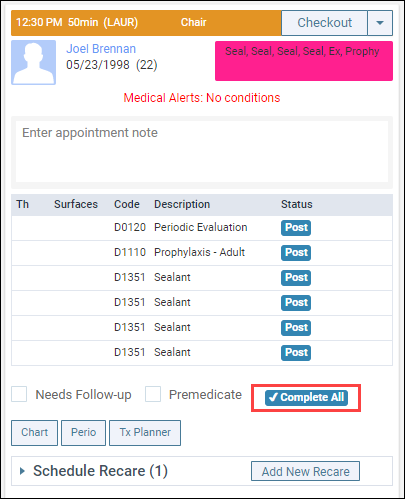
The button appears once the appointment card makes it to the Chair, Checkout, or Complete status in the routing panel.
The name of a procedure’s Status button is Post when the procedure is added to the appointment without being treatment-planned, and Complete when the procedure is treatment-planned.
One of two things happen when you click Complete All:
- All treatment-planned procedures and any posted procedures not requiring a tooth number or surface (for example, a prophy) change to the Completed status.
- A Bulk Edit Procedure wizard opens to guide you through inputting any required tooth number or surface information for posted procedures.
The Bulk Edit Procedure wizard includes a tab for each procedure requiring additional information. Navigate to each procedure either by clicking the procedure number at the top or by clicking the Back or Next buttons at the bottom of the window.
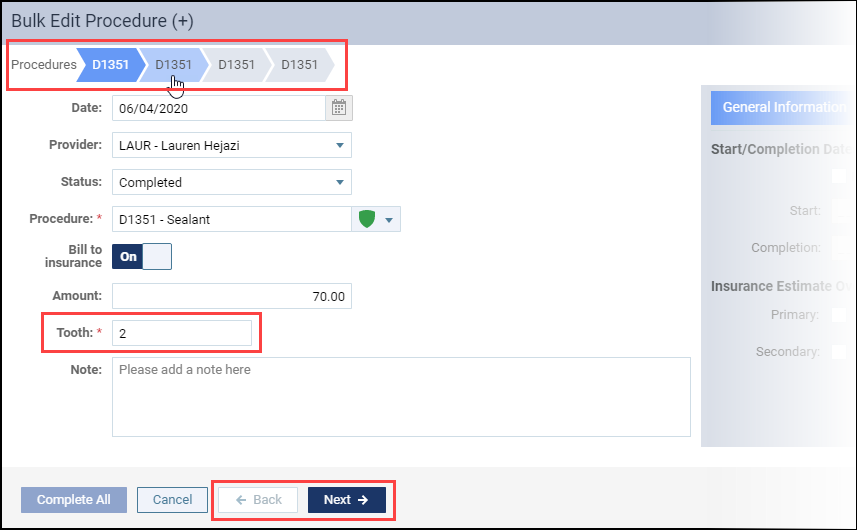
After you enter the required information, a green highlight appears on the navigation panel under the procedure number.
Once you satisfy all the requirements for each of the procedures, the Complete All button becomes available.

When you click Complete All, the status becomes Completed for each procedure.
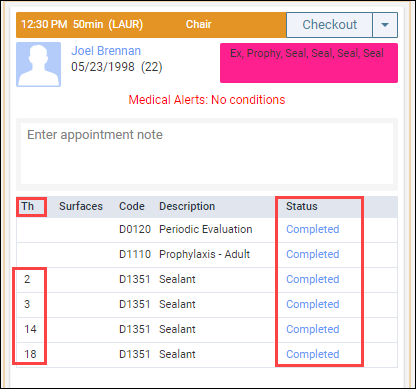
Completed procedures automatically post to the Ledger.
Clinical
Show Perio Exams in Progress Notes
This update adds perio exam visibility to the Progress Notes tab and to the progress notes section of the Chart chairside dashboard.

The Progress Notes tab has a new Perio Exam checkbox to help you filter the patient’s notes for perio exams; and if you have an uncompleted exam, a new Resume button reopens the exam from within the notes. Clicking the line item opens any perio exam.

Reporting
Insights Dashboard Enhancements
Some practices define patient retention as the percentage of active patients who consistently return for recare visits within a specified period. Want to keep an eye on your numbers? The Insights Dashboard has a couple of enhancements, one of which specifically targets active patients in recare. To see the enhancements, open the Insights dashboard (Home > Insights).
The Recare section has a new bar chart giving you a snapshot of active patients in recare. Note this graphic only includes patients assigned to prophies and not perio. The time frame is 18 months. As a rough gauge, you can see at a glance the total number of active patients and the percentage in recare for the current location. Hover over the color bars to see the numbers.
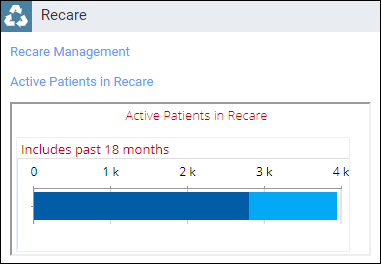
For a more detailed report, or to see data for the entire organization, click the associated Active Patients in Recare link to open the Active Patient in Recare power report, which you can edit to get the report you want.
The second enhancement is two links to the Daily Huddle dashboards from the Schedule Optimization section.
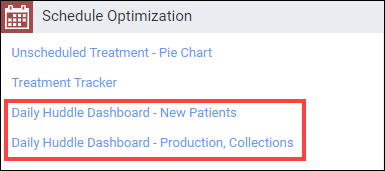
New within the production and collection daily huddle dashboard, the Scheduled Production – Today and Scheduled Production – Remaining Month reports solely measure gross estimated production. Net production is not yet available for these reports (which you can see in the Production Totals report in the Calendar).

Power Reporting
Additional Claim Fields in Power Reporting
Give your revenue cycle management a boost by better identifying claims and providers in those claims. Create Ledger reports that associate transactions to unique claims, claims by rendering providers with their NPI scores, and claims by billing providers and their TINs by utilizing a new set of data fields added to the Insurance Claim section of the Interactive Ledger Report Builder.
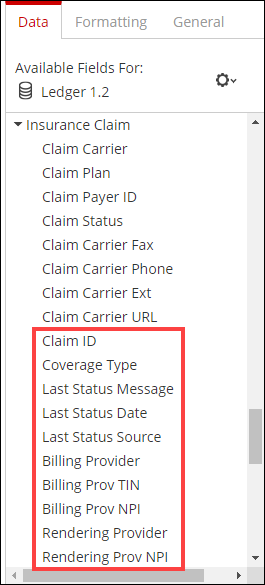
- The Claim ID is a large number used internally to the database and does not display on any page. As a unique identifier, it can be useful in creating claim histories.
- The Coverage Type refers to primary, secondary, and so on out to 10 levels.
- The Last Status fields show which user last touched the record, and when, and any notes they entered.
- The remaining field names should be self-explanatory.
No new report was prebuilt to make use of these fields.
User Rights
No changes to user rights are included in this release.
New Learning Content
Dentrix Ascend includes an extensive library of learning materials, freely available to every member of your practice at any time. Below is a sample of both new and popular topics. Click a topic title to open the article.
Appointment Colors
The Calendar include colors and icons that give you appointment information at a glance. You have the option to color your appointments two ways: by provider, or by procedure.
Checking Text Message Responses
At the beginning of the day, one of the first things you need to do is check your patient messages to see if a patient canceled an appointment.
Validating Appointments Booked Online
It’s a new day, and one of your many tasks is to ensure that all overnight online appointment bookings are correctly assigned to your patient’s records.
Adding Insurance Carriers and Plans
From Dentrix Ascend, you have access to a large database of supported payers that is updated regularly for your convenience.